
How to Improve Video Quality for YouTube Without Ruining the Final Export
How to Improve Video Quality for YouTube

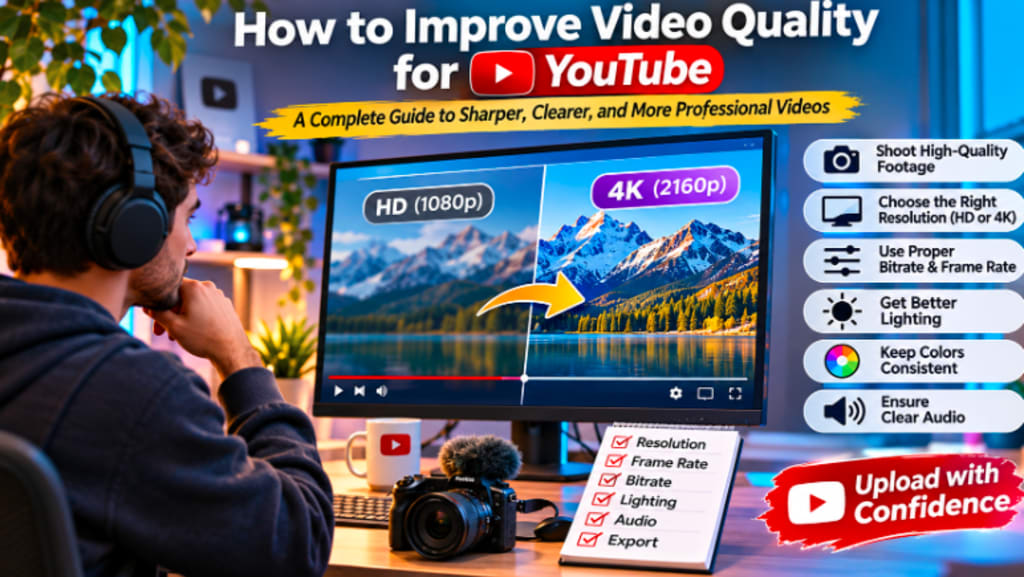
Posting videos to YouTube is easy, but maintaining a high-quality, professional video after compression can be more difficult. A video might look great on your computer, but turn out looking softer upon upload, particularly in scenes with movement, finer textures, gradients or detailed backgrounds.
This is because YouTube will re-encode videos for efficient streaming on various devices and internet speeds. The source material quality, resolution, bitrate, frame rate, light and export settings all impact the product.
The high-quality video does not require costly equipment. Careful workflow can make all the difference.
Use Good Source Footage to begin.
The final outcome will greatly rely on the quality of the original recording.
If your video is blurry, noisy, compressed or underexposed, a high resolution export will not completely resolve the issue. Software can "enhance" some of the features of a clip, but it does not perfectly "recapture" detail that was not recorded.
Record on the highest setting possible that your camera can achieve.
Pay attention to:
Focus
Lighting
Exposure
Stabilization
Bitrate
Camera movement
It is often better to get a well lit 1080p shot than noisy 4K footage in bad lighting.
It is easier to correct the problems while shooting than it is after.
Understand YouTube Compression
YouTube makes several different versions of each video that you upload so that viewers can watch it in comfort on their various devices and bandwidths.
In the process, the video is compressed.
Compression might degrade the quality of fine details, especially in high-motion or content-heavy scenes.
Photos with water, grass, crowds, confetti, smoke, moving backgrounds, or very detailed textures may be more impacted.
When compressing footage for upload, don't do it more than once, as this can help to preserve the quality of the image.
Make edits from original camera files wherever possible and produce a quality final export from the project.
Select the correct resolution for the image.
Full HD is a resolution of 1,920 x 1,080 which works well for most of the YouTube videos.
4K UHD is 3840 × 2160 pixels, and has a lot more image information. If your footage is in 4K, uploading in 4K will help retain detail, particularly when viewed on a big screen.
But if you export a low quality source at 4K, it will not automatically become a true 4K footage.
Enhancement tools may be useful for some older clips or lower resolution clips to produce a more uniform appearance. For creators who require to upscale video for YouTube, AI-powered upscaling tools can help them enhance the apparent quality of lower-resolution videos before incorporating them into a higher-resolution video.
The use of upscaling can enhance the presentation but should be used in a realistic way. It is not able to recreate information not captured by the camera.
Match the Frame Rate
The frame rate has an impact on the appearance of motion.
Common frame rates are 24, 25, 30, 50 and 60 frames per second.
Typically, the export frame rate should be the same as the original footage.
When you export at 60 fps, this isn't a guarantee of smoother motion, if you recorded at 30 fps. The software runs a copy of, or more frames of, the animation.
A higher frame rate is helpful for games, sports and fast motion, while 24 or 30 fps are great for interviews, tutorials, reviews and cinematic quality footage.
It is more important to be consistent than to pick the largest number available.
Use an Appropriate Bitrate
Bitrate is a measure of how much data it takes to represent each second of video.
Even at a high resolution, a low bitrate can result in discernible compression artifacts.
That's why sometimes a bad 4K export may be worse than a properly encoded 1080p video.
Use a good export preset, matching your project's resolution and frame rate.
The higher the resolution, the higher the bitrate, but if the bitrate is very high, it does not really
result in a noticeable increase in resolution.
Check the final export before uploading and ensure that scenes that are predominantly moving, text, faces, shadows, gradients, and detailed areas have been checked for motion.
Rather than over-sharpen, improve lighting
Creators attempt to try to repair the soft footage through adding excessive sharpening.can lead to halos, unnatural edges, rough skin and increased noise visibility.
Generally, better video quality is achieved with good lighting.
Acamera can also get clearer detail without noise when it receives sufficient light.
Making some simple changes can help:
Film near a window
Make sure to use a soft light source.
Try not to have very dark rooms.
Illuminate the scene equallyIn the case of talking-head videos and tutorials, high-quality lighting will have a more profound impact than a switch to 4K.
Reduce Noise Carefully
The image may be noisy when recorded in low light.That may be more noticeable with YouTube compression.
Noise reduction tools can be useful, but over processing can de-lens the image and make faces look artificial.
Apply noise reduction judiciously.
Moderate noise reduction and colour correction is often preferable to heavy filtering.
If possible, make lighting more correct while shooting, so that the correction is not so heavy.
Keep Colors Consistent
Quality of a video is not only determined by the sharpness of the video.
When a project is unified by a consistent color, it is more finished.
If the clips were recorded on different cameras or under different lighting conditions, make the clips sound like they are from the same video.
Pay attention to:
White balance
Exposure
Skin tones
Contrast
Saturation
If the clip is obviously too blue, orange, dark or washed out, it may appear of poor quality even when it is actually sharp.
In most YouTube projects, natural and consistent colors are more significant than dramatic coloring.
Use simple, straightforward text and graphics.
The compression problems are usually apparent very rapidly in text.
Youtube videos include a lot of common elements, such as lower thirds, captions, subtitles, titles, graphics, charts, and screen recordingsWhen compressing, small or thin text may be hard to read.
Avoid using small fonts, use good contrast and do not make important information too small.
When taking screen captures, try to record at a high enough resolution and don't enlarge low quality material too much in the editing process.
Use graphics close to the finished project, if possible.
Avoid Excessive Digital Zoom
The digital zoom can degrade the image rapidly.
When you increase the size of the 1080p clip to a large size within a 1080p project, the picture may become soft.
If you record in 4K, then you can crop in to give more area to display if you decide to make a 1080p video.
This is particularly important for content like talking heads or interviews. There is a good chance that a single 4K shot can be used for a wider and tighter shot with minimal loss of quality.
This provides the editors with a far greater level of flexibility without the need for several cameras.
Stabilize Footage Carefully
Shaky videos can make a video look unprofessional.
They can be stabilized but if set too aggressively, the image may end up being cropped significantly or with weird warping at the borders.
Only use stabilization when you need it and check out the whole clip afterwards.
Higher resolution for extra room for cropping if you are expecting to stabilize footage.
Even better, when recording, use a tripod, gimbals or a good hand-held method.
Do Not Ignore Audio
Good pictures don't make up for bad audio.
The video might still sound cheap when there's loud background noise and/or the dialogue is hard to understand.
Always use an appropriate microphone and monitor the recording area.
Make sure:
Dialogue is clear
Speaking does not drown out music
Background noise is controlled
Volume remains consistent
Clean audio is as effective at elevating the perceived quality of a video as good visual content; this is particularly true for tutorials, interviews, and commentaries.
Avoid Repeated Exports
Every export and re-compression of a compressed video can result in loss of quality.
If you, for instance, export a video, import it in a different editor, edit it and export it once more, there is an unnecessary loss of quality.
It's better to stay linked to the source files.
Finalize editing, colour correction, graphics and sound before making final upload file.
If more than one copy is necessary, make multiple copies of a high quality master when possible.
Look at the Final Export.
Don't assume an export has been successful because it did so.
Please note: View the entire video before uploading.
Check:
Fast movement
Dark scenes
Text and subtitles
Fine textures
Audio synchronization
Graphics
Skin tones
Cropped edges
Music levels
If you can, check the video out on a few devices.
A video that works well on the computer might not work on a mobile phone or TV.
Allow High-Resolution Videos to take their time.
YouTube might not display the high quality options at first when you upload a high quality video.
Processing of higher resolutions may take longer, particularly for 4k or long videos.
Don't presume there is a problem with the highest resolution if it is not available at the moment.
Please wait for all processing to be done before judging the final upload.
Think About Mobile Viewers
A large number of people use YouTube on their cell phones.
This is to inform you to make your edits accordingly.
Fine text, subtle graphics, fine interface details, and low-contrast captions might not be easily visible on mobile devices.
Preview your project at a smaller size before exporting.
This can be helpful for tutorials, software demonstrations, education, and videos with charts or instructions.
Establish a Standard Operating Procedure
Quality control is easier with a repeatable workflow.
You could consider something like:
Record at best resolution possible.
Edit from the original files.
Proper exposure and color.
Only use sharpening and noise reduction when necessary.
Export at an appropriate resolution and bitrate.
Check final file.
Upload the master version.
When you have found settings that are good, save them as presets in your editing software.
This can help to minimize errors and expedite subsequent projects.
When 1080p Is Enough
Not all YouTube videos have to be 4K.
1080p is a good option for:
Interviews
Tutorials
Commentary
Podcasts with video
Educational content
Presentations
Casual vlogs
Even properly exposed and well-edited 1080p footage can be very good.
When 4K Makes More Sense
4K is particularly beneficial for:
Travel films
Nature videos
Cinematic projects
Detailed product footage
Large-screen viewing
Videos requiring cropping
Long-term archival footage
If the source footage does actually contain that level of detail, the additional resolution will give a lot more detail and editing flexibility.
Final Thoughts
Enhancing the quality of YouTube videos isn't a one-size-fits-all process.
It is the result of good source material, correct lighting, focus, sound, color, bitrate, enhancement, and export settings.
Resolution is important but it's not all there is to it.
A videographer can make a good 1080p video look better than a bad 4K video. Also, well processed older footage can be used in conjunction with newer footage as needed with proper workflow.
The ideal way is to capture as much quality as possible, not compress that capture needlessly and select settings based on the content you want to capture.
About the Creator
Gulshan
SEO Services, Guest Post & Content Writter.
Enjoyed the story? Support the Creator.
Subscribe for free to receive all their stories in your feed.
Comments
There are no comments for this story
Be the first to respond and start the conversation.