
Can a Drilling Rig Reach Your Backyard Well Site?
A compact drill rig can reach some backyards through a side gate, but the gate measurement answers only the first question.

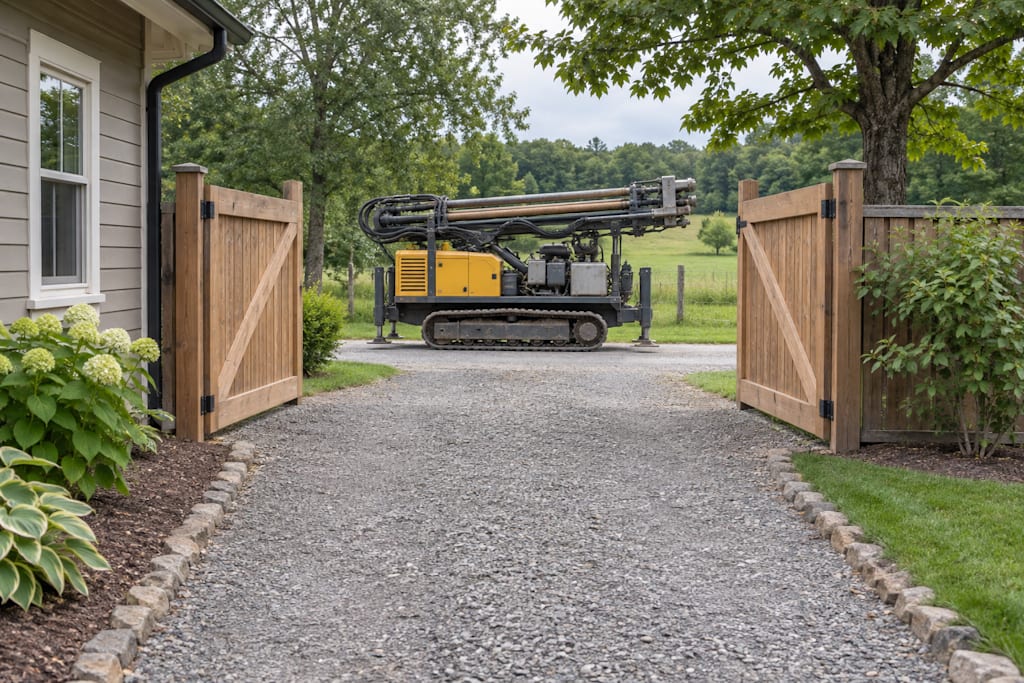
A compact drill rig can reach some backyards through a side gate, but the gate measurement answers only the first question. A contractor has to get from the road to the proposed well, make the turns, place the machine over the borehole, and bring in the tools and support equipment needed to drill it. The finished well also needs a way back in for service. Before a site visit, you can help by measuring the route, photographing its tightest points, and showing where equipment could stage.
Walk the route from the road to the well
Start at the road or driveway. The rig might arrive on a transport trailer even if it travels on its own tracks inside the property. The crew needs a practical place to unload and a route from that point to the well. If the driveway climbs immediately from the road or cars usually line the curb, photograph that approach too. The question is where the combination can stop and unload without blocking the only way into the site.
At the gate, measure the clear distance between the closest fixed points with both leaves fully open. A hinge, latch, post cap, or section of fence that leans inward may define the width. Measure any narrow section after the gate as well. A roomy entrance followed by a pinch point at the corner of the house still limits the route. Note low eaves, branches, overhead cables, and anything else that changes the height available along the path.
Next, look for turns. A machine can be narrower than a gate and still have trouble with an immediate right angle. Its front and rear need room as it changes direction, and any equipment being towed has its own path through the turn. Two photos often tell the story better than a long description. Take one facing through the gate and a second from inside the yard facing back toward the approach. Show where the fence, wall, or landscaping forces the turn.
Read the ground as well as the tape measure
A route can look wide enough on a sunny site visit and become unusable after rain. Point out soft garden soil, filled areas, abrupt grade changes, or places where rainwater regularly pools. Flag any septic tanks and drain fields, known buried lines, buried irrigation components, and covers over vaults or drains. A track pattern or a clean-looking driveway gives little information about what lies below it. The crew needs to assess where its loaded equipment can travel and stand.
It helps to distinguish features that can move from features that define the site. A removable planter could free up a turn. A retaining wall or an underground tank could make the same plan impractical. If the route crosses a neighbor’s land, identify who controls access before anyone schedules a rig. Make a note of what needs to be restored afterward, especially if a lawn, pavers, or an irrigation line is involved. That can prevent a small access change from becoming a separate dispute.
The preferred drill point also has to make sense as a well location. Penn State Extension discusses well siting alongside well construction and the relationship to potential contamination sources [1]. A convenient spot beside the gate may be unsuitable once the contractor checks the site and applicable local requirements. Have the first conversation with two pieces of information available together. Show where a well might belong and how the crew could get there.
Give the equipment room to work
The rig’s transport dimensions are useful for the approach. At the drill point, the crew works with a different envelope. The mast has to move into its working position. Rods need to be brought to the rig. Depending on the drilling method, the team might use a separate compressor or a pump and circulation equipment. There also needs to be room for drilling returns and spoil. The National Ground Water Association’s homeowner guide describes well construction as part of a wider water system that also includes items such as pumps and pressure tanks [2]. Some of the space you plan for will still matter after drilling.
Location
What to record
What it helps the driller judge
Road and driveway
Approach, slope, available staging area
Where the transport unit could unload and turn
Gate and side path
Clear width, lowest obstruction, tightest turn
Whether the rig and any support loads can pass
Proposed well point
Overhead features, ground surface, nearby structures
Whether there is room to set up and handle materials
Possible staging area
Distance to the borehole, access for deliveries
Where support equipment, rods, and returns could go
Photograph the overhead area from the proposed pad as well as along the driveway. A lowered machine can clear an obstruction that matters once the mast is raised. NIOSH documents overhead electrical contact at surface drilling sites during activities such as raising the mast [3]. Show the contractor any overhead lines on the approach and at the drill point so the crew can assess them before choosing a setup.
An example with a narrow side gate
Suppose the clear opening on a property is 1.35 meters. The published width of one mini crawler water well drilling rig is 1.20 meters. On paper, that leaves 0.15 meter of total clearance, or 7.5 centimeters on each side if the machine were perfectly centered. That is simple geometry. It does not establish a workable travel margin. Posts may be out of plumb, the approach may slope across the opening, and the listed width may need confirmation for the exact equipment being delivered.
Now suppose the inside corner begins a meter beyond the gate. The crew needs to assess that turn as a separate movement. It might be able to stage a support unit on the driveway, depending on how it connects to the drill point and where hoses can run. But if a rod delivery cannot reach its staging location, the gate calculation still leaves an open logistics problem. The site survey should end with a plan for the machine, the support equipment, and the materials, each with a route.
Equipment catalogs can help explain why contractors bring different packages. For example, HJi water well drilling equipment includes crawler and other carrier types, along with accessories such as air compressors, drilling tools, and mud pumps. On a residential job, the next useful step is to compare the actual equipment list against the route you measured. Even a small change in the support package can shift where the crew needs to stage.
Compare the changes you can actually make
Ask the contractor to separate access problems that could be solved on the day from changes that need a decision before booking. Moving a raised bed or temporarily removing a gate leaf may be fairly straightforward if it provides useful clearance. Moving a fence post may affect the boundary or a shared fence. Altering a slope or creating a loading area is a different job. A proposal is easier to compare when it identifies which changes are assumed, who will make them, and how much of the yard will be affected.
Think about how the property is used while work is underway. A driveway that can serve as staging space in the morning may be the only vehicle exit later in the day. If another family member needs to leave, or a neighbor shares the drive, tell the crew before choosing where the trailer and support equipment will park. A serviceable plan keeps a predictable path open or sets an agreed schedule for when access is restricted. This often makes a compact setup more useful than shaving a few inches off the rig width.
If the first approach looks marginal, ask the contractor to compare a second one on the same sketch. One option might keep the original well point and remove a gate panel temporarily. Another might use a different equipment route and leave the fence untouched. Compare the effect on the work area, restoration, and later service access. If changing the well point is an option, evaluate it with the well siting questions as well. The most convenient setup is the one that works for the whole job and leaves a well you can maintain.
If the contractor asks for a rough plan before visiting, use a few measurements tied to recognizable objects. Write “gate opening measured between latch and hinge” rather than “gate about four feet.” Add the distance from the gate to the first turn and note whether the truck can stop on the driveway while the gate stays open. These details let the contractor bring a better equipment plan to the visit and tell you which spots need a second measurement.
Keep a path for future work
Talk about service access before putting back fences or planting along the drill route. Pump replacement or other well work may need lifting equipment and a clear approach to the wellhead. Ask the contractor to show you which section of the yard should stay reachable and where any permanent features would interfere. Make a simple sketch showing the finished well, access route, and any buried lines installed for the water system.
Frequently Asked Questions
Is the width in a brochure enough to confirm access?
Use it for a first screen. The delivered rig, the closest point on the route, and the shape of the approach all matter. Give the contractor measurements and photographs instead of trying to judge the fit from one number.
Does the compressor have to fit through the same gate?
It depends on the proposed setup. The contractor may be able to stage support equipment separately if the site permits a workable connection to the borehole. Share both the gate dimensions and the available staging locations.
What should I mark before the visit?
Show known buried installations, overhead wires, soft ground, edges of retaining walls, and any places where vehicle access crosses someone else’s property. Include features that are easy to miss in a photograph, such as a buried tank.
Can I move the well closer to the driveway to solve the access problem?
Bring that option to the site visit. A shorter equipment route can help, but the proposed point still has to work for well construction, water supply, site conditions, and future access.
Prepare for the site visit
Send the driller a short walk-through, the narrowest clear measurement, and a sketch of the gate, proposed well, and staging area. Ask which equipment needs to go through each section. That gives both sides a practical way to decide what must move before the rig arrives.
References
[1] Penn State Extension. Drilling a New Well.
[2] National Ground Water Association. Well Construction. NGWA Well Guide.
[3] National Institute for Occupational Safety and Health. Noise Exposure and Overhead Power Line (OPL) Safety Hazards at Surface Drilling Sites. DHHS (NIOSH) Publication No. 2006-113.
About the Creator
Enjoyed the story? Support the Creator.
Subscribe for free to receive all their stories in your feed.
Comments
There are no comments for this story
Be the first to respond and start the conversation.