
How To Create A DCP
If your a filmmaker, sooner or later you will need to make a Digital Cinema Package

Every filmmakers has a passion to see a film on a big screen, but in order to get that film on that big screen, a DCP (Digital Cinema Package) will need to be made. This is a package that makes a film play perfectly on a cinema projector, for some festivals, they will accept a MP4 or Mov file but as you grow and target bigger festivals a DCP is no longer an option, it’s a requirement.
Getting a DCP made is a fairly random task, that for many causes great confusion, for others it creates great expense. Getting a feature film DCP made can cost around $1500-$2000, this is an expense that many filmmakers have not factored in. But fear not, there is a very “free” way to make a DCP and the complication is not so complex as it first seems. Worse still the very method I’m about to explain to you, is the exact same method many of these $2000 DCP makers will use.
First of all you will need a DCP maker, we used a free product called DCP-o-matic, while its free the creators at some point will make the request of a donation, whether you choose to donate at all is up to you.
A quick stipulation for you, while using a MAC is great for editing, its not always best in terms of projection. The reason being is that most projectors of industry standard made prior to 2011 will only allow Windows format DCP’s. So where possible if making on a MAC, get your file if you can onto a Windows PC for the conversion of the DCP. Its always safer to play it safe than assume, as it may mean you find yourself creating a DCP at the 1th hour if the cinema cannot play it, or worse still they decide not to play it at all.
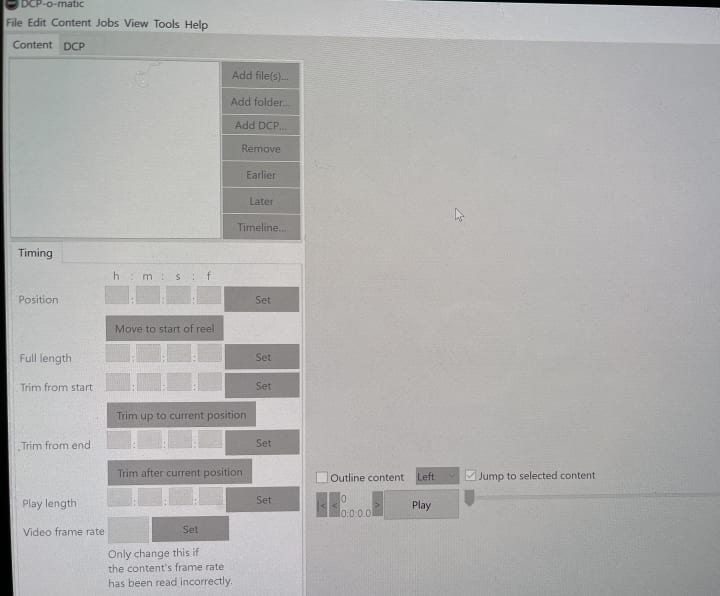
When you have downloaded DCP-o-matic from the DCP-o-matic website and installed it you will see the above when you launch.
To start you need to head to the File section on the top left hand side.
Head to File and select New, you can either create a new file through your computer or correct a new file at this point.
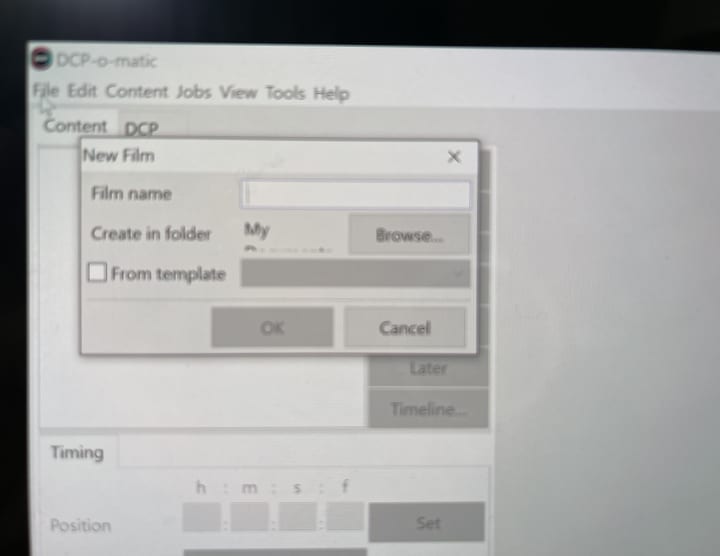
As you can see I have created a file called Horror DCP's, so for the benefit of this demonstration I'm selecting that file. So go to the section that says Create In Folder and select the file you have created, by browsing your computers hard drive, it wont matter that there is nothing in that file.
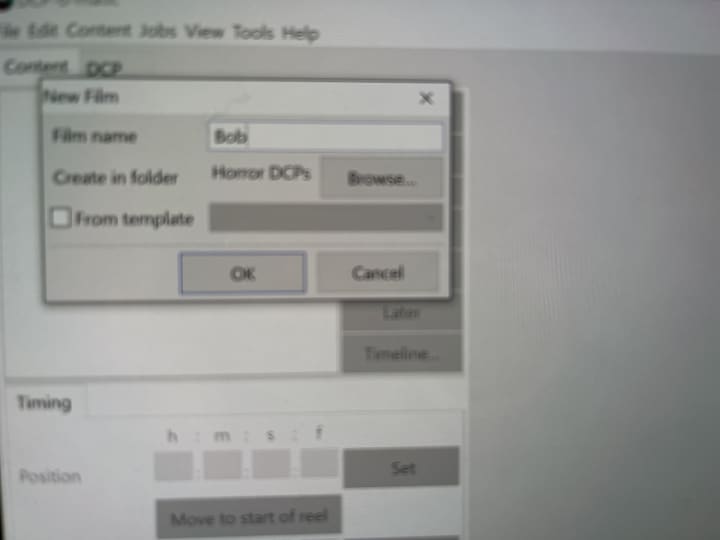
I'm calling this file Bob, so in file name I have entered that after selecting the file to browse. Now push OK.
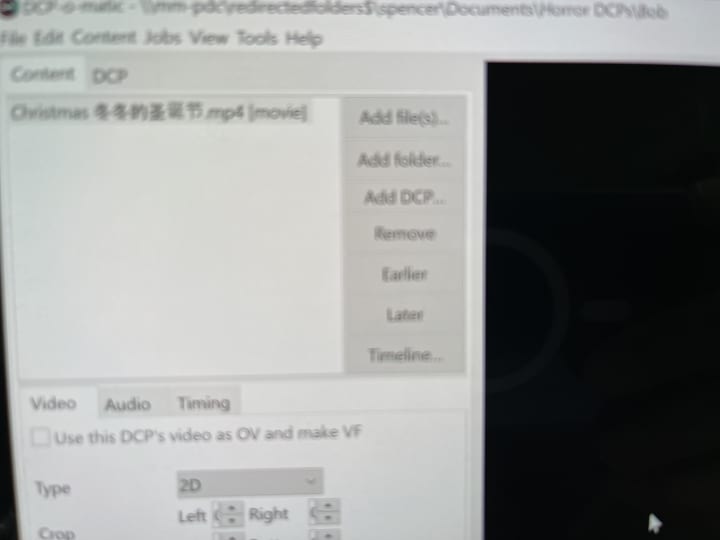
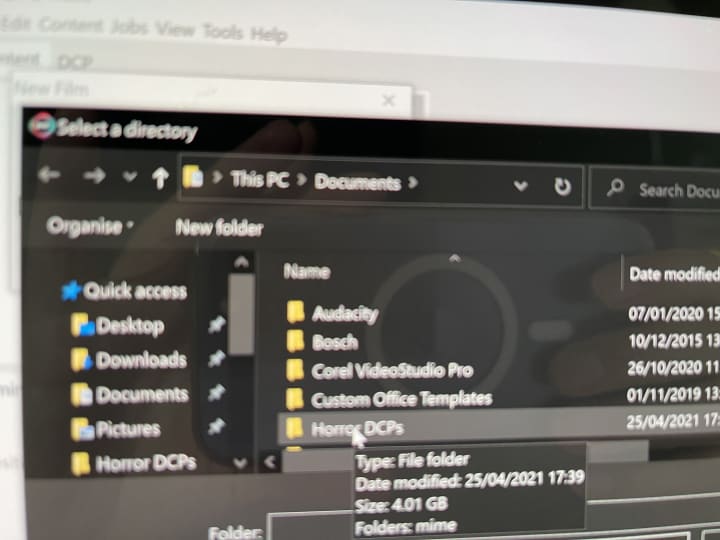
Next you need to find or add your film. I find it easiest to save my file be it Mov, MP4 or Pro-res in downloads. So now in the first white box click add files and it will show you your hard drive, select downloads or wherever you have saved your file and click it and it will show in the content box on the programe.
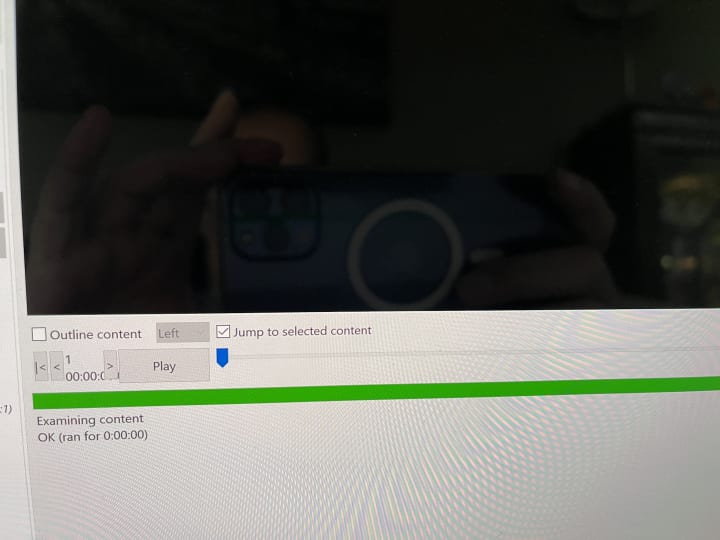
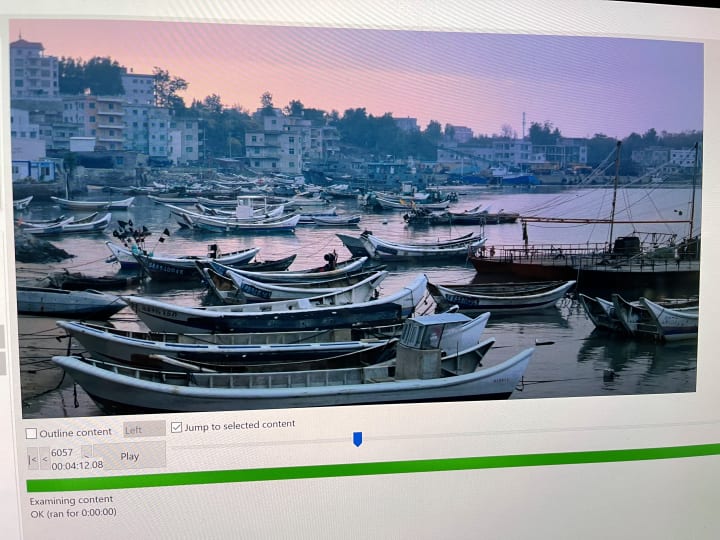
One you have loaded the file, on the right of the screen the box area that was initially blank will now show a black box. Underneath the screen you will see a blue marker as highlighted above. Grab that with the mouse pointer and pull it to the middle of the screen.
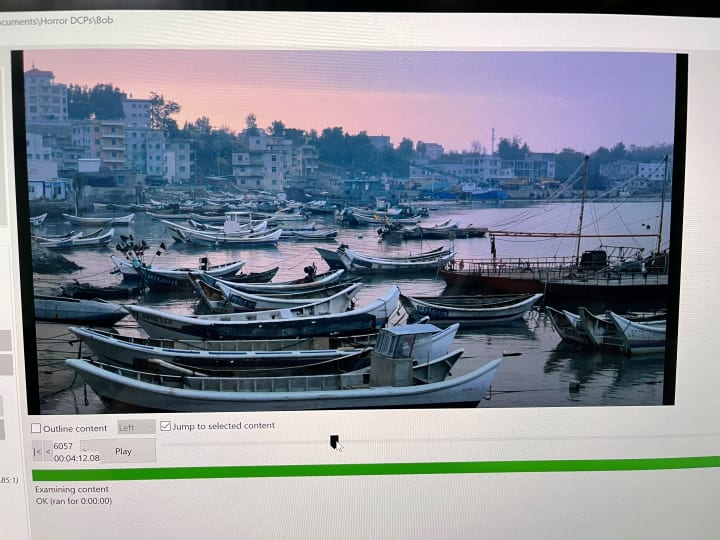
You will now see your film in the window. But if you look at the screen you will see there are black borders at the side. The reason for this is that its currently added in the wrong ratio, so you need to select the right one.
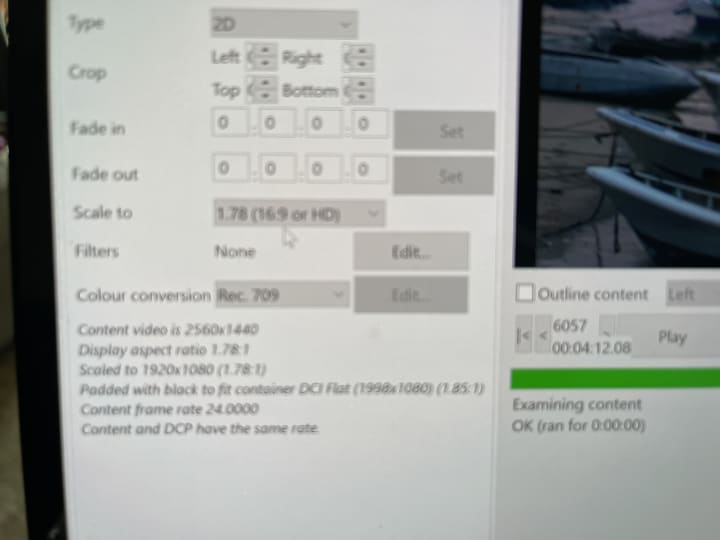
To the left of the image screen you will see a section that says Scale to. Click the drop down box and you will be presented with the options, there are several, but essentially you just need to pick the one that covers the whole image and removes as much of the bars as posdible. I moved the ratio from 1.78 to flat.
Having selected Flat, you will see the borders to the side of the image are now missing. Congratulations, you have the right ratio. Sometimes if in scope you may need to flick trough the options that give the smallest borders at the top and bottom of the screen, and give you the best view of the image available.
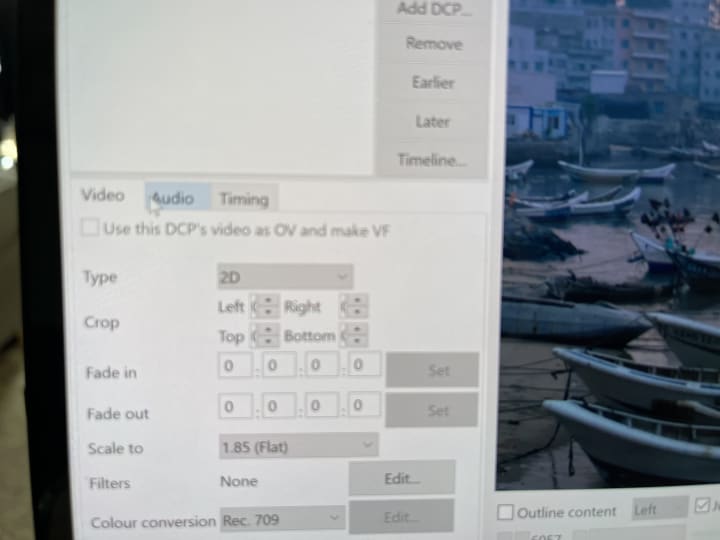
Next click the audio section of the this sub-section of the screen. It's time to work on your sound.
Once you click on the audio tab a new section will appear. Click calculate and you will see the below screen.

As the programe calculates the volume levels you will see the image below. The original slider line has now been joined by another that is calculating audio.
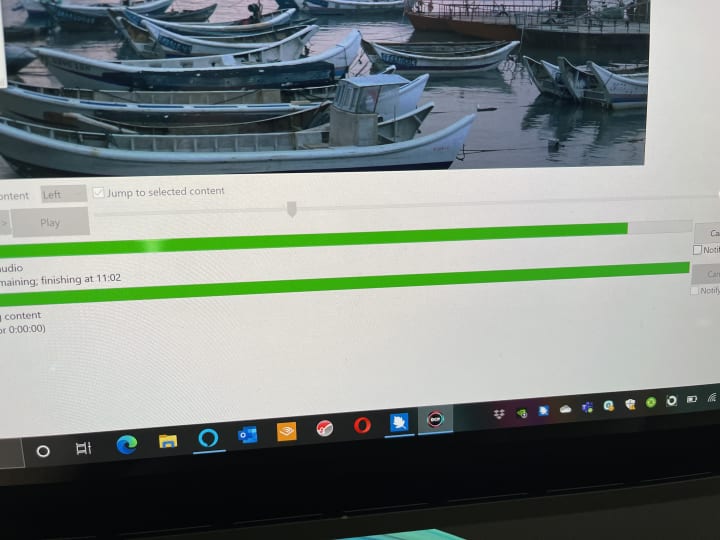
This green line will slowly move up and after a few seconds or minutes depending on the file size the green line will reach the end and you'll see the breakdown.
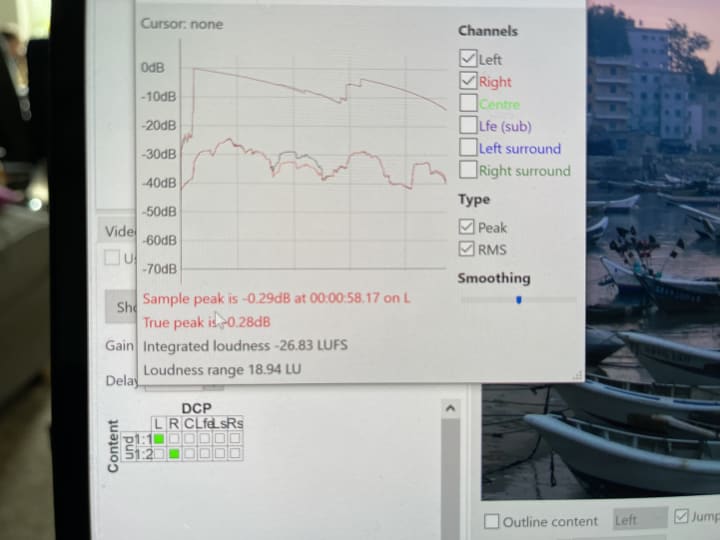
The file will tell you the true peak, you now have a choice. accept and enter that figure in the gain box. Or play it safe and consider that the projection and sound system may be older. In which case I generally input -6.5 because this means that cinemas that do not have the latest sound system will get a suitable punch to your sound.
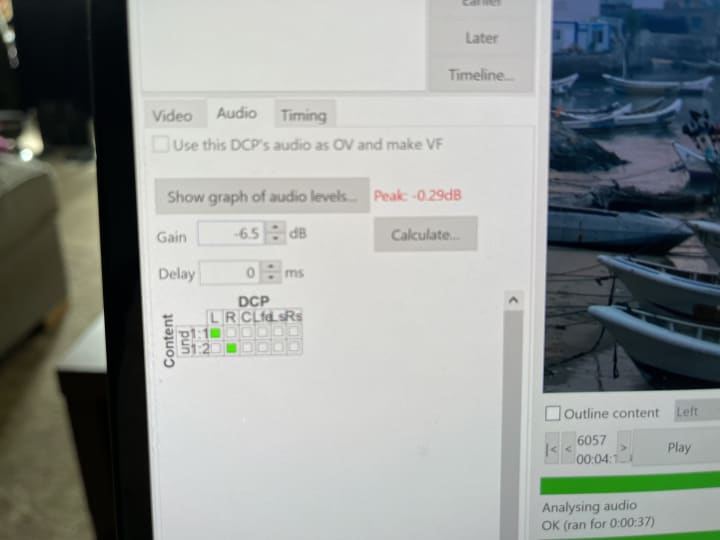
As you can see I have opted for -6.5. Dont be tempted to start messing with the sound channels, just accept the version the programe has picked for you. This means you wont discover when played in the cinema that one channel is mising sound.
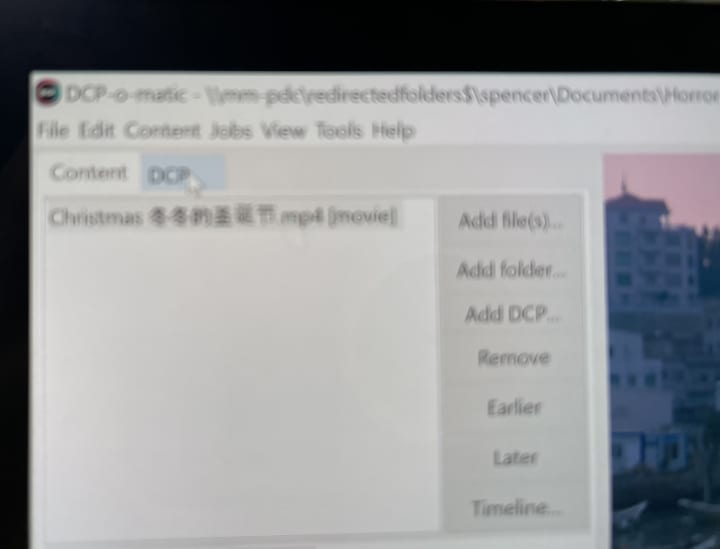
Next move back to the original section. And highlight the tab that says DCP.
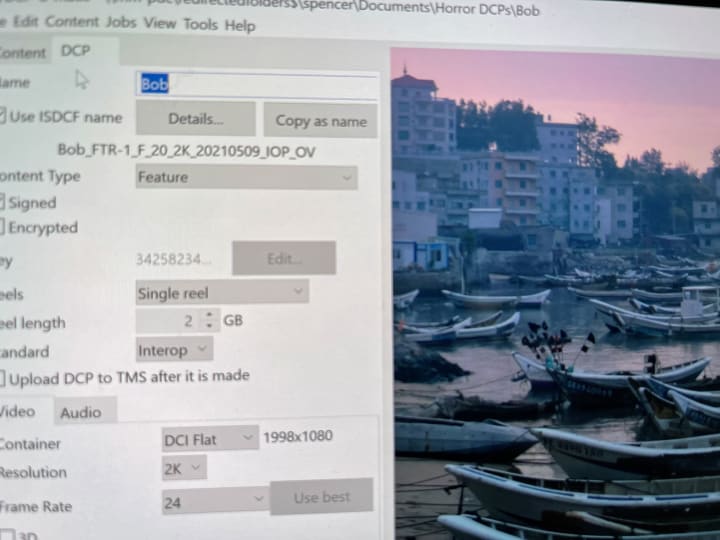
As you can see the title is highlighted. Under details you'll see a long code reference, this will be your files title. Beneath that is a selection that says content type, as you can see here I have selected feature.
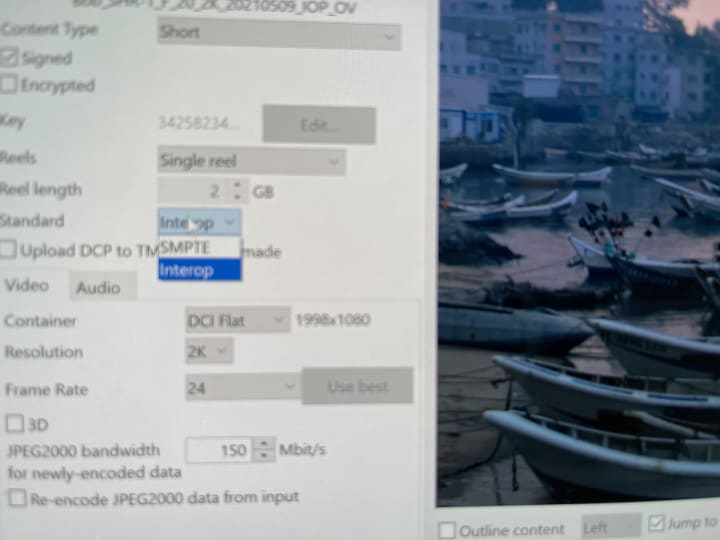
Moving further down you will see the section that says Standard, in here are two options Interlop or SMPTE. Again its often better to be safe than sorry, SMPTE is a newer format, whereas Interlop is a more traditional format. If you are making a short DCP why not make one in each format. Or if you know its a new projector send SMPTE format. But if you want to be safe, why not make the file in Interlop, this way you know it will play.
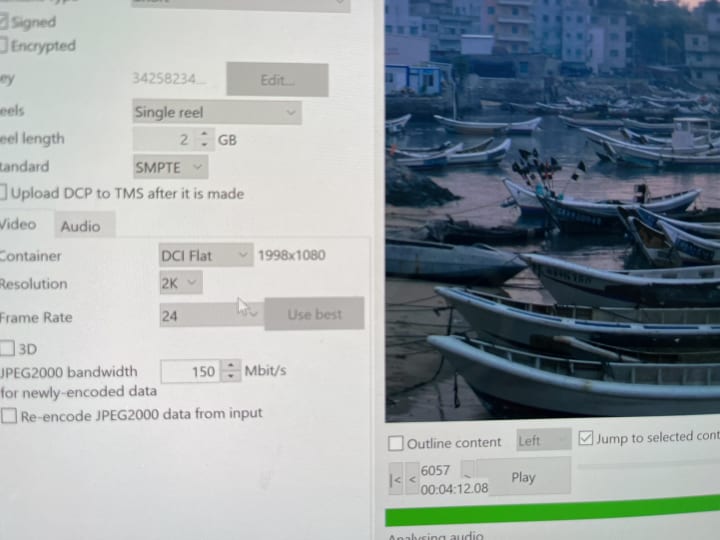
The final section here focuses on the container and frame rate. Because we made the film in flat format, we picked the correct container. However if it was a scope film with borders at the top and bottom, the container must say scope. Dont panic if you forget this, you'll be reminded later if the programe sees an issue.
Under that you will see the frame rate, lots of people do not know the frame rate of their film. But panic not, if you click the frame rate drop down box, selected the highest frame rate, then click use best, it will figure out the frame rate for you.
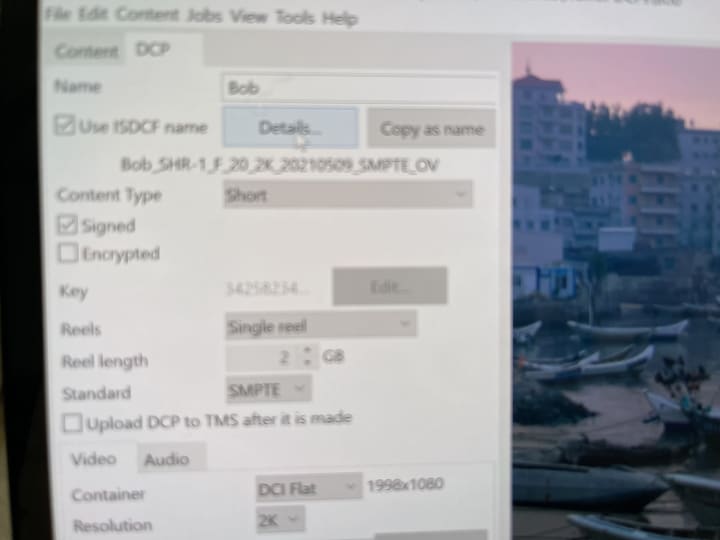
You're near the end. Go back to the first section, click details as shown above.
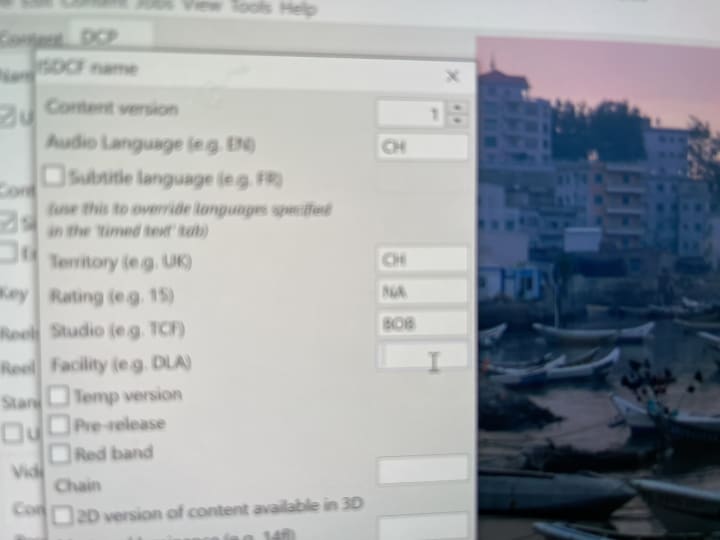
This final section is really just a reference, it changes the file name by adding details, this helps when creating multiple similar files. You have 4 last sections to complete. Language, Territory, Rating and Studio. Complete them as appropriate.

To complete the final process when creating your DCP, head to jobs. Then click the section that says Make DCP.
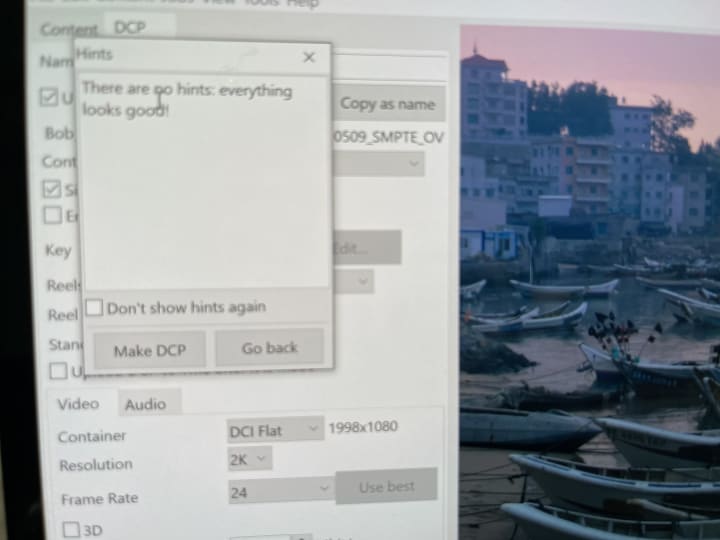
You will now get this checkbox, the box will now tell you if everything is ok, or it will will highlight issues for you to go back and correct before hitting the Make DCP button.
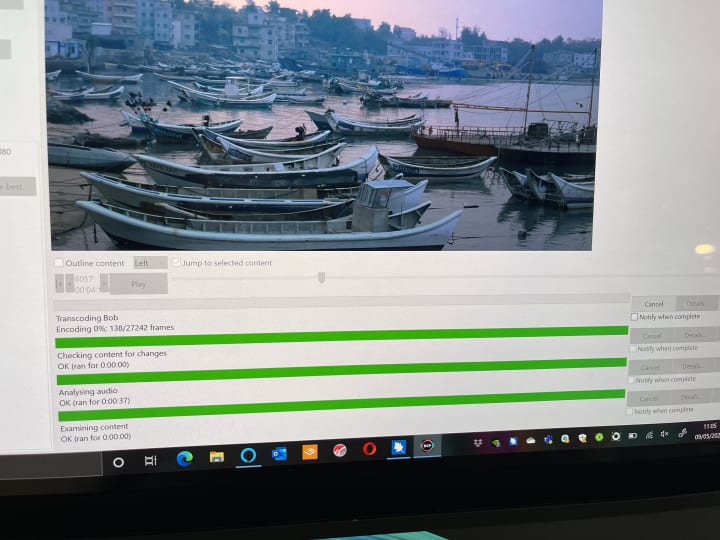
Finally, once you click the Make DCP button, you will now see two more green lines appear under the image. The top one after a few seconds will give you an estimated completion time.
This section can take anywhere from twenty minutes depending on the films ratio and running time, to several hours.
All that remains now is to find the saved file on your computer and either put it on a hard drive or digitally submit to the festival or cinema. You've just made your first DCP, congratulations.
About the Creator
Spencer Hawken
I'm a fiftysomething guy with a passion for films, travel and gluten free food. I work in property management, have a history in television presentation and am a multi award wining filmmaker, even though my films are/were all trash.
Keep reading
More stories from Spencer Hawken and writers in Geeks and other communities.
I don’t want to think about Annette Crosbie having sex!
For a decade Annete Crosbie was best known for playing Victor Meldrews long suffering wife Margaret in the smash hit BBC comedy One Foot In The Grave and for most of us, that’s just how we like to see her. But recently subscription streaming channel BritBox who partner with Channel 4 have been raiding the annals of the channels first movie releases way back in the early 1980s with surprising results.
By Spencer Hawken3 years ago in Geeks
The Pearl by John Steinbeck
‘The Pearl’ is a well-known by under-read classic and, as a teacher, many of my students have absolutely loved it. Not just because it is short, but because it presents a storyline that is interesting and corrupting. Easy to read and easier to analyse, ‘The Pearl’ is one of Steinbeck’s hardest hitting classics with an underlying message about protecting what is actually important. By the end of the book, the reader is left defeated and believing in the wrong thing. The idealism around this book is incredible and it is so dark too. For a long while you are supporting the wrong people, thinking in the wrong way and the whole story becomes one long act of misdirection by Steinbeck to show in a ‘Monkey’s Paw’ fashion why we should never chase wealth and status.
By Annie Kapur25 days ago in Geeks
Rumors abound that Tanner Novlin is leaving The Bold and the Beautiful
Rumors about Tanner Novlin are unfounded Social media posts in Facebook groups suggest Tanner Novlin has been fired as John Finnegan on The Bold and the Beautiful. No one has given a source for this information, but it is being passed around. The only articles I could find on the issue were from the period when Finn was shot by Sheila and presumed by many to have died.
By Cheryl E Preston5 days ago in Geeks
The Business of Nature
Dew drops reflected the light of the sun. The inhabitants of Whispering Woods woke up to the golden droplets of water on the leaves of the flora. The oaks particularly enjoyed the light and the maples did, too. Happiness enveloped all who lived there, even the rocks that cried out in the night delighted in the morning.
By Skyler Saunders6 days ago in Fiction


Comments
There are no comments for this story
Be the first to respond and start the conversation.