
Sprites, Mask and Particles O my
Combining particles, Sprites and Sprite mask in unity
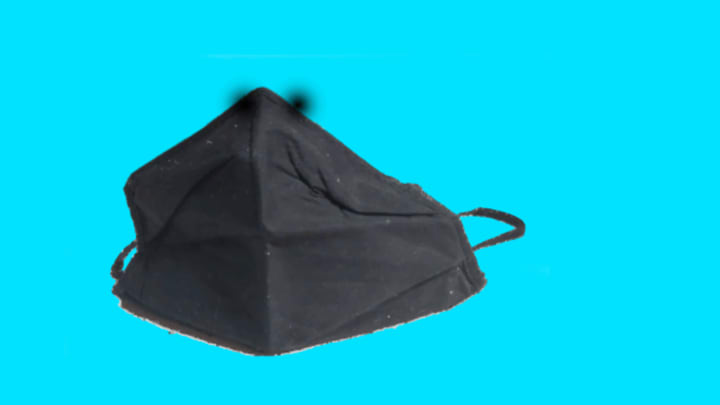
To create a small clip for my nanites destroying a facemask for a story I am writing I went through several different iterations.
The first thing that I tried was to just create a series of images and use the animator and standard particles. This gave me a lackluster results looking very flat and not overly good.
As said before it is lackluster. Nothing spectacular and nothing to write home to the special effects crowd. To solve this lackluster I needed to first to get a better dissolving effect on the mask.
To do this Dissolving effect I started with a sprite mask, using the standard CircleMask that is a default with the sprite mask.
I created the SpriteMask and used the following settings.

This can be seen in scene view. I screen shoot is included next.

With this in place I can animate the position of the SpriteMask this will give me much better visual appearance of the mask dissolving. The added advantage to this is it gives me a clean dissolve line where as the line created with visual tool is chopper and lopsided. Not to say a more mature Gimp or photoshop user couldn't create the images just as clean as this technique. It does benefit me to come up with a better solution so that I can make this work with other images faster.
The next challenge to improving my initial design was to improve the look of the nanites. I envisioned them as being a black mass with a almost metallic glint. The particles that where created where just black and flat, missing the metallic look all together.

To solve this problem I created a series of images with paint 3d using a 3d doodle brush. The image above is one of those images. I produced a total of 8 images and then assigned them to texture sheet animation in the particle system. The image below is what that settings looked like.

I set the particle to animate over these pictures over the lifetime with it going through the images twice. The reason for this is it gave them a flowing changing feeling. This was the feeling I was going for the effect.
With the new look of the nanites set up the next thing to work out was the emitter shape under shape. The first shape I tried was the cone it gave a pattern that was originally used. Trying some of the other shapes yielded different results with the limitation of the shape of it. If I had used a square line the Box or Rectangle would be better shapes depending on the 3d or 2d aspect of it. In the paste I have created a 3d shader that can clip based off a position specified as data or by calculation. This is more in depth and with enough request I could write up an article for that.

The shape that was decided on was sphere. I used the settings in the image above. The arc of 180 allows for the shape was needed. The half of a sphere gave my a elliptical shape that matched the elongated circle used as the sprite mask. With the shaped finally picked out I was able to start working on the effect. To build the effect in the video I would vary the position and the scale to cover the currently dissolving area using the animation system. A note on one thing that was difficult was only in play mode will the particles system show exactly what are covered. This took several iterations to get coverage exactly where I wanted it.
The animation system is very handy it can animate most properties of an GameObject and its child objects. This includes almost all of the properties for the particle system. I have mentioned several of the properties that where animated on the particle system. One notable property that wasn't mentioned being animated was The Emission system. I both animated it being disabled and enabled but also animated the emission over time parameter. The Emission over time was animated because as the area that is covered by the shape increases I had to increase the number of particles emitted to cover the area.
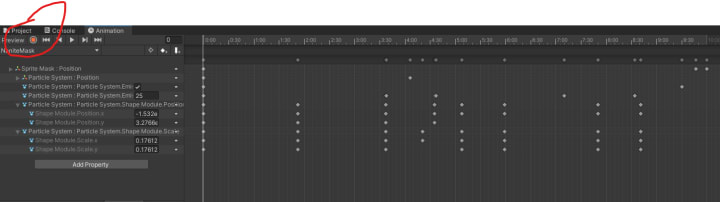
The previous image shows how few properties where needed to get the effect I wanted. I circled in red the Enabled/Disable keyframe recording mode. This can be used to record animation easily without having to make manual create each keyframe. This can also be useful when you want to setup multiple properties in the animation. Regularly you will add each property to the animation but with the keyFrame recording it will add each property and even create before and after keyFrames so that you don't have to.
This was the Journey of taking a lackluster effect and make it into something better. Please follow and support me on my twitter and at Buy Me Coffee. You can also check out my profile for other articles in development or my stories that I create.
About the Creator
Ricky Tucker Jr
I will be feeling my stories with amazing adventures fueled by all the intangible ideas that float through my mind.
You can leave comments, help shape my adventures or buy me a coffee at https://www.buymeacoffee.com/rickytuckerjr
Keep reading
More stories from Ricky Tucker Jr and writers in Futurism and other communities.
Black Goop Chapter 3
With daylight dawning, Caden and Trace prepared to leave the sonic they camped at. They both felt confident because where they were alone the previous night, today they were with an ally and stocked upon resources. The boys grabbed some food supplies that were non perishable with a long shelf life. The nanites harvested materials from useful components such as computer terminals, blenders, speakers and other miscellaneous equipment with rare materials.
By Ricky Tucker Jr2 years ago in Futurism
Quantum Computing: A Quantum Leap in Data Encryption
What happens in the computing arena is that new to the scene but indisputably quantum computing is coming. In fact the quantum computers, rather than use bits for calculations, make use of the “qubits” to implement calculations which are thought to be impossible to be done using classical computers each time. Security is one of the most powerful sides of quantum computing, because quantum devices can help to do better data encryption. Accordingly, this article will highlight quantum computing as the template for data encryption reformation, presenting a new dimension and timeline of cybersecurity and digital privacy.
By Domenico Mustoabout 19 hours ago in Futurism
Reaching Out
I promise her. I'd do anything for her. She's my mom. Even as Lanie and Deanna are flying home, Mom is scrappy fighting dying. She lays too still in that too-big bed with all the toasty white hospital blankets, in the south tower, at the broad end of a long slow-turning corner that delivers me again to her private room with the view she can't see through, with the beeping that tells us nothing new, and all these ice chips she can't swallow, and a flood of well-intentioned nurses who cannot do a damned thing all the same.
By Christy Munson4 days ago in Fiction


Comments
There are no comments for this story
Be the first to respond and start the conversation.