
DIY Christmas Cards kids can make!
Fun and cute ideas for every child!


There comes a point when children want to give loved ones something, just like everyone else. I certainly remember being a child and wanting to give back, but not knowing what I could do or if anyone would like it, at that.
So, here is a list of some DIY cards that are easy and fun to make for any child. And they come out so cute too. Just be aware that they may need some adult assistance and/ or supervision here and there.
Now, let's dive in!
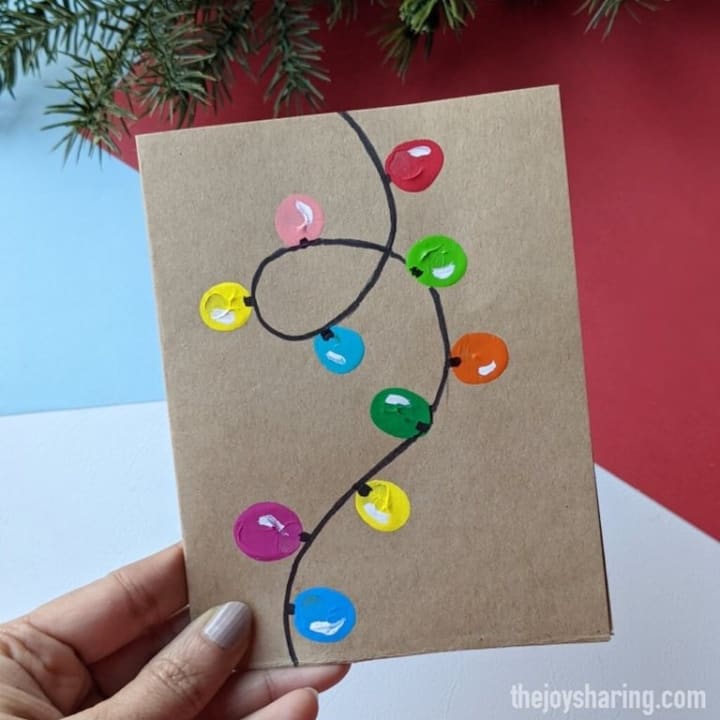
1. Fingerprint Lights Christmas Card
Supplies:
Washable finger paints
Black marker
Paintbrush
Cardstock papers
Scissors
Steps:
- Cut an A4 size cardstock into half and fold it from the middle.
- Using a black marker, draw the wire for lights. You can get as creative as you want with your little one.
- To make the colorful light bulbs, have your child dip their finger in washable paints and stamp along the black line. You can mark along the wireline to assist your child on where to go.
- After fingerprints dries, add a small white paint accent on the lights using a paintbrush.
- Let your child personalize the card with Merry Christmas greetings for family and friends.
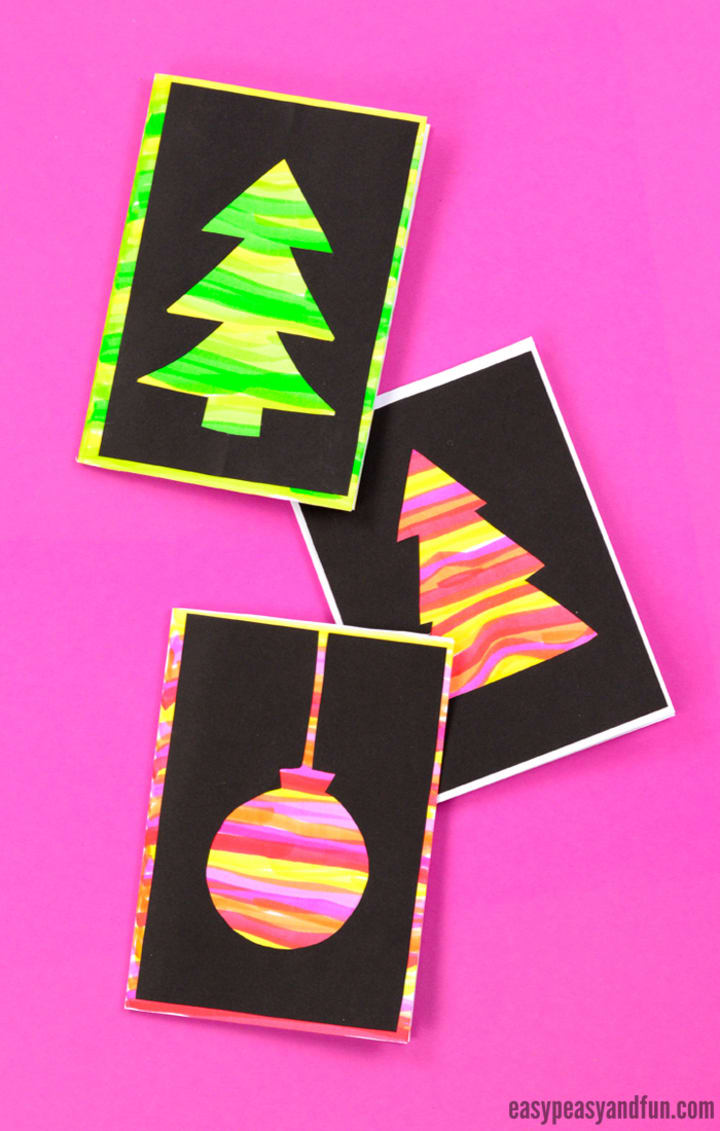
2. Silhouette Christmas Cards:
Supplies:
1. A4 sized white construction paper (you can alternatively use blank cards).
2. Sheet of black paper.
3. Coloring supplies of you and your child's choosing.
4. Glue.
5. Scissors.
Steps:
- For younger kids, fold the white piece of construction paper. This larger format works well for them. For older kids, cut the piece of paper in half and fold those in half (one piece of paper will make two cards).
- You and your child can color the card however you like. Get those creative juices flowing!
- Place your card on top of a black sheet of paper and trace around it with a pencil.
- Cut out the black rectangle. (Trim it down a little both in length and width if you want some of the base card edges to show, so as to leave a colored border.)
- Cut out the festive shape of the black paper.
Gently fold it in half (don’t crease) and cut out a Christmas tree shape. This should be easy for most kids, for younger kids you will have to prepare this step.
Another shape that’s easy to make is the Christmas bauble. Trace around a round object, draw a straight line and a small rectangle shape on top of the circle shape. Cut out the bauble. There's no need to fold this one.
- Glue it on top of the card and write a personalized message inside.
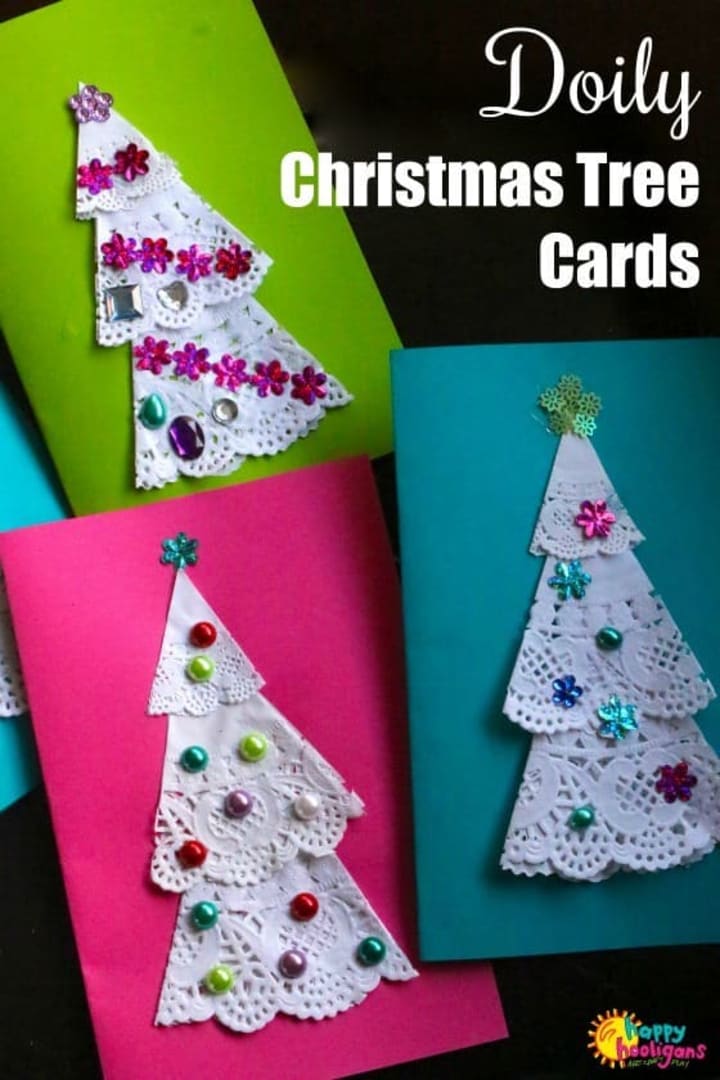
3. Doily Christmas Tree Cards:
Supplies:
1. Doilies in various sizes.
2. Cardstock
3. Sequins and Gems.
4. Scissors.
5. Glue.
Steps:
- Use three size different doilies for the trees. Large for the bottom section, Medium for the middle, and Small for the top.
- For each section, fold a doily in half and then in half again. Open one half (leave the first half folded still) and cut along the lines of the folds.
- Glue the doily pieces on a folded cardstock paper. Start with the bottom doily first. Then, glue the middle doily, slightly overlapping the bottom. And, lastly, glue the top doily, slightly overlapping the middle.
- Glue the gems/ sequins where you and your child want to. Be as creative as you like!
- Finish by personalizing the card.
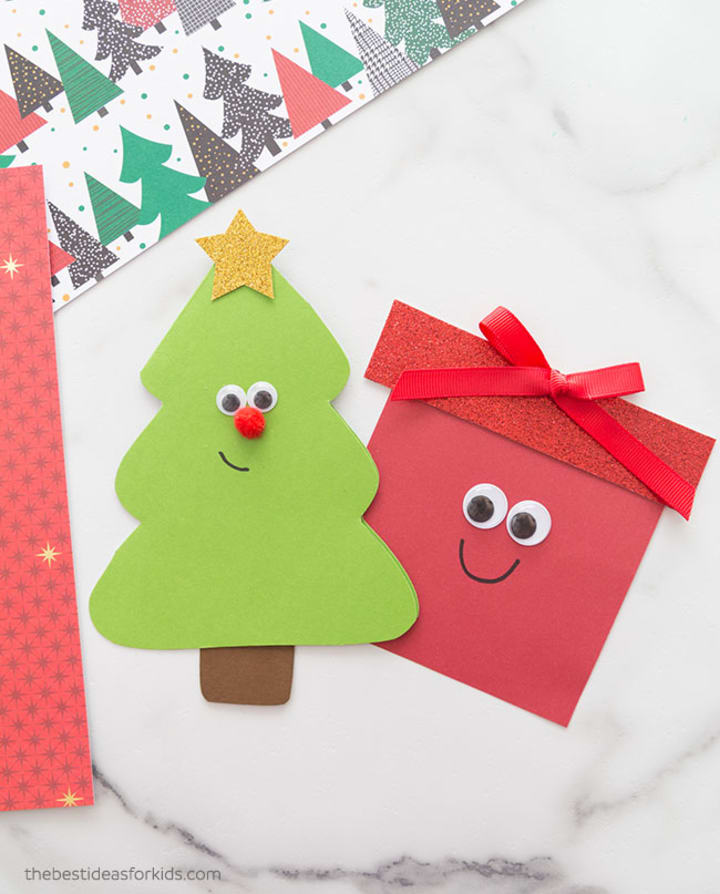
4. Christmas Tree and Present Cards:
Christmas Tree Supplies:
1. Green Cardstock
2. Brown Cardstock
3. Gold Glitter Paper.
4. Small red pom poms
5. Googly eyes
6. Black Marker
7. Scissors.
8. Glue
Present Supplies:
1. Red Cardstock
2. Red Glitter Paper
3. Red Ribbon
4. Large Googly eyes
5. Scissors
6. Glue
Christmas Tree Card Steps:
- Fold a piece of green card stock and draw the outline of the tree so that the top portion of the tree is along the folded part.
- Cut a small square out of the brown cardstock for the tree stump. Cut the star out of the gold glitter paper.
- Glue on the two googly eyes, a red pom for the nose, and the star. Glue the brown tree stump on the inside of the top flap.
- Draw on a smile with the marker and write a personalized message on the inside.
Christmas Present Card Steps:
- Fold over a piece of red cardstock (this will make the card open upward with the top of the present along the folded part) and draw a square. Cut it out.
- On red glitter paper, cut a long rectangle and glue this along the folded edge of the red cardstock. Add the ribbon bow on top.
- Glue on two googly eyes and draw a smile with the black marker.
- Write a personalized message inside.
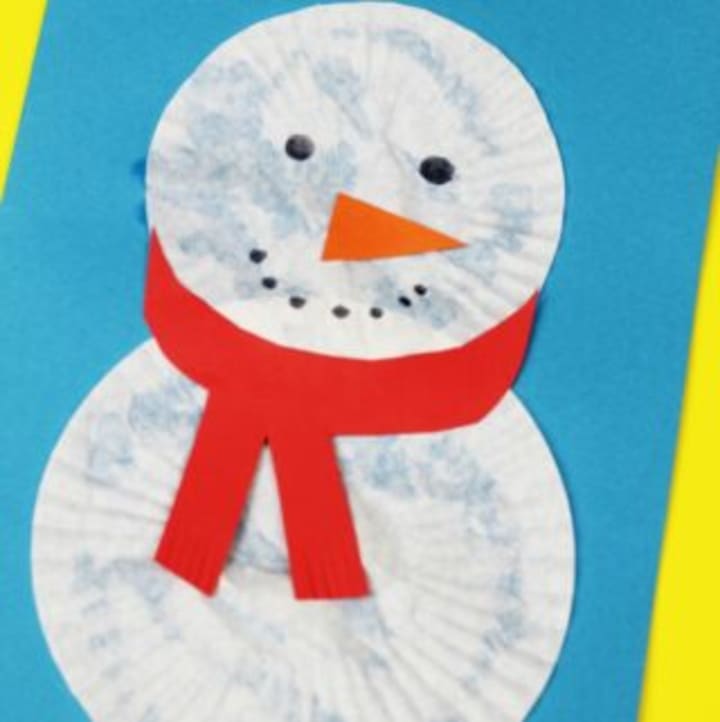
5. Snowman Christmas Card:
Supplies:
1. 2 Cupcake liners
2. Glue
3. Scissors
4. Black pen
5. Different colored cards or cardstock (for the card, the carrot nose, and the scarf).
Steps:
- Flatten out one cupcake liner and glue it to the card (closer to the bottom, as this is the snowman's body).
- Fold the second cupcake liner in half and start trimming some of the edges off.
- Glue the smaller cupcake liner on to make the snowman's head.
- Cut out a scarf shape from colored cardstock and glue it on.
- Cut a long triangle shape out of orange cardstock or paper and glue it on the snowman's face.
- Draw in the snowman's eyes and mouth using a black pen.
- Write a personalized message inside.
Hope you all enjoyed these DIY craft cards! Have fun creating with your little ones. These cards would also be great for writing thank you cards after Christmas.
Have a very Merry Christmas and a happy new year!
Skye Marin
About the Creator
S. G. Marin
I'm optimistic, married, a mom, a writer, a reader, an artist. Being only thirty years young, I want to be a published author when I grow up. I hope to help heal the world with my words, for they are quite powerful when used correctly.
Keep reading
More stories from S. G. Marin and writers in Families and other communities.
Descent
“60 seconds.” Aris tightened her grip on the overhead handhold. The troop transport shook like a leaf in a windstorm as it battled through the atmosphere. Dim lights flickered on and off as the ship’s systems were battered by pelting rain and narrowly dodged blasts from laser cannons on the surface of the planet.
By M. A. Mehan 7 days ago in Fiction


Comments
There are no comments for this story
Be the first to respond and start the conversation.