
Simplifying React State Management with the useContext Hook: A Beginner’s Guide
A Beginner's Guide with useContext

In React, there’s a common challenge we often face: sharing information between different parts of our application. To tackle this, we might find ourselves passing data from one component to another, and then to another — a process known as ‘prop drilling.’ While it works, prop drilling can get a bit messy and make our code harder to understand. But fear not! There’s a handy solution called the useContext hook, and it’s super easy to use.
In this guide, we’ll explore prop drilling using a simple example, and then we’ll introduce the useContext hook to make our lives a whole lot easier. Let’s dive in!
Understanding Prop Drilling:
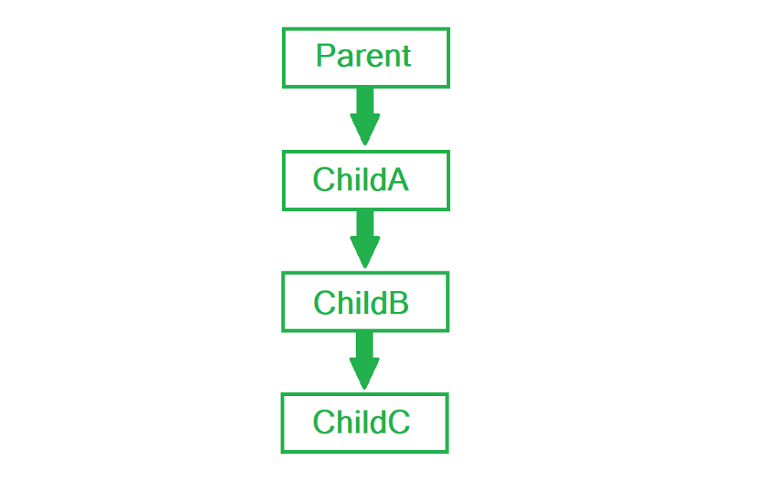
Let’s simplify prop drilling. Imagine you’re playing a game of passing a ball. You start with the ball (your data) and pass it to the person next to you (Child A). Then, they pass it to the next person (Child B), and so on until it reaches the last person (Child C) who needs it. This passing game is like prop drilling in coding. It’s when we need to share information between different parts of our project, but we have to pass it through several components.
Think of it as everyone in the chain passing the same ball until it gets to the person who really needs it. This can get tricky as your project gets bigger because you end up with a long line of people passing the ball, and it can become hard to keep track of who has it!
In the picture below, you can see how this passing game works in code. The data travels through each component until it reaches its final stop in Child C. This whole process is what we call prop drilling, and it can make our code a bit messy and tricky to handle as our project grows.
Unlocking the Power of useContext: A Quick Example
Now, let’s roll up our sleeves and see the useContext hook in action with a simple counter app. This little app will store a counter value in a special place called a context, making it easy for both parent and child components to work together smoothly.
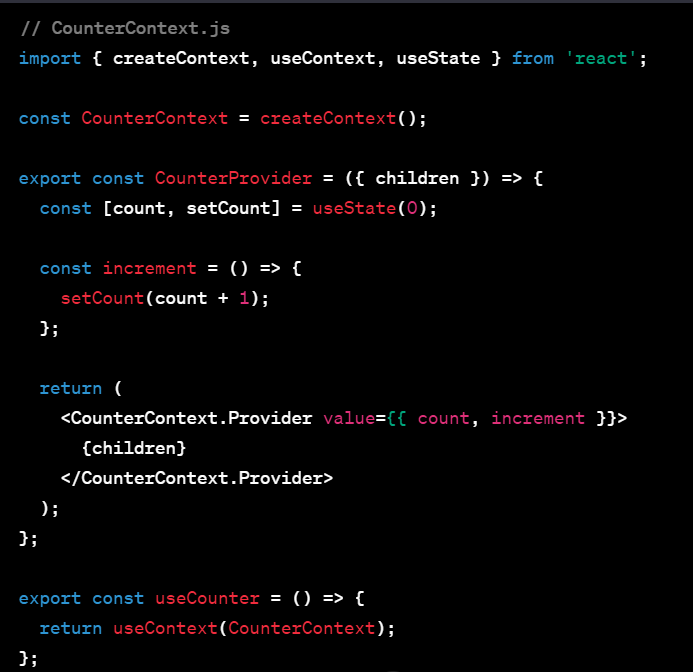
Step 1: Set Up the Context
Imagine creating a secret storage room for our counter. First, create a file named CounterContext.js. In this room, we’ll keep our count and a magic button to make the count go up.
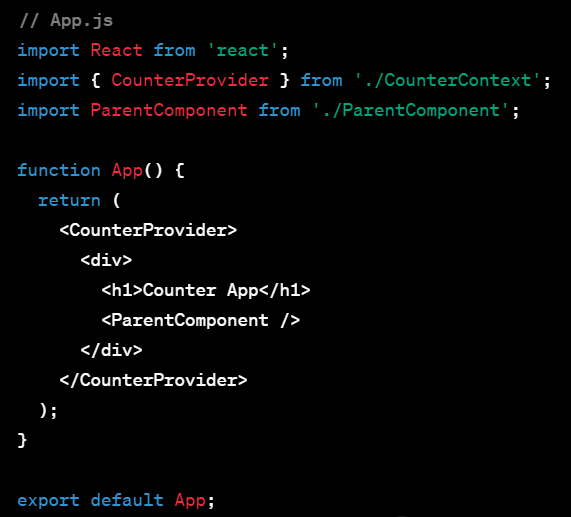
Step 2: Create the Main Component
Now, let’s create the main part of our app, App.js. This is like our house, and we’ll use the CounterProvider to wrap everything inside.
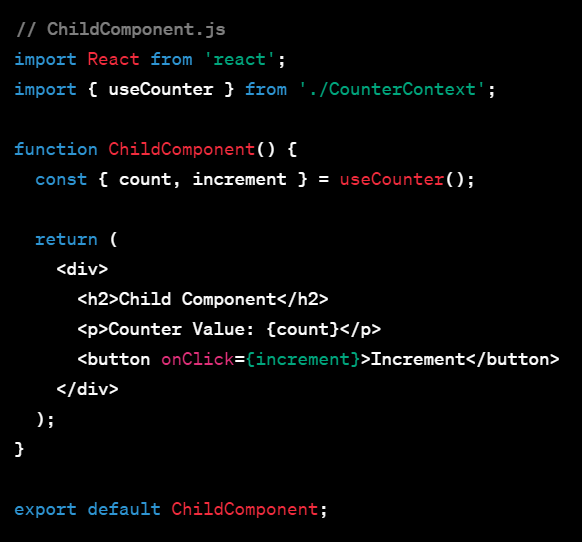
Step 3: Create the Counter Component
In the ChildComponent.js file, we’ll create the child component that will show the counter value and have a magic button to make the count go up.
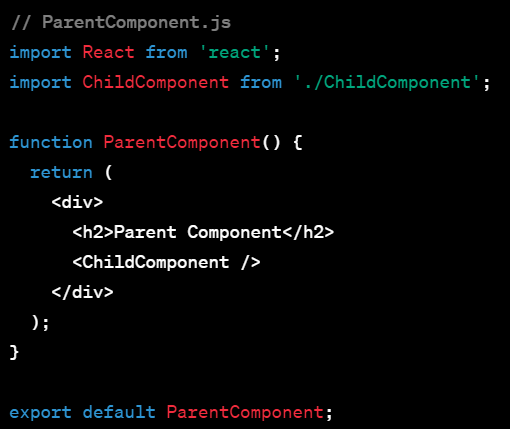
Step 4: Connect the Dots
Lastly, in ParentComponent.js, we bring everything together. It’s like setting up the playground where our ChildComponent can play.
Summary:
With these simple steps, you’ve created a clever counter app where the counter value effortlessly flows between parent and child components. This highlights the seamless data-sharing magic of the useContext hook in React.
That’s a wrap for today! I hope this journey into the useContext hook has shed light on a more streamlined React experience. Thanks for joining me; looking forward to sharing more insights in my next article. Happy coding!
Your thoughts matter! Share your feedback on the blog in the comments below. I'm eager to hear your insights and make our coding journey even better together. Happy reading! 🚀
About the Creator
Enjoyed the story? Support the Creator.
Subscribe for free to receive all their stories in your feed.
Comments
There are no comments for this story
Be the first to respond and start the conversation.