
What is Scan to BIM?
A Practical 2026 Guide for Architects & Surveyors
I want to start with a story before I get into definitions.
A few years back, our team took on a renovation project for a 1960s office building in the mid-Atlantic region. Three floors, roughly 28,000 square feet (2,600 m²), and — like most buildings from that era — the as-built drawings were a mess. Some floors had partial CAD files. One floor had only paper drawings, scanned to PDF, rotated at a slight angle that nobody had noticed until we tried to use them. The structural drawings disagreed with the architectural drawings on column locations by up to 4 inches (about 100mm) in some spots.
The contractor had already priced the renovation based on those drawings.
You can guess where this is going.
That project is what made me take scan to BIM seriously — not as a technology trend, but as a risk management tool. We ended up commissioning a laser scan mid-project to verify existing conditions before the MEP rough-in. It saved the project. It also made me wish we had done it from day one.
So what actually is Scan to BIM?
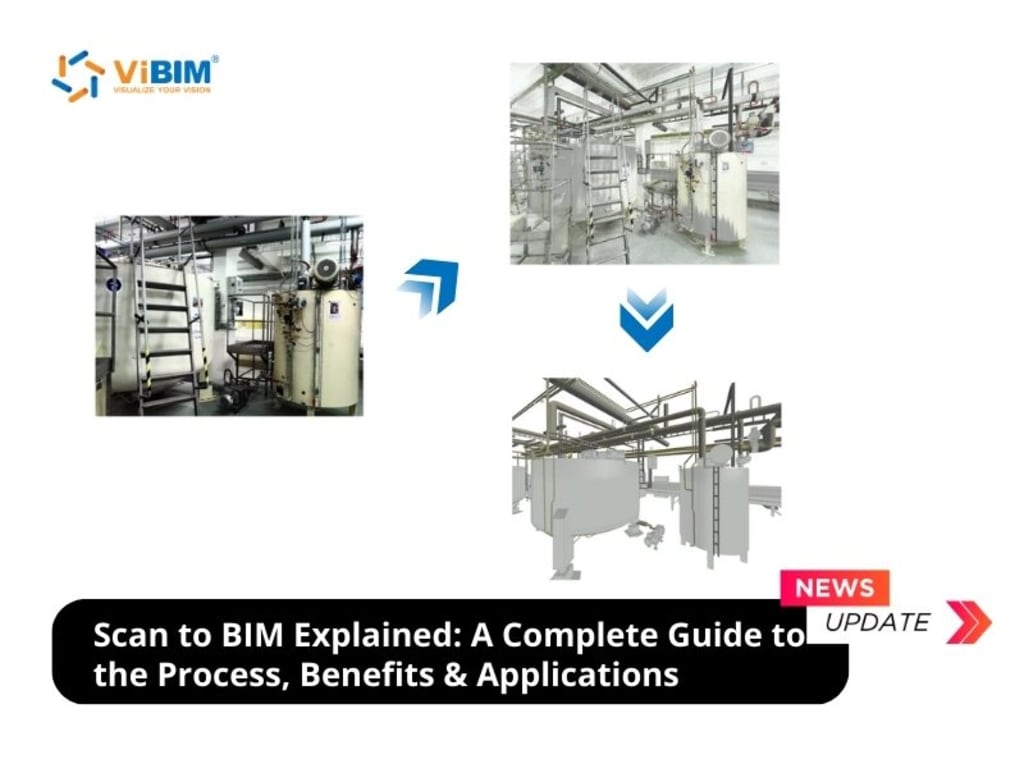
At its core, scan to BIM is the process of capturing an existing physical structure using laser scanning or photogrammetry, then converting that captured data into an intelligent 3D model — typically in Revit, but sometimes ArchiCAD or Bentley depending on the project context.
The capture side produces what's called a point cloud: a dense collection of measured points in 3D space, each with X, Y, Z coordinates. A single terrestrial scan session on a medium-sized building might produce 50 to 200 million points. Those points collectively describe the geometry of every surface the scanner could reach — walls, floors, ceilings, structural elements, mechanical equipment, even ductwork and piping if you're scanning an exposed ceiling.
The BIM side is where human judgment comes in. Someone — a modeler — takes that point cloud and traces intelligent Revit elements over it. Walls, slabs, columns, beams, windows, doors, MEP systems. The point cloud is the reference; the model is the deliverable.
That distinction matters. The point cloud is not the model. Software like Autodesk ReCap lets you index and visualize the cloud, and Revit can link it directly. But Revit doesn't automatically generate model geometry from scan data. Every element still gets placed by a person, informed by what the scan shows.
There are automated tools attempting to close that gap — Autodesk's own ReCap Photo, some AI-assisted segmentation tools — but for production-grade deliverables in 2026, human-guided modeling is still the standard for anything above LOD 200.
Why it matters for architects specifically
Architects deal with existing buildings constantly. Additions, renovations, adaptive reuse, historic preservation — a significant portion of architectural work involves structures that predate BIM entirely, and often predate accurate CAD documentation.
The traditional alternative to scan to BIM is field measurement: a surveyor with a tape measure, laser distance meter, and hand notes. That process works for simple spaces. It does not work reliably for complex geometry, multi-level coordination, or anything where MEP routing matters. Field measurements introduce human error, and that error compounds across a full set of construction documents.
A registered laser scan eliminates most of that error. Modern terrestrial scanners — instruments like the Leica BLK360 or FARO Focus — capture at accuracies of ±1–3mm (±0.04–0.12 in) at typical working distances. The registered point cloud becomes a permanent spatial record of the building as it existed on the day of scanning.
For architects working with preservation guidelines or managing contractor RFIs on existing conditions, that record is worth having regardless of whether a full BIM model gets built from it.
The workflow, without the jargon
Here's how the process actually runs on a typical project.
A scanning crew visits the site and sets up the scanner at multiple positions — usually every 15 to 30 feet (4.5 to 9 meters) in open spaces, more frequently in tight corridors or mechanical rooms. Each scan position captures a full 360-degree sphere of data. The crew places targets between positions so the individual scans can be stitched together into one unified point cloud — this stitching process is called registration.
Registration happens in software: Leica Cyclone, FARO Scene, or Autodesk ReCap, depending on the scanner brand. A well-registered cloud for a mid-sized building has an RMS error under 3mm (0.12 in). If it's higher than that, the modeling tolerances downstream degrade proportionally.
Once registered, the cloud is indexed into ReCap and linked into Revit. The modeling team then works discipline by discipline — architectural elements first, then structural, then MEP — tracing Revit families over the scan geometry. The level of detail they work to is defined upfront by the LOD specification: LOD 200 for early massing, LOD 300 for construction documentation, LOD 350 if trade coordination is in scope.
Delivery is typically the Revit model files, sometimes with a federated NWD for clash review, and often with a deviation report showing where modeled elements sit relative to the scan.
Back to that 1960s office building
When we ran the laser scan mid-project, the point cloud showed us three things the original drawings had wrong: two columns were offset by 3–4 inches (75–100mm) from their drawn locations, a load-bearing wall on the second floor had been partially removed at some point without documentation, and the floor-to-floor height on the third floor was 6 inches (150mm) shorter than the drawings indicated — enough to affect the plenum space available for new ductwork.
Any one of those would have caused a problem. Together, they would have been a serious cost issue if the contractor had framed and roughed-in based on the original documents.
The scan caught all three before a single new element was installed.
That's what scan to BIM does in practice. It's not about technology for its own sake. It's about having accurate information before decisions get made — and before mistakes get built.
A few things worth knowing before you commission a scan
Not every project needs a full LOD 300 BIM model from scan data. Sometimes a registered point cloud alone is sufficient — for clearance checks, for quantity take-offs, for early design reference. Paying for full Revit modeling when you only need spatial reference is a scope question worth asking upfront.
The scanning itself is usually fast. A two-story, 15,000 sq ft (1,400 m²) building can typically be scanned in one day. The modeling takes longer, and the timeline depends entirely on LOD, discipline count, and how much of the building is in scope.
Also: the quality of the point cloud limits the quality of the model. If the scanning was done poorly — missed areas, bad registration, obstructions not cleared — the modeler can only work with what the cloud shows. A thorough scan brief before site day is worth the time.
If you want the detailed version — including how to spec LOD for a scan to BIM project, what to expect in a deliverable package, and how to evaluate vendors — the ViBIM scan to BIM guide covers it more thoroughly than I can here.
What I'd leave you with is this: the value of scan to BIM isn't in the technology. It's in the decision quality it enables. And in renovation and retrofit work, that's usually where the real project risk lives.
About the Creator
ViBIM - BIM Modeling Service
Founded in 2014, 3D Revit BIM Modeling outsourcing services at ViBIM based in Vietnam, dedicated to helping architects, engineers, and contractors transform complex laser scan data into precise, high-quality Revit models.
Enjoyed the story? Support the Creator.
Subscribe for free to receive all their stories in your feed.
Comments
There are no comments for this story
Be the first to respond and start the conversation.