
The Key Points For Your Product Photo Win in Amazon/Shopee
How to make your product photo more attractive and turn into a sale, here are some key points for the photo.


What shoppers see is deciding whether they will order the product on your online store or not, so it’s crucial that you invest in taking perfect photos for your products and create an online store that catches their eye and keeps them intrigued.
If you’re running an e-commerce business, you will know all information customers get for your products are from the pictures on your website no matter how wonderful your products are. This is why the best e-commerce websites not only have great products, but also great photos of their products. These images testify to the quality and value of your products and establish transparency in your e-commerce business. This article will disclose all things about product photography so that you can be on your way to getting that perfect shot.
Types of Product Photography
According to different purposes and styles, product photos also come in a variety of styles. Here list of the six most common types of product shots. Whether you want to maintain a consistent look across your product photos or tastefully mix and match them, it’s important to understand the difference between each type of product photography and how to best capture them.
1. Individual shots

Individual shots are one of the most common types in product photography. These single-object photos can be seen on catalogs and pages throughout products to showcase them independently from their full collection without any other objects distracting your attention or integrating into what you’re looking at too much more than necessary for uninhibited viewing!
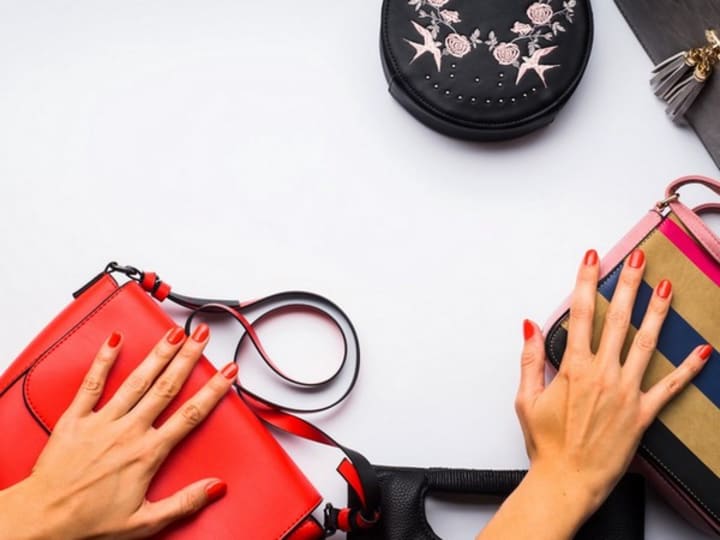
2. Group shots

Group shots are used to display multiple products together. They are frequently employed for product kits and collections, showing the range and variety of your products and giving the customer a more comprehensive view of your offerings. These images are perfect for social media posts and advertisements because they give customers a taste of your brand as a whole rather than just one item.
3. Lifestyle shots
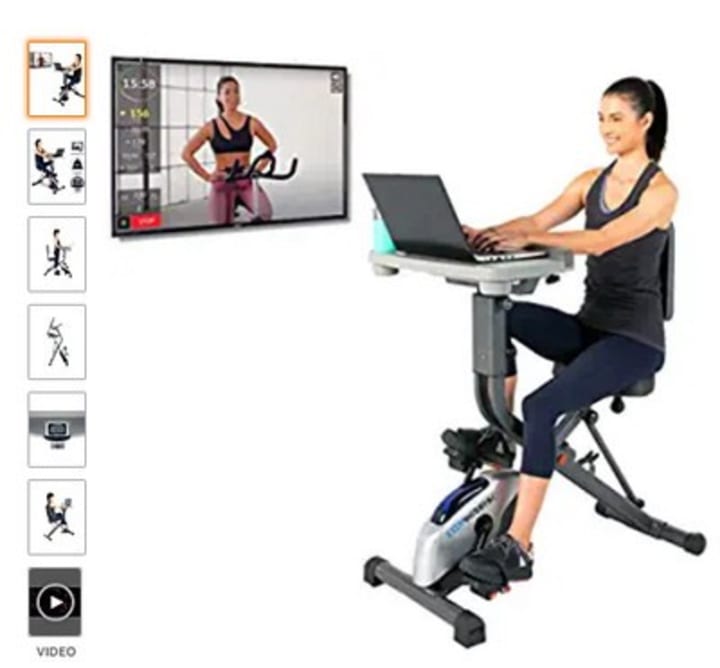
Lifestyle photography is used to demonstrate your products in action. This image from Peter Christian, for example, shows how customers can use your products in their daily lives. Lifestyle photos tell the story of your product and demonstrate how your clients can utilize them in their lives. They are also suitable for social media, email, advertisements, and other visual platforms because they are eye-catching and appear more personalized.
4. Scale shots
When shopping online, a common issue is not being able to gauge the actual size of a product. While product descriptions may list the dimensions of an item, product photos can be deceiving. But with scale shots, you can help your customers get a better idea of the actual size of a product by comparing it with other everyday items. This will help your customers visualize your products in their everyday lives and increase their confidence when purchasing online.
5. Detailed shots

For products with small intricacies that require a close-up, including jewelry and other small items, detailed shots help highlight the specific features of your product, that a traditional photo might not catch. This type of photography often requires specific light and camera settings, such as a macro lens, to capture those delicate shots.
6. Packaging shots

Packaging shots feature not only the product itself but also the product packaging, whether it be a box, bag, or label. From browsing your website to making a purchase and receiving their product in the mail, customers seek a shopping experience that is consistent from start to finish. So, even though you may have an amazing product, if your presentation isn’t up to par, your customers might make no order. And if your products come with beautiful, branded packaging, featuring it on your product page will give your customers better expectations.
Tips to Take a Professional Product Photo
Some necessary tips will help you to get a perfect and professional photo. Here are some tips and practical steps for building your own photos at home.
1. Set up a photo background
Getting the right background not only keeps the focus on the product you’re photographing but also helps simplify the editing process when it comes time for post-production. Try using a white or light backdrop, as this will make it easier to remove unwanted objects and retouch photos.

2. Set up the product
Place your product in front of the backdrop, making sure that it’s centered and on a flat, stable surface like a table or chair. For things like jewelry and other accessories, you may want to use a bust that better displays the product, and for items with labels or special designs, you may need to spend some time adjusting the product until it’s precisely centered.
For smaller, more intricate products, here are a few more tools that might be helpful:
- Glue dots and tapes for keeping small products in place, such as earrings or necklaces.
- Mannequins for clothing and accessories.
- Hangers or eye-catching flat lay for displaying products at different angles.
- A friend or team member for modeling clothes or creating fun lifestyle shots.
3. Set up light
The light is also very important for product display. Although it may be tedious to adjust, creating good lighting makes all the difference in an image, and you’ll have fewer edits to make during the post-production process. You can use natural light and artificial light.
The natural light is actually ideal if you’re shooting outdoors or if you’re shooting a lifestyle photo with a model. Just make sure you’re shooting during the day when the sun is at its peak so that you can get optimal light. If you’re having a product shoot indoors, place your backdrop and shooting table close to a window that gets a lot of natural sunlight, and if the light is too intense, you can try diffusing it with a light sheet or paper draped over the window.
The artificial light will be a better choice if you want to shoot during different times of the day when the sunlight isn’t at its peak. What you’ll need are at least two softbox light setups, which will help soften shadows. You can find clip-on light clamps and strong bulbs.
4. Use a tripod
If your camera is on a slow shutter speed, and it’s nearly impossible to hold it still enough with your hands to avoid ending up with a shaky and blurry photograph, the tripod is the correct option to save all your effort.
5. Take more photos for selection
During you are taking the photo shots, the first few might be a little rusty, so feel free to take more. Take shots at different angles, distances, and positions to see which one works best.
6. Pick the right camera
Choosing the right camera is essential to successful product photography.
If you’re looking to invest in a DSLR, here are some suggested camera settings:
* Adjust your white balance (WB) to the same Kelvin temperature as your studio lights.
* Set your aperture depending on the type of photo you’re taking. If you want to leave some parts of your product out of focus, then set your camera to a wider aperture. Or, if you want a sharp, focused look, then set it to a smaller aperture for a wider depth of field.
* Turn your flash setting to Off. You won’t need it, since you’ll have already adjusted for natural or artificial light.
* Set your camera to the highest quality image setting . If your camera has it, choose Raw, but if not, choose the largest JPG setting. Often you’ll see two setting options:
Size: Choose Large, which will give you the largest file size for the best image quality.
Quality: Choose Superfine, as this will use all the available pixels on your camera and give you the highest quality image.
Once you’ve adjusted to your desired settings, make sure to document them for easier setup the next time around.
Don’t worry if you don’t have money for a fancy DSLR. There are plenty of smartphones that will do just fine since modern smartphone technology has come away. Even iPhone users will find themselves ready enough when taking perfect pictures if the iPhone has access memory or tracks light well enough. Remember this skill takes time and practice every day until one day they’ll become some nature.
7. Retouch and optimize your photo
Retouch and optimize your photo for post-production, which allows you to do color correction, remove unwanted objects, and adjustments in lighting. Of course, it may seem tedious at first, but after a few times around with the help of photo enhancement software, you’ll be able to fly through post-production in no time. And the one among these tools, AVCLabs Photo Enhancer AI is recommended.
AVCLabs Photo Enhancer AI embeds AI machine-learning technology. It is perfect for photo noise removing, sharpening, upscaling, face refinement, BG removing, color calibrating, and more! It is very user-friendly and does not require any photo skills or knowledge. With one click, the AI will do all the work and you can get the perfect product photo.

Features:
- Upscale photo resolution from low to high with super-resolution
- Fix the blurry photos by removing noise & grain and sharpening
- AI Face Retouching tool to make the portraits and selfies look beautified
- AI Photo Colorizer to naturally bring B&W photos into colors
- AI Color Calibration to fix the color issue of photos
- AI BG Removal to turn the photo into transparent background
How to Improve the Product Photo with AI
- Download and install the AI photo enhancer program.
- Open your product photo in the AVCLabs Photo Enhancer AI. You can click the “Browse” button to open your photo or drag and drop the photo into the program.
- Choose an AI model according to your needs, such as AI Upscaler, AI Denoise, Color Calibration, etc. If your photo contains people's faces, you can pick “Face Refinement”.
- Then set the output photo size. It supports upscaling the photo to 400% of the original one. And the output image formats.
- Click on the folder icon to set a folder to store the enhanced photo.
- After all the settings, click the “Save All” button to start AI to improve the photo.
- Tips: you can preview the effect before you save the photo by clicking the “Eye” button.

Do You Need to Hire a Professional Product Photographer
For the following conditions, you might need to hire a professional photographer, which is really pricey.
- You likely don’t have the necessary equipment and software to achieve the highest quality photos. The quality of your equipment usually determines the quality of your photography and, most likely, a professional photographer will come loaded with the best of the best.
- You need consistent product photos. If you require the same lighting, color, and positioning every time for your product photos, and as an amateur photographer without much experience, you might feel it may be difficult to recreate. But this is a professional photographer’s forte.
Conclusion:
And all the above are tips and tools and resources to revamp your product photography. Definitely, you do not need to implement all of these improvements at once. Creating high-quality product photos is not something that happens ASAP, so it may take some trial and test to achieve the best effect you want. And hiring a good photographer or an AI tool assistant will help you a lot. Surely the AI tool is much cheaper. You can have a free trial and then decide between it and the photographer.
About the Creator
Chloe Huang
Dedicated to sharing a variety of useful technical tips~
Keep reading
More stories from Chloe Huang and writers in 01 and other communities.
How to Use Audible on Android Auto
Apart from the empowerment of technology, another reason why audiobooks have been able to develop so quickly is that people can use the fragmented time to listen to audiobooks anytime and anywhere to receive new information and knowledge. This convenience cannot be replaced by traditional paper books. Users can listen to audio programs through devices such as mobile phones and smart stereos and can combine listening to books with other activities such as driving, exercising, and doing household chores. Previous articles have detailed how to play Audible audiobooks on various music playback devices such as iPods, MP3 Players, or watches such as Apple Watch, Samsung Galaxy Watch, and speakers such as Sonos, but there is no tutorial on how to play audiobooks in the car.
By Chloe Huang2 years ago in 01


Comments
There are no comments for this story
Be the first to respond and start the conversation.