
Light up your creativity and Imagination
I love creating digitally responsive garments and wearable art!!!

Many of my recent creations have been constructed using LEDs, motors, sensors, and boards. Exploring the world of digitally responsive garments is both exciting and frustrating. I create wearable art using fabric, scissors, thread, solder, electrical components, and imagination. I am a draper/pattern maker, and I love collaborating with designers to construct intricate, beautiful costumes that are exceptional because of our creative teamwork. My favorite part of being the draper is taking a rendering from two-dimensional images and recreating the costume in three-dimensional forms. I obtain a sense of accomplishment when I compare the original rendering and see my finished creation. I have incorporated the latest technologies, including computer patterning, three-dimensional printing, and circuitry design, into my work. Combining the different skills, crafts, and experiences helps me create beautiful and unique wearable artwork.
Lifelong education and learning are critical to me. I am inspired by applying new techniques and technology to costuming and know I will be learning new ideas and skills throughout my life. I indulge in taking risks because I find the process challenging and producing the final result extremely rewarding. Finally, I challenge myself for my own satisfaction and for the art, beauty, and emotional response I create.
Inspiration for projects comes from everywhere. I may see a particular string of lights, and I know how to incorporate it into a garment. Or I am reading a book, and the words come alive off the page, and I create a rough rendering of a beautiful gown. I have also had many inspirations from everyone around me and what our minds can dream up together!!!
I first began my adventure into wearable technology, starting with the Lilypad sewable boards and LEDs, creating simple jewelry like bracelets and earrings. I would dream, create and take pictures and then rip them apart to create a new project. A creative desire inspired me to expand my abilities. Creating different projects helps me develop new skillsets. I also like to challenge myself to expand my knowledge by creating bigger and better projects.

After creating many different projects out of the conductive thread and sewable components, I quickly wanted to create more extravagant projects. I began using solder instead of conductive thread and full LED strings instead of a single LED. Working in half scale helped me hone and understand the basics. Some of my mistakes include melting a battery pack, touching a high voltage board (and getting zinged), and blue smoke coming from many different micro chipboards. I was once told by a mentor that there is always a certain amount of blue smoke that can come out of the board before you have fully demolished the components. There have been a few boards that I saw the blue smoke quickly and could unplug and save the board. However, I have killed a few boards by embracing the blue smoke theory. Learning from my mistakes is important but allowing myself to make those mistakes is an integral part of the learning process! These mistakes are now some of my favorite stories to tell and inspire people to create their own light-up wearable art. Failing forward on a small scale helped me really enjoy the experimentation and problem solving of learning a new skill.
My first large project was a half-scale dress that incorporated fairy lights and EL-wire. I wanted twinkling fairy lights and the hem of all the ruffles to be light up with the EL-wire.

Soon I began including motors and LCD screens in my projects. One of my first projects to incorporate this new technology was a unique steampunk-inspired top hat. I worked for hours to figure out the correct programming to get the clock hand to move in the sequenced I wanted.
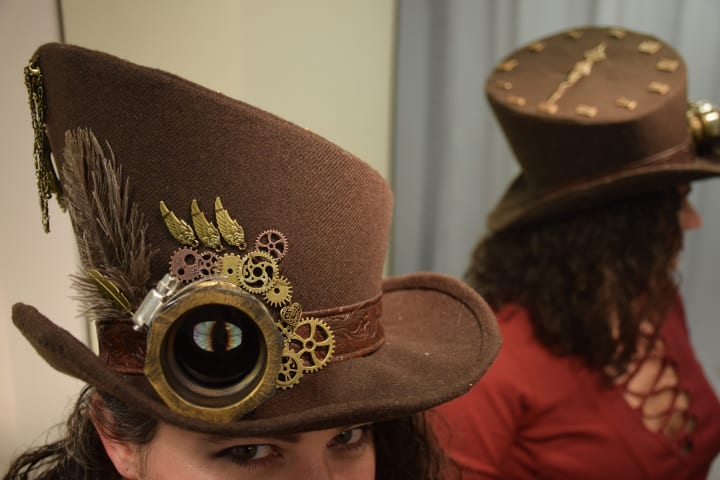
The biggest lesson I learned on this hat had more to do with travel. Airports do not like anything that has wires, a battery, and a clock on it. However, I was able to fix the part they broke with a little solder once I got back home.
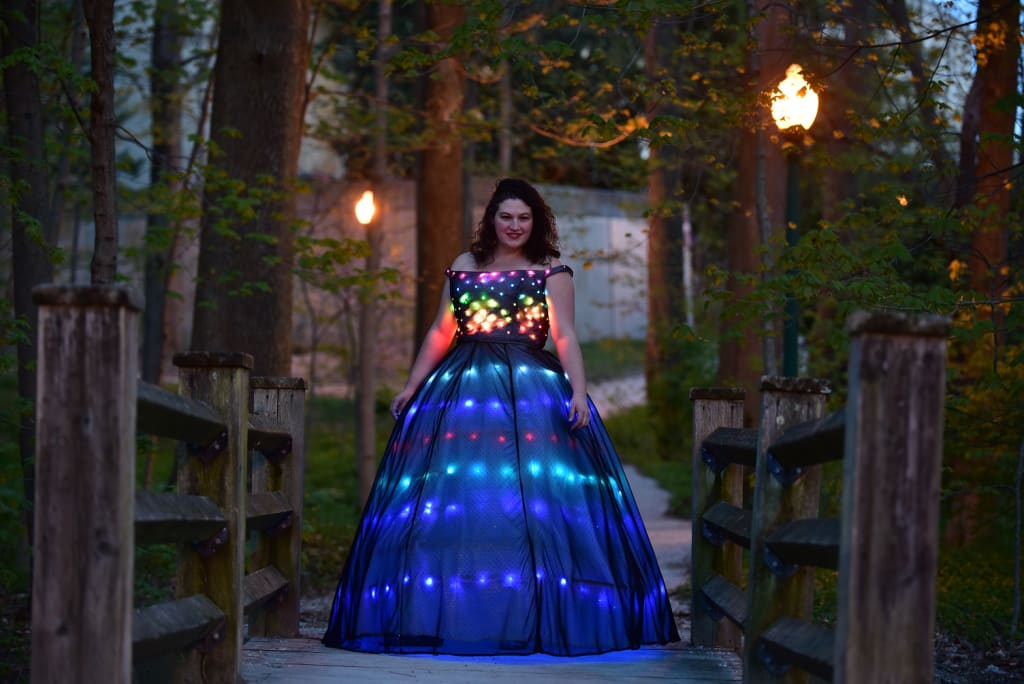
After many small projects and experimentation, I knew I wanted to walk across the stage in a full light-up crinoline gown to celebrate my graduation from Indiana University with a Master of Fine Arts.

I had to drape and pattern the bodice to attach the individually programable NeoPixles. I knew access to the NeoPixles after the gown was complete was essential. I learned this after experimentation from previous projects. This way, if a solder point needed to be fixed, I could quickly and easily gain access for repair. I designed the bodice to have a base layer of stiff canvas fabric with a lightweight sheer layer on top. These two layers would snap together at the waist seam. Now that I had the bodice base layer, I planed how close the NeoPixels could be and finalized how many I would have to solder together. I spent every spare minute I had soldering NeoPixels together, and by the end, I was fast enough to solder 10 together in 30 minutes. Which when you are soldering 148 of them together, the time adds up quickly!! Each NeoPixel had 6 flat electrical connection points on the back, all needing to be soldered together.
Next came time to place and sew the NeoPixels onto the bodice. This process took a while because I had to hand sew each side of every NeoPixel to secure them in place. Once they were all attached, I ran a test program through the bodice and was delighted with the outcome. The final steps were to finish all the edges of the bodice and snap closed the waist opening.
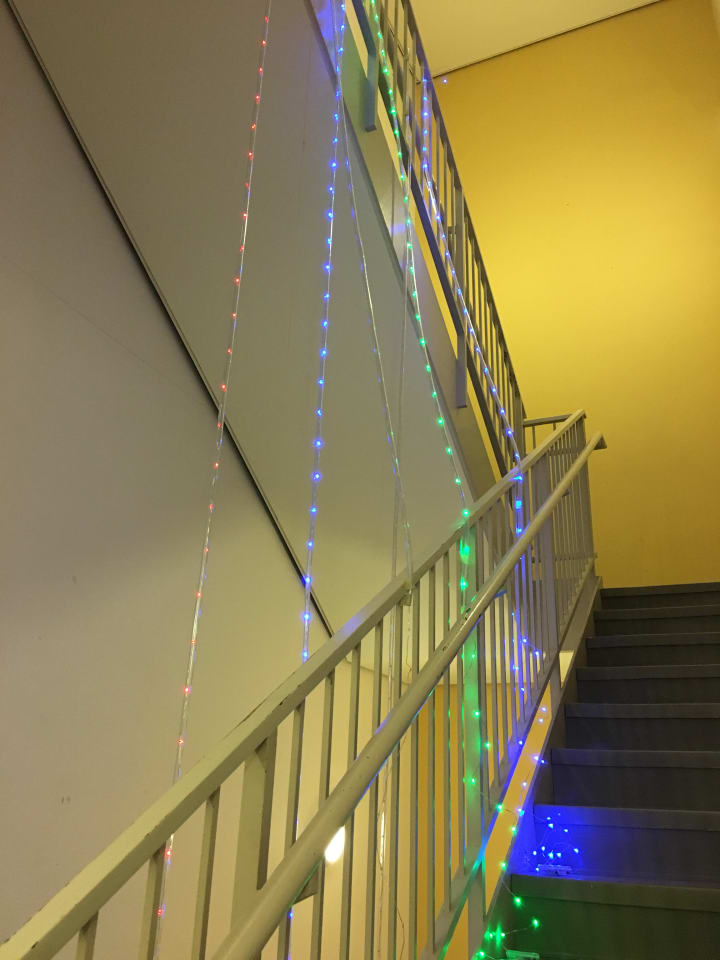
Time to design and build the understructure for the skirt. I decided to make the hoop skirt out of rope lights. I elected to create rope light from scratch myself. Dealing with cutting premade rope lights to the size I wanted was not my idea of fun. Creating each hoop the size I wanted seemed simpler. I wanted to make each row out of the same brand of LEDs. This way, I could eventually connect all strands to an Arduino board. Sometimes the best way to create art is to have a grand idea and not enough time to complete it. I am leaving opportunities to enhance my vision later when I run out of time to complete it as originally envisioned.
First, I decided how many layers of hoops I would have on my Crinoline Hoop Skirt. Next, I figured out the circumference of the required hoops. To easily feed the LEDs into the tubing, I taped the tubing between a first and second-floor staircase. Then I could easily and quickly feed the LEDs through at the correct lengths. I got a lot of stair workouts that day!!!
Once I had all the LED ropes made, I created each hoop. Using unusual materials for structure, I used door jam plastic and hose clamps to create each hoop. Next, I added each hoop, starting for the top and working downward to the nylon strapping. I safety-pinned each hoop in place to ensure the placement was correct. Once I was happy with the placement, I stitched down each casing. To help balance out the battery packs, I placed every row on alternated sides. I still needed to add a little weight in the center back to help balance out the entire structure.

I wanted a simple skirt so that the uniqueness came from the lights and patterns it could create. I patterned a simple 6 panel gored skirt with a layer of tule to smooth the fabric over the hoop skirt. Finally, it was time to put on the dress and take some amazing pictures!!! When I graduated, my dress consisted of 23 batteries, and my parents had no problem finding me in the crowd. The man walking everyone through the metal detector was impressed by the dress but shook his head with how much metal my garment had built into it. He quickly waved me through and congratulated me on my achievement.

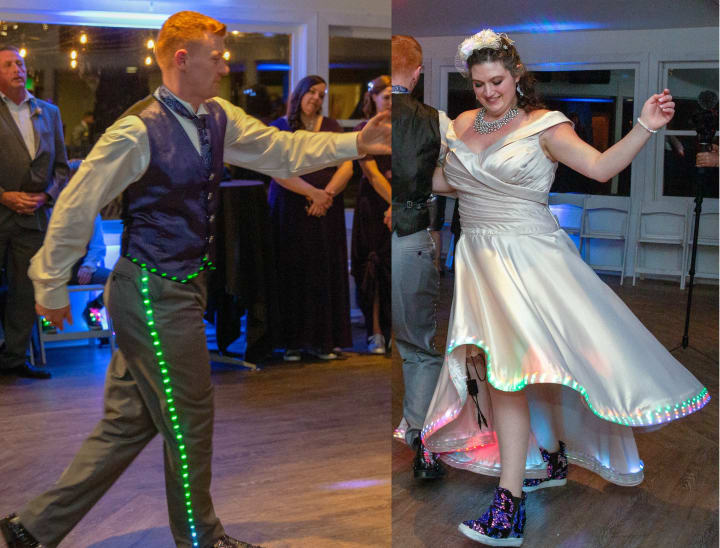
Since then, some of my other projects have been a light-up Wedding Dress hem and a matching groom's suit. The Bride had 65 feet of NeoPixel LEDs in her hem connecting to a board with a sensor that made the LEDs beat with the music. All this was powered by a 12-volt battery that was held on by the garter. The Groom had a similar setup with a board and battery contained within the lining of the vest.
Another was a Cycling jacket with blinkers controlled by two buttons and a flex sensor on the glove that changed the warning triangle to flashing red to symbolize the biker is slowing down.

These projects are only the beginning, and I love exploring new techniques and enhancing my knowledge to create more amazing wearable light-up art!!! I love searching for creativity and inspiration. I look forward to discovering what will inspire me and what I will dream up next!!!
About the Creator
Christina HadleyDike
I am a Creator Artist and I gather inspiration from everywhere! My imagination comes up with crazy ideas. I love bringing those ideas to life! I love wearable art and I love creating different digitally responsive garments!!!
Keep reading
More stories from Christina HadleyDike and writers in 01 and other communities.
Adventures in Slow Motion:
Adventure cycling is a growing trend in the bike community. It can be scary at first to leave everything behind and head out on an adventure, but it's also liberating. We love to share our stories with others so they, too, can find their own adventure at 12 miles per hour. So please slow down and truly experience the world your traveling through and the people who share it. Really taking your time to explore. One of our favorite things about bicycle touring is getting to every destination fueled by our own power! Carrying everything on the back of your bicycle makes for a great feeling that we hope to inspire everyone else to experience. So come with us on a journey of inspiration, and let us show you how easy it is to find the key to unlocking your own adventures!
By Christina HadleyDike3 years ago in Motivation
API Management 101: What It Is and Why Your Business Needs It
Technology drives efficiency, innovation, and development in today's corporate world. APIs are a crucial component of modern technology. APIs enable software programs to communicate and interact seamlessly. However, with the proliferation of APIs comes the need for effective management. Enter API management—a crucial component for businesses looking to leverage the full potential of APIs while ensuring security, scalability, and control.
By Pankaj Kumbharabout 17 hours ago in 01


Comments
There are no comments for this story
Be the first to respond and start the conversation.