
Install Dynatrace Extension On Azure Function & App Service using Terraform
azapi_resource
Terraform is a programming language to provision cloud infrastructure (Infrastructure as Code). IaC is all about deploying infrastructure through software. It helps achieve consistent and predictable environments.
The most significant advantage of Terraform is the concept of state files. The state file allows Terraform to deploy the differential. In this way, the provisioning of resources is faster than using other IaC toolsets like ARM or Az Cli.
Dynatrace is a monitoring tool. It provides an in-depth analysis and reporting of the health of enterprise systems.
In this article, I will show how to install the Dynatrace extension via Terraform. Dynatrace is a monitoring tool. It provides an in-depth analysis and reporting of the health of enterprise systems. To enable the monitoring of Azure functions & Azure app service, we can install the Dynatrace extension.
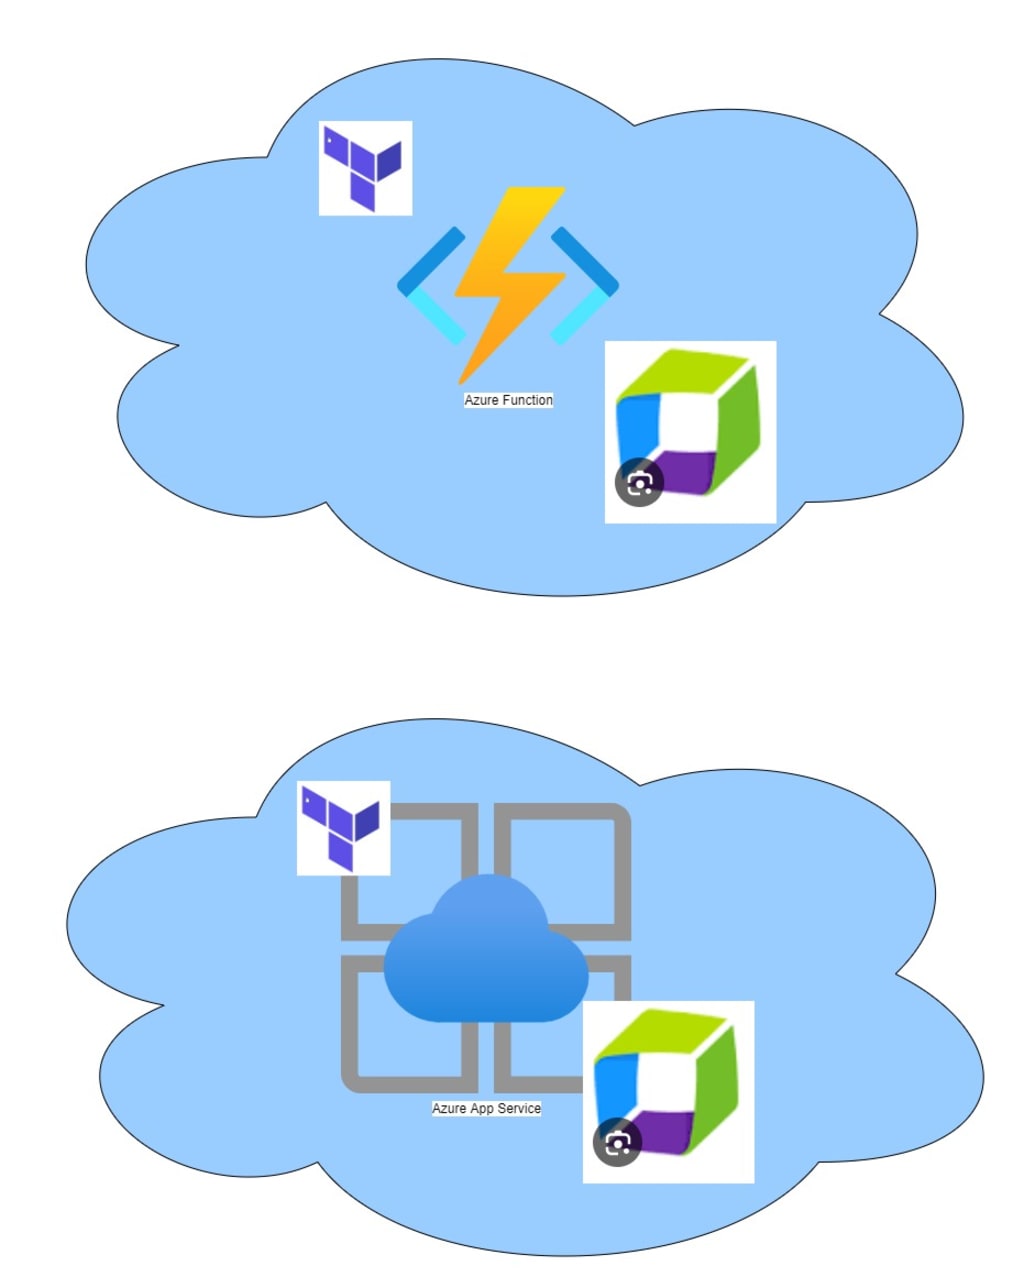
Dynatrace extension on Azure function
We can install the extension from the Azure portal as well. View the link below for detailed steps.
Monitor Azure Functions on App Service Plan for Windows - Dynatrace Docs
Please note that the below solution will work only for Azure function on Windows.
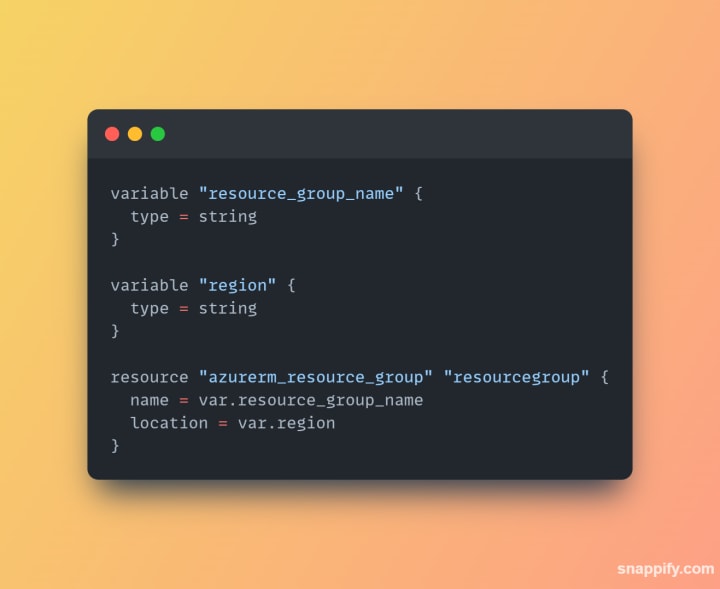
Step 1 – Create an Azure Resource Group
Code snippet to create a resource group

Step 2 – Create a Storage account
Azure function needs a storage account. It's used for triggers, bindings, and states but there are other usages as well. In case you need detailed information on why Azure function needs a storage account. Read Storage considerations for Azure Functions | Microsoft Learn

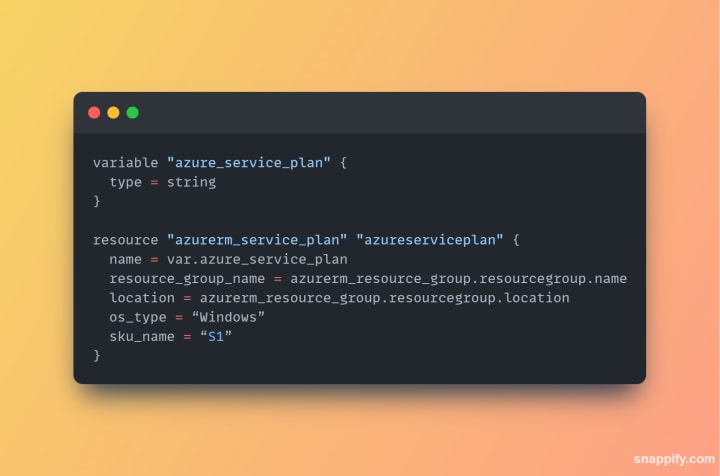
Step 3 – Create an App Service Plan(ASP)
An Azure service plan provides the compute for the Azure function.
Code snippet to create an app service plan.
Step 4 – Create an Azure function
The next step is to create an azure function
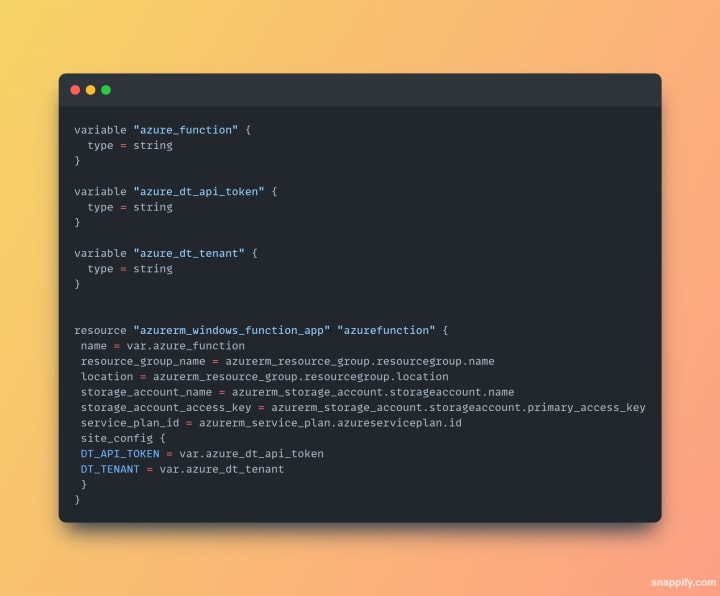
We can see a couple of configurations. These are Dynatrace environment-specific configurations to send monitoring information to the Dynatrace server. The configurations are:
- "DT_API_TOKEN" - PaaS token
- "DT_TENANT" - Environment ID
Step 6 – Install DT extension
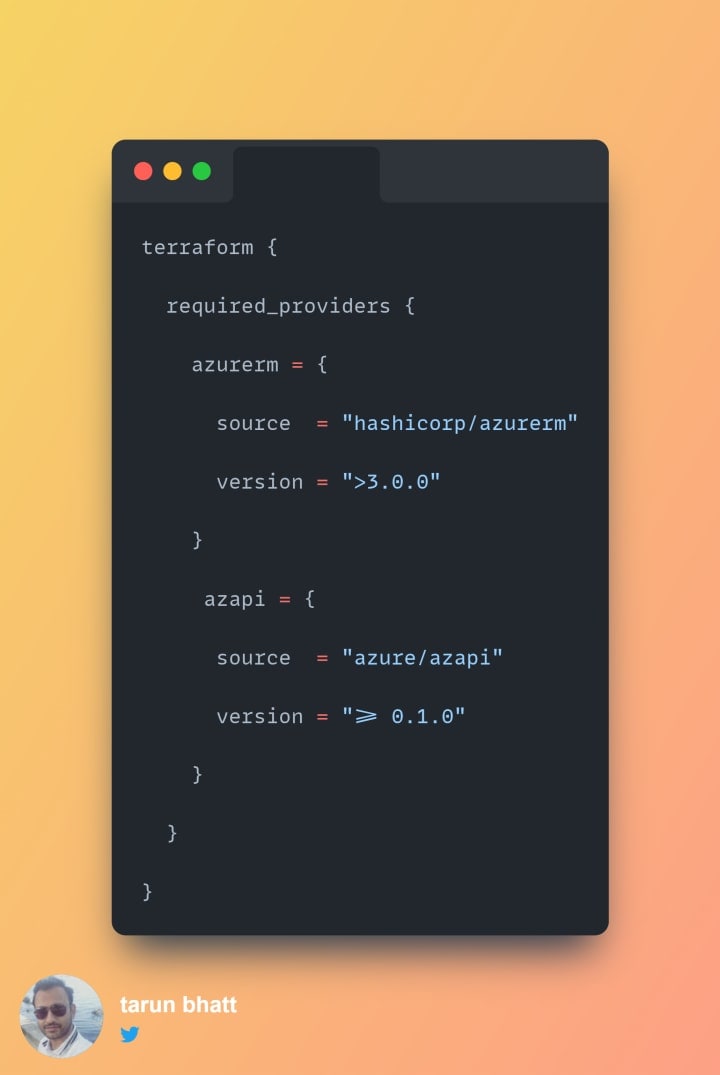
The last step is to install the DT extension using azapi_resource. azapi_resource does not come as part of azurerm provider. It comes as part of azapi provider. Hence our provider block will look like the below:
The resource block to install the Dynatrace extension is below:

The AzAPI provider is a very thin layer on top of the Azure ARM REST APIs. It complements the AzureRM provider for Azure resources that are not yet supported. If you want to read more on this. See link below:
Docs overview | Azure/azapi | Terraform | Terraform Registry
Final Code
The final code will look like

Dynatrace extension on Azure App Service
In this section, I will cover installation for an Azure App service. We can install the extension from the Azure portal as well. View the link below for detailed steps.
Monitor Azure App Service on App Service Plan for Windows - Dynatrace Docs
Please note that the below solution will work only for Azure app service on Windows.
Step 1 — Create an Azure Resource Group
Code snippet to create a resource group
Step 2 — Create an app service plan(ASP)
An Azure service plan provides the compute for the Azure app service.
Use the code snippet below to create an app service plan.

Step 3— Create an Azure app service
The next step is to create an app service.

We can see a couple of configurations. These are Dynatrace environment-specific configurations to send monitoring information to the Dynatrace server. The configurations are:
- DT_API_TOKEN — PaaS token
- DT_TENANT— Environment ID
Step 4— Install DT extension
The last step is to install the DT extension using azapi_resource. azapi_resource does not come as part of azurerm provider. It comes as part of azapi provider. Hence our provider block will look like the below:

The resource block to install the Dynatrace extension is below:

The AzAPI provider is a very thin layer on top of the Azure ARM REST APIs. It complements the AzureRM provider for Azure resources that are not yet supported. If you want to read more on this. See link below
Final Code
The final code will look like:

Let me know if there are any questions.
Regards Tarun
About the Creator
Keep reading
More stories from tarun bhatt and writers in 01 and other communities.
Azure Key Vault – Update Expiry using Terraform
Azure Key Vault is Microsoft's cloud solution to store secrets and certificates. Enterprise applications can fetch them using Key Vault URLs. It enables easy and secure management of passwords and connection strings. Every secret has an expiry attached to it.
By tarun bhatt6 months ago in 01
Web3 Trends in 2024
Get ready to fasten your virtual seatbelts! The internet is on the verge of a revolution powered by Web3. This next iteration of the web promises to be more decentralized, user-controlled, and brimming with innovation. 2024 is shaping up to be a pivotal year for Web3, with exciting developments that will significantly impact how we interact online. In this blog post, we'll explore four key trends that are poised to define the future of Web3:
By BlockchainX3 days ago in 01
Chill in Style: Revolutionize Your Ice Game with the Nugget Ice Maker Countertop
In the realm of modern convenience, the ice maker has become an indispensable appliance in households, offices, and commercial settings alike. With the ability to produce ice on demand, these innovative machines offer unparalleled convenience for a variety of needs. Among the plethora of options available, three stand out for their unique features and functionality: the Nugget Ice Maker Countertop with Chewable Ice, the ecozy Portable Countertop Ice Maker, and the Nugget Countertop Ice Maker with Soft Chewable Ice.
By Stephanie Johnson5 days ago in 01
The Voyeur's Incandescent Reasoning
The woman sat nonplussed, in the Waiting Room. In a sort of daze, looking straight ahead patiently. She had already had three small breakfast's that morning and a nip of sherry, this was not unusual she would typically wait until an hour after she took her anti-depressant and was her morning routine. She was merely following instructions she assured herself, shifted slightly in her seat and feeling a little heart burn thought, maybe she should skip lunch. Dom had said to have the task done this week. She was well used to his methods and desired to get this over and done with soon. She glanced at her watch, smiled weakly at the Receptionist who was there for a moment and then gone.
By Canuck Scriber L.Lachapelle Author7 days ago in Fiction


Comments
There are no comments for this story
Be the first to respond and start the conversation.