

Hello, we are back with our next article in the series of iOS native development. In this article we will learn about various parts of an iOS project. At the very high level we will explore each project. If you are very new or a beginner to native iOS development, we recommend referring to our previous articles here.
So let’s start by creating a new Xcode project. You can refer to this article for creating a new Xcode project. We will refer to the single view application for this article. However this article will be more or less applicable to other types of iOS applications as well.
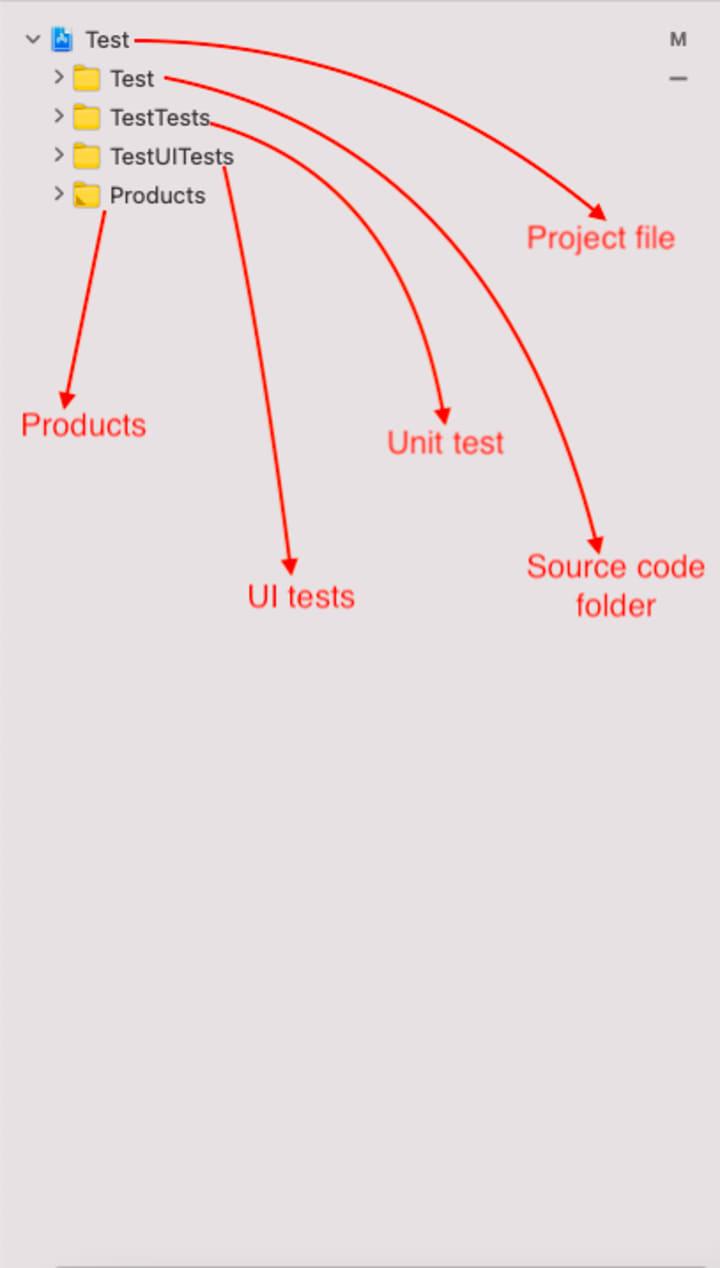
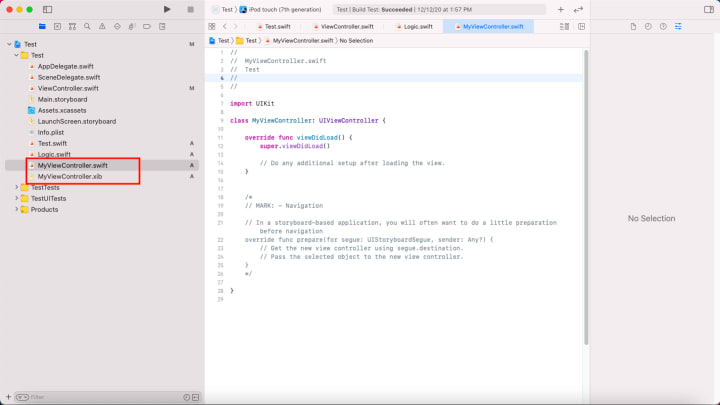
When we create a new single view application using Xcode. We get an initial project with a single view or screen. Below figure shows initial project structure when we create a fresh Xcode project.
Let’s explore each part one by one.
Project file
At the very top we have an Xcode project file. The name of your xcode project file is the same as the name of your application with .xcodeproj extension. You can rename this file once created either from Xcode or by navigating to the file in Finder. It is not recommended to rename the project file. Even if you want to try to do that from Xcode and not from Finder as it will, that will rename required references as well. Every iOS project will have a single .xcodeproj file.
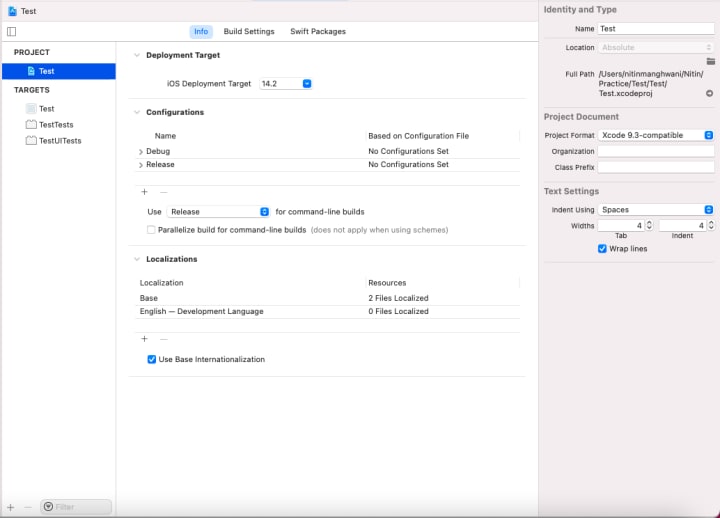
When you click on this file it opens various applications level settings in the editor. We will cover details about these settings in one of our future articles.
You can also open an existing iOS project by opening this project file in Xcode using “Open...” option from File menu.
Source code folder
This is the most important part of an iOS project as this folder contains your source code. By default Xcode creates a single folder group for your source code with the name of your application itself. You can create more sub folder groups inside this folder.
One thing to note here is that any folder group or group does not behave like packages. In fact in iOS there is no concept like packages and we require only file names for a successful import. Any folder group or groups created are just for visual organization of the developer.
Whatever code we write in our application, either it falls under logic(business, presentation, data, threads, helpers etc.) or user interface or UI. Whatever logic we write in our iOS application is a swift source code file with .swift extension. Whereas for user interface we use .storyboards, .xib and .swift files.
Adding a logic file
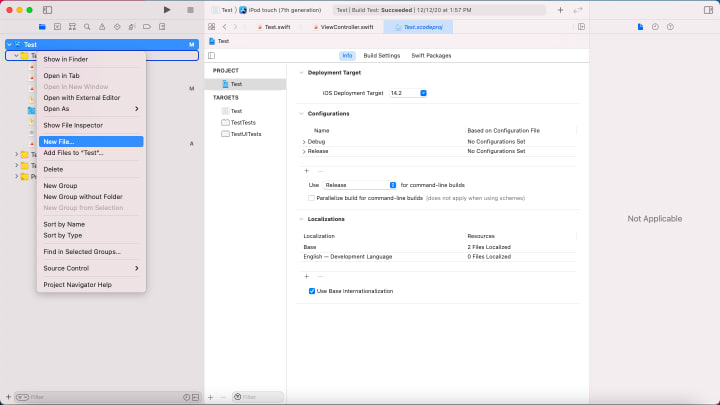
At any time while development we can add a logic file to our source code. Right click on any group or folder group, select “New File...” and choose “Swift File” and provide it a name. This will generate a blank swift file with a single import statement for Foundation framework.


Adding a user interface file
At any time while development we can add a user interface file to our source code. Right click on any group or folder group, select “New File...” and choose “Cocoa Touch Class”. Input the file name and choose UIViewController in the subclass drop down and check mark the “Also create XIB file” option. This will create 2 files, one .swift file which is a subclass of UIViewController and another .xib file which acts as a view part for our view controller class. Refer below figure.

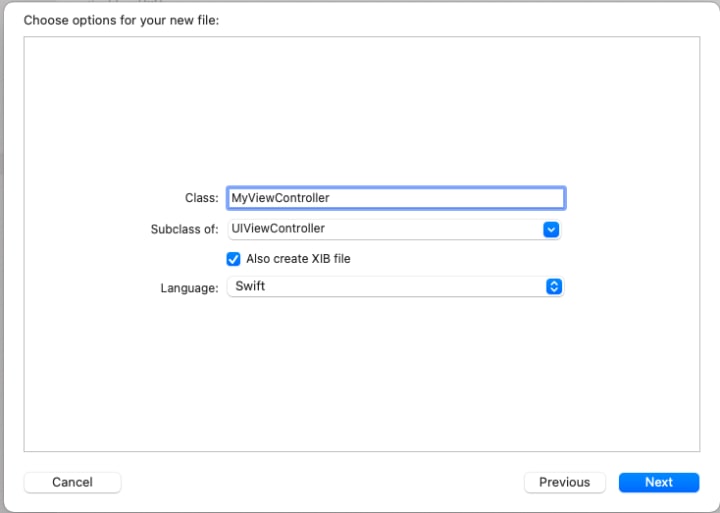
Most of the user interface files are subclass of UIViewController(this is analog to Activity in Android). We will use UIViewController subclass whenever we want to create a new page or new screen. This UIViewController subclass will contain life cycle methods, references(IBOutlets) and some time presentation and business logic as well.
Adding only xib file
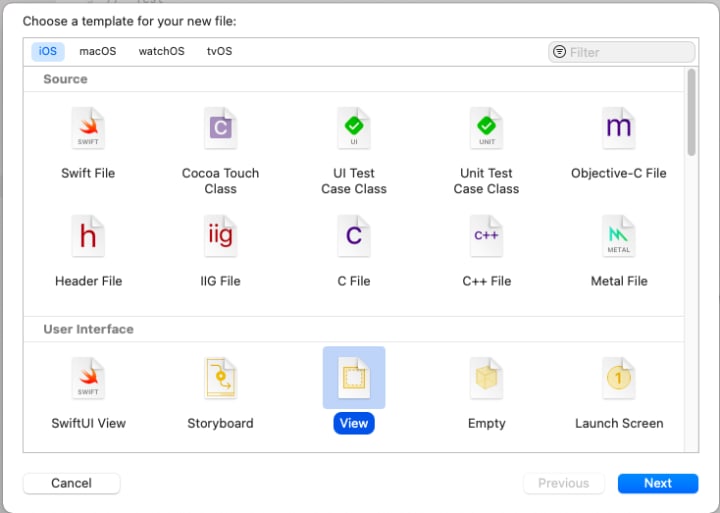
User interface can also be added to the source code using the xib file. To add the xib file right click on the folder group you want to add the file to, select “New File...” and choose “View” or “Empty” files. Name your file and choose the path. This will create a new .xib file with empty canvas in Xcode. Refer figures as below.


Adding storyboard file
Just as we added the xib file. Right click on any folder group, select “New File..” and choose storyboard. This will give you a new .storyboard file without any scenes. Refer figures as below.


Please note we will explore these logic and user interfaces files in more detail in our upcoming articles.
Resources
An iOS application can have multiple types of resources likes images(.png, .jpg etc.), local web pages(.html, .htm), pdfs, .cert, .pem etc.
Out of these most frequently used resources are images. We generally add images to our iOS application in .png format. An iOS application requires images for various purposes like home screen icon, splash screen, images used inside the various screens etc. To fulfill any of these purposes you need to add images to a folder called “Assets.xcassets”.
To add any image asset select Assets.xcassets, click on the “+” button in the bottom left corner of the editor and select the appropriate option like App Icon. Each asset will ask you to add images of required dimension according to application type. Refer below figure.

You can also add any other assets to any group or folder by right clicking and selecting “Add files to application name...”. Refer below figure.

We will discuss more about assets in detail in our upcoming articles.
Info.plist
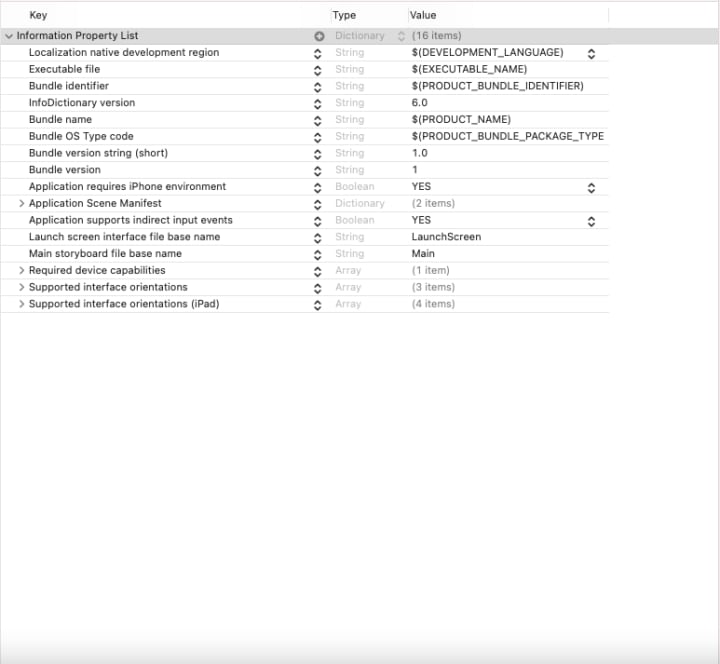
This file is automatically created by Xcode while creating the new project. Plist stands for property list. So this file is basically the properties/configuration file of your application. It contains properties like application name, identifier, build version etc. It can also contain the permission for your application like location, camera access etc.
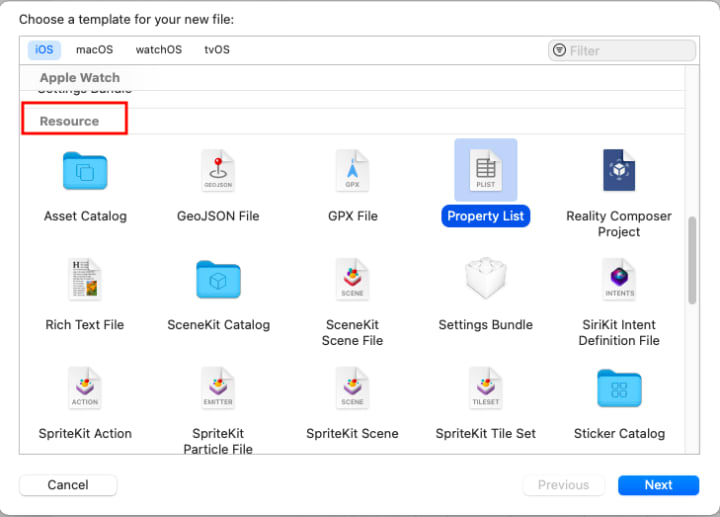
Generally there is one info.plist file. However you can add your custom .plist file by right clicking, selecting “New File” and then selecting “Property List” under resources section.

Property list generally a hashmap that contains all the information. You can view property files as source code. Right click property file select “Open As” and select “Source code.”
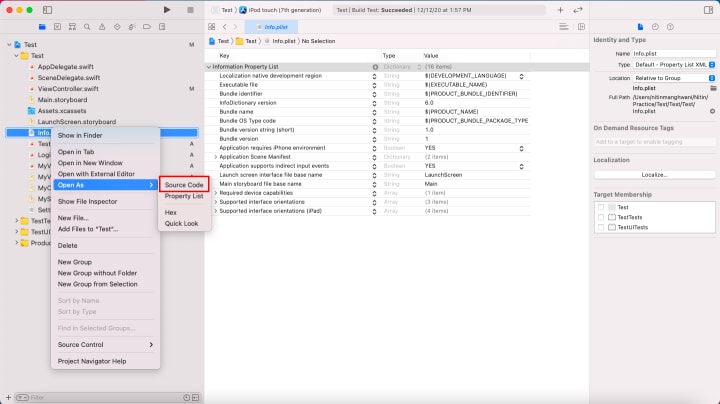

To add new property to .plist file. Hover the mouse on any property and select the “+” icon as shown in the figure below. Alternatively you can also add new property by opening .plist in source code format. New properties to be added can be system defined or user defined.


Unit tests and UI tests
If you select options for unit tests and UI tests while creating a new Xcode project. Xcode will generate separate folders for both. These folders will have unit test and UI test classes respectively. We will cover these test topics in detail in our upcoming articles.
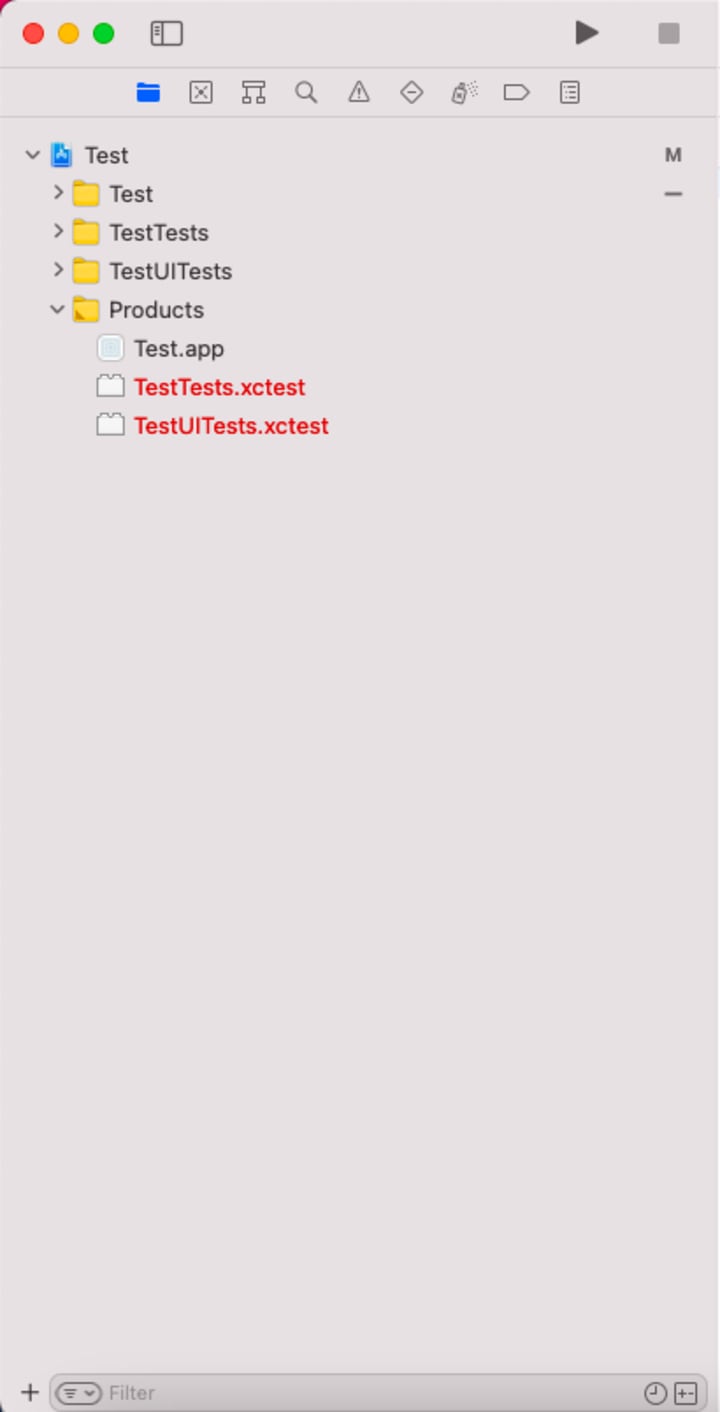
Products
This folder contains products for your application, unit tests and UI tests. So when you build the source code, you will get your product in .app form under the “Products” folder. Similarly when you perform unit test or UI test for your application you get respective .xctest products under this folder.
That’s it for this article. We will bring more regarding project structure, view controller life cycle in our next articles. Till then please stay tuned.
Thanks for reading this article. If you have any queries related to this topic or iOS, Objective C and Swift. Please write us at [email protected] or direct message us on instagram at conficle(instagram username).
Also keep watching this space for upcoming articles on iOS development, software development and technology concepts.
About the Creator
"Slicing Success: Why your Kitchen Needs a French Fry Cutter with Suction Feet"
In the realm of evolving advancements one kitchen tool that has proven its worth, over time is the industrial French fry cutter potato slicer set with suction feet. It goes beyond being a kitchen gadget; it serves as a trusted companion that transforms cooking tasks into extraordinary culinary experiences.
By Boundlessname2 days ago in 01
Doing it for the troops
The others dropped like flies around me. We fought and struggled to get to this point. I'm the only one left now. The objective is right there. A mere two hundred feet away. The last of my team got a bullet to the head right next to me, but I couldn't do anything. I was able to locate and neutralise the sniper as he shot my friend, so his death was at least not in vain.
By Mohammed Darasi2 days ago in Fiction


Comments
There are no comments for this story
Be the first to respond and start the conversation.