

Hello everyone, we are back with our article on a brief introduction about macOS and creating the first Xcode project. In case you directly jumped on this article you can read our previous article on Basic requirements for starting iOS native development before moving further.
Brief introduction to macOS
So again macOS is an operating system developed by Apple for their laptops and desktops computers. So starting with its first release since 2001, the latest version of macOS called ‘Big Sur’ was released last month in November 2020. Apple launches a new version of macOS every year. Note: It is important to stay on updated macOS as Apple keeps a minimum macOS version for new versions of Xcode. So if you don’t keep you mac updating there is a chance you may not able able to install latest version of Xcode
Below are a few applications and options that one should be aware about macOS. Though while doing development for iOS applications most of interaction is with Xcode application knowing about below options and application gives you a little speed. So let’s start.
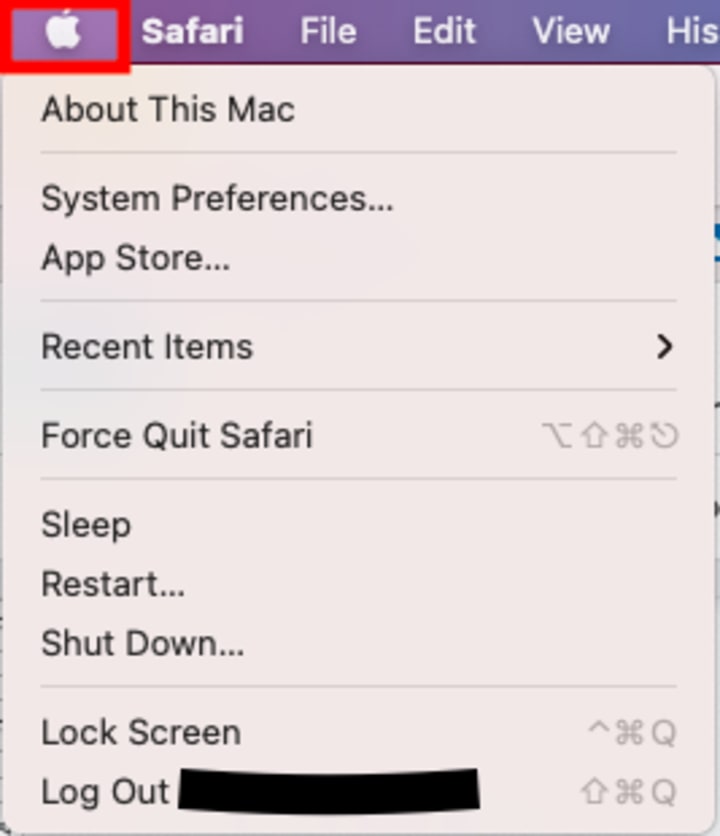
Apple logo: On the top left of screen we have the Apple logo. This option is used mostly for restarting, shutting down and making your going to sleep.
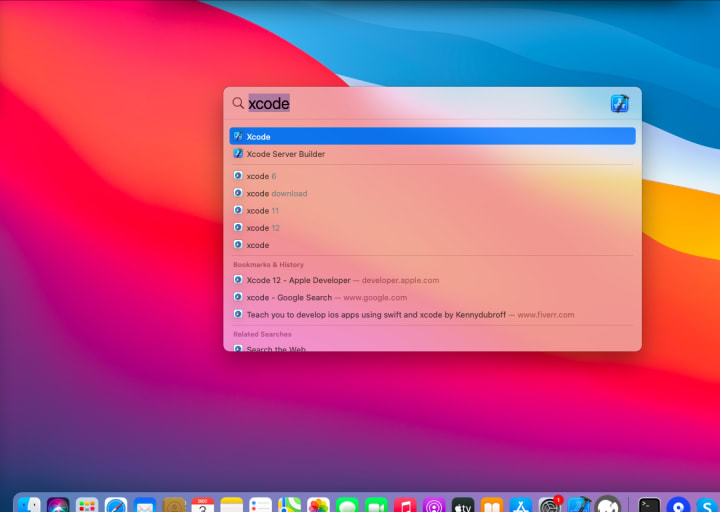
Global or spotlight search: On the top right of screen there is a search icon. This option is very important as it helps to search for anything on your mac machine. Shortcut for this option is command + space-bar

Application tray or dock: In the bottom of the screen there is an application tray or dock. This shows some default applications and whatever applications you add to dock. To add any application to dock, that application must be opened first. Right click on icon of application that is open and select ‘options->keep in dock’

Finder application: In the bottom left of the application tray there is a Finder application. As the name implies this application is used to find anything on your mac machine. This resembles the ‘My Computer’ option on Windows machines.
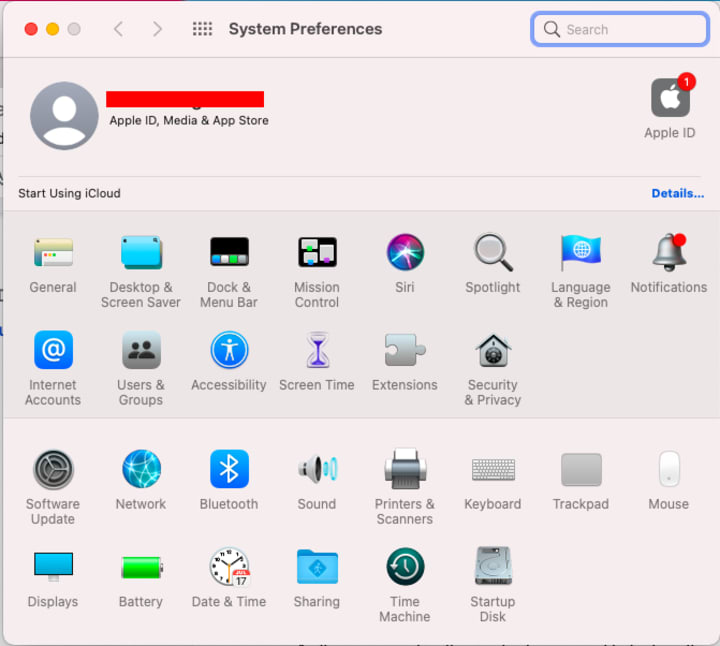
System Preferences application: This application is used as a settings application for your mac machine. This application resembles the ‘control panel’ on Windows machines.
Terminal application: Command line application for macOS.
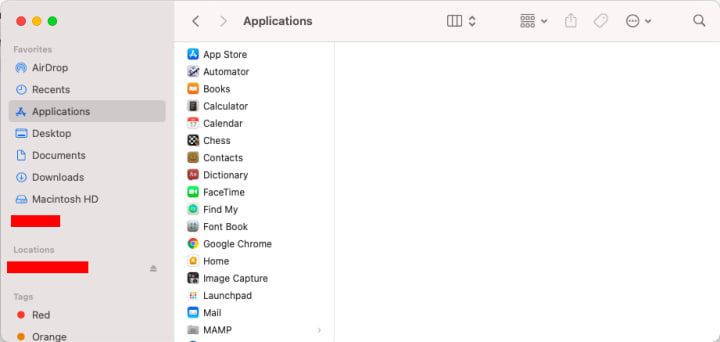
Applications folder: This is where all applications are present. Whenever you will install any new applications you will be asked to copy to the Applications folder after installation. You can find this folder on the top left side in the Finder application.
That’s it for macOS introduction. Now let's move to the next section which is creating the first Xcode project.
If you have not already installed Xcode you can follow the steps in our previous article Basic requirements for starting iOS native development to create the apple id and download and install the Xcode. Alternatively if you already created the apple id you can use ‘App Store’ application on your mac machine to download and install the Xcode. Do not forget to sign in to the ‘App Store’ application first.
Once you have installed the Xcode application. Launch Xcode application using spotlight or global search option mentioned above or launch Xcode from Applications folder present in Finder application.
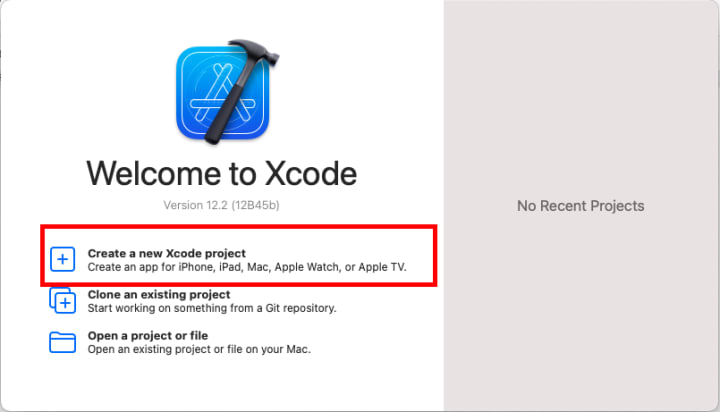
Once you open the Xcode application you should see below options on Xcode. Select ‘Create a new Xcode project’ option.
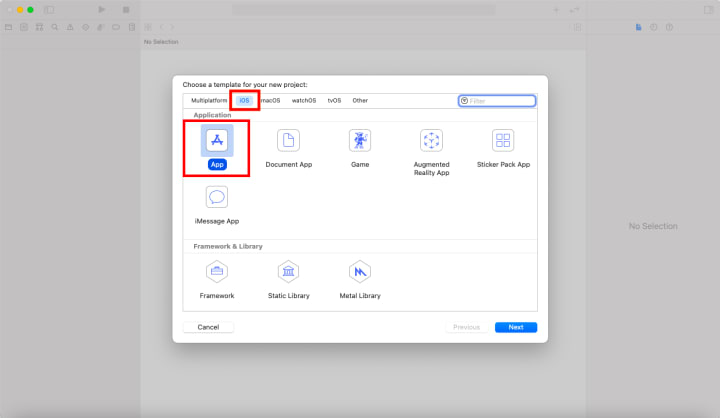
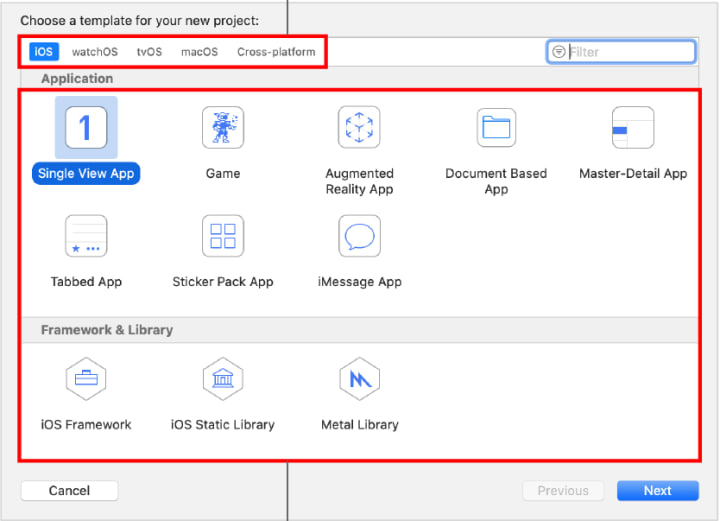
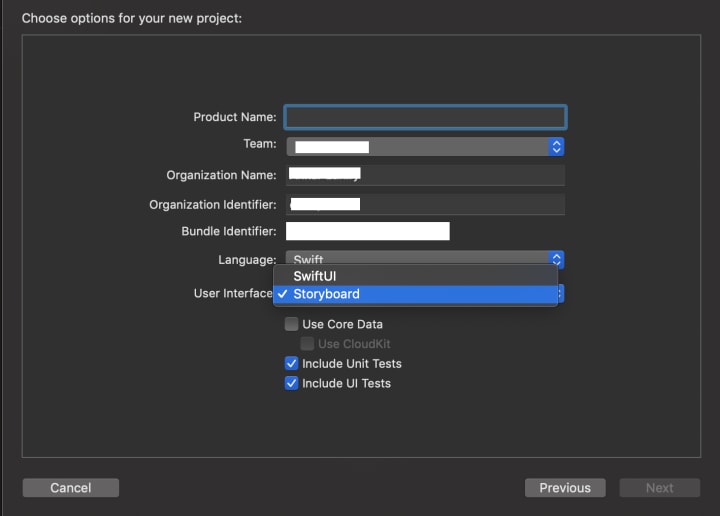
Now if you are using Xcode 12 then select ‘App’ option under iOS option or select ‘Single View App’ under iOS option as shown in below screenshots. Don’t worry about other options for now as we are going to cover them in upcoming articles.
Xcode 12
Before Xcode 12
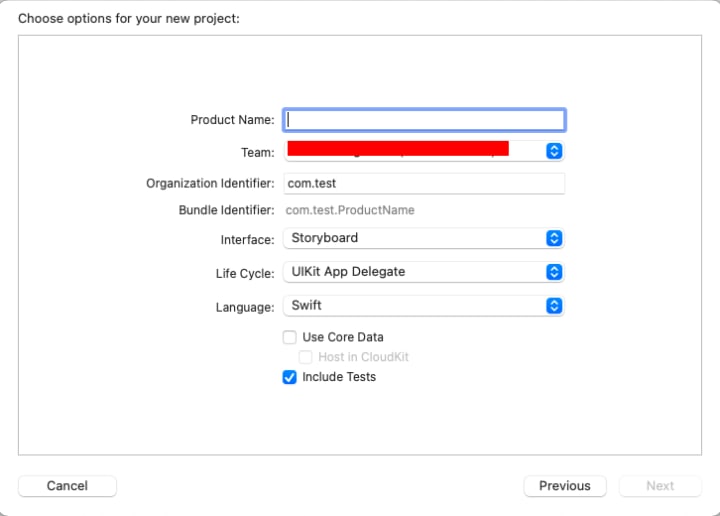
Once you will select ‘App’ or ‘Single View App’, you will be navigated to the screen shown in the screenshot below. On this screen you will be shown below options.
1. Product name: This is the name of your application. It identifies your application globally. This should be unique.
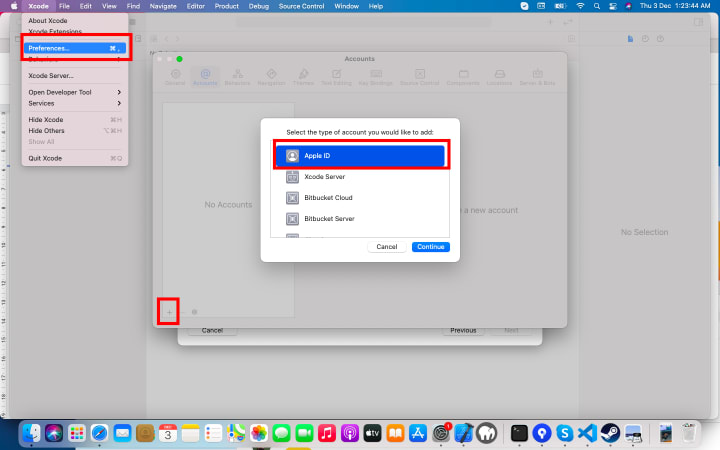
2. Team: You need to add your apple developer account here. For now you can add an account using your apple id. You can also add an account by going selecting Xcode from top left corner of screen besides Apple logo then select Preferences -> Accounts -> Plus sign in bottom left -> Apple ID. Please note you do not need any paid developer account for development.
3. Organisation Name(before Xcode 12): Name of you organization. You can keep any temporary value for now. This will be actually used when you upload your app to the app store. So this does not have to be a real company name. You can use test or any value you like. You can’t leave this blank.
4. Organisation Identifier: This is a reverse domain value of your organization, For example com.apple. You can use com.test for now.
5. Language: Select Swift here. As we will be using Swift language in all our iOS development articles.
6. User Interface or Interface: Use Storyboard for now. We will have separate series of articles for SwiftUI
7. Lifecycle(only in Xcode12): Choose UIKit App Delegate
Xcode 12
Before Xcode 12
Leave all other options as it is and hit the ‘Next’ button. You will be asked the location to save the Xcode project. Select any folder location and hit the ‘Create’ button.
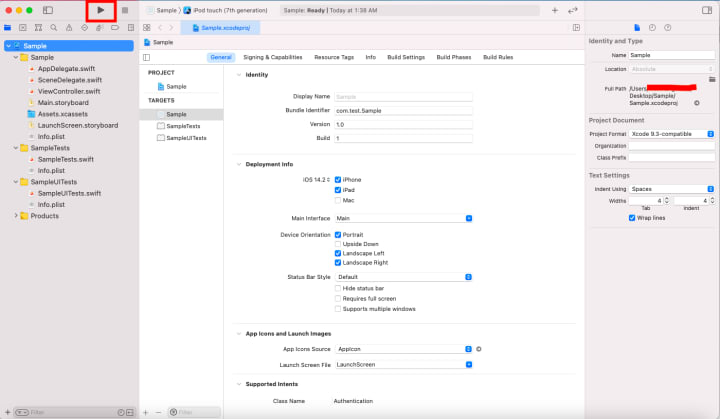
Now you will see the initial project has been created by you for Xcode. Hit the run button on the top left corner of Xcode and you will see a simulator will be launched automatically with a blank screen.

Congratulations you have created your first Xcode project. That’s it for this article. We will cover the detailing of Xcode IDE in our next article which will help us to move further in iOS development.
We hope you find this article useful and start with your iOS development. If you have any queries related to this topic or iOS, Objective C and Swift. Please write us at [email protected] or direct message us on instagram at conficle(instagram username).
Also keep watching this space for upcoming articles on iOS development, software development and technology concepts.
About the Creator
Top Android app development Trends To Watch in 2024
The mobile app industry is upscaling with the advent of contemporary technologies and is accelerating the creation of mobile apps. The global mobile app market size was valued at USD 228.98 billion and is anticipated to grow at a CAGR of 14.3% from 2024 to 2030.
By Shirleyevaabout 16 hours ago in 01


Comments
There are no comments for this story
Be the first to respond and start the conversation.