

Hello, we are back with our next article in our series of iOS Native Development. Before starting in case you have directly jumped to this article you can start from our first article in the series Native iOS Development. In this article we will try to explore the only IDE used for iOS Native Development, Xcode. We are not going to cover 100% of it. However we will make sure to cover the features that are important and will help you to speed up your development. In case you have any query we will leave our contact details at the end of this article.
So without wasting any further time let us begin. Please note for this article we are using Xcode 12. The GUI may be a little different from the previous Xcode version. However the important features are all the same.
Let’s start with the top most part
Status bar

As shown in image above, excluding the Apple logo there are 12 menu options in the status bar. Though these menus may cover everything but trust us as you move ahead in development these menu options will be left far behind and you will use most options either from other parts of screen or either using keyboard shortcuts.
Let’s explore some important menus and options as below. Rest you can try yourself.
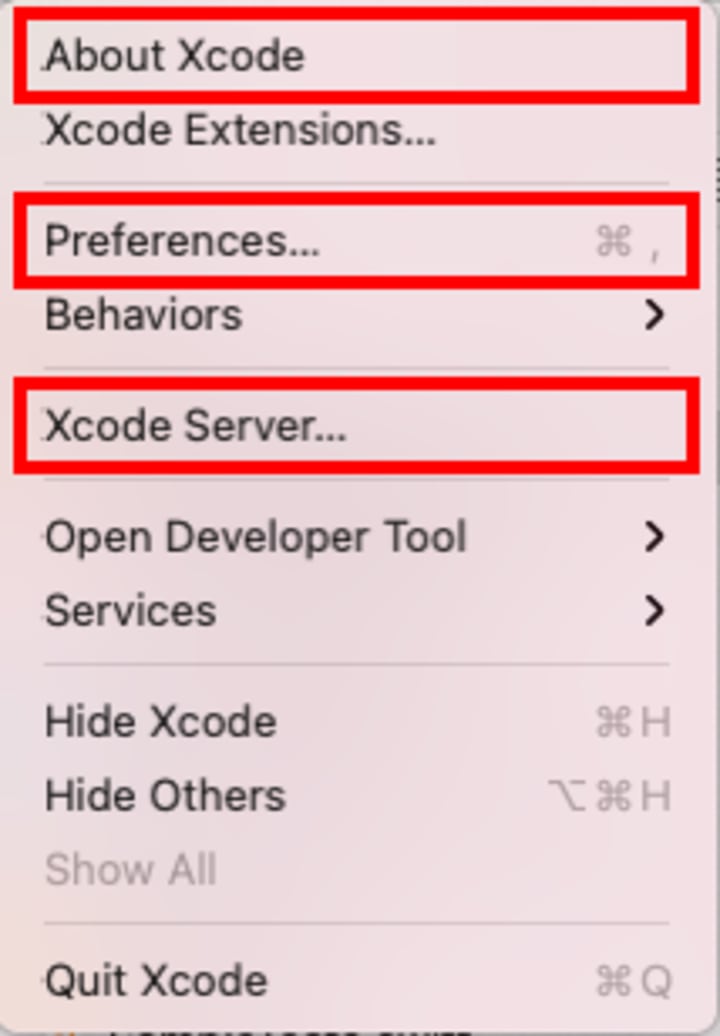
1. Xcode Menu
About Xcode: This option is used to check the version of Xcode installed on your machine. In fact most applications you open on mac, will have the first menu option as application name and first option in that menu will be about that application. To know the version of your macOS click on the Apple logo and select ‘About This Mac’.
Preferences: This option will open the preferences for Xcode. This option is used to configure the Xcode application. Like the user interface configuration, Xcode theme, developer account to be used for testing, source control config, CI/CD config, build locations etc.
Xcode server: This option is used to set up CI/CD with Xcode using Xcode Server(this is a separate mac application). Selecting this option will take you under the Preference menu, servers & bots section. We will have a future article for setting up CI/CD with Xcode server and Xcode
2. File, Edit, View, Find
These are standard menus for any application. They contain options related to file management, view management, formatting and searching. We will have a separate article on searching. In case anyone is not aware, command + c and command + v is used for copy and paste respectively. Command key is analog to control key on windows.
3. Navigate
This option is used to navigate between files and reveal any file in the project navigator, However we will see in the sections below how this can be done from the editor itself.
4. Editor
This option is used to manage GUI of the editor part and it has options related to editor selection. For example, the editor for a swift file will be different from the editor for storyboard or xib file.
5. Product
This menu has options for building, running and testing. Options for packaging and archiving the application are also available here. Mostly you will use the ‘Clean Build Folder’ for deleting an already created build folder and ‘Archive’ option for app testing and distribution from this menu.
6. Debug
This menu has options for code debugging like managing breakpoints, location simulation for simulator and store kit.
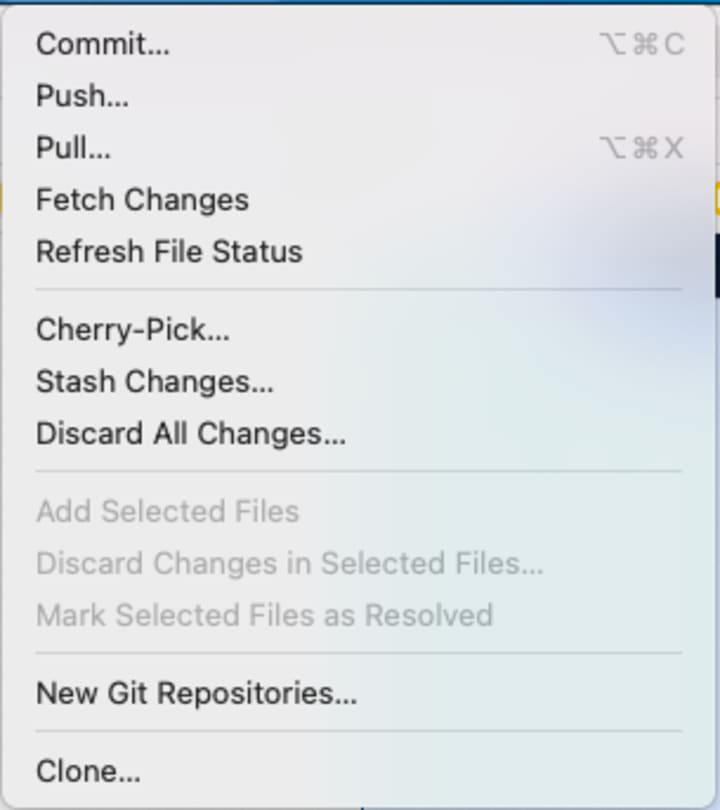
7. Source control
This menu has options for source control management like clone, push pull, fetch etc. Xcode has capability to attach with any source control without the need of installing separate source control applications.
8. Window
Apart from window management options this menu has 3 below important options
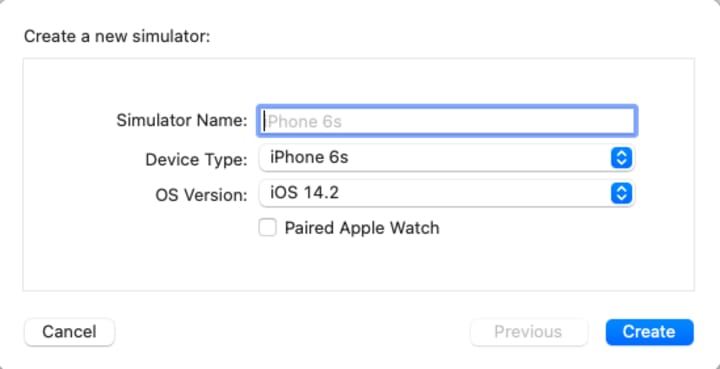
- Devices and simulator: All the devices attached to Xcode and simulators are shown using this option. You can also add new simulators using this option.
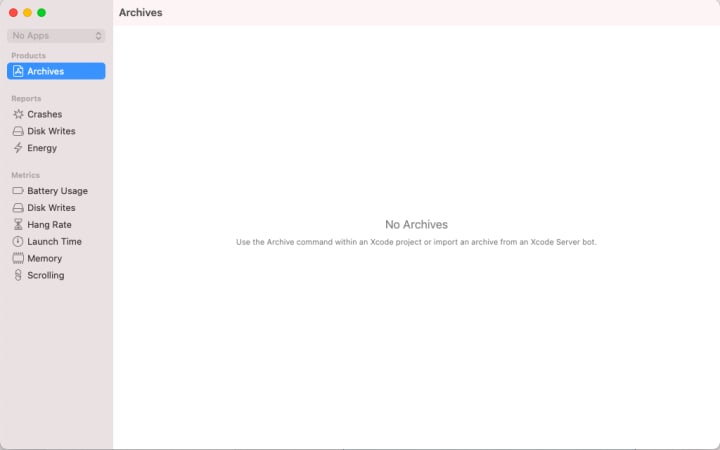
- Organizer: This is where build archives are available. Build archives are converted to .ipa files for application distribution for testing and app store.
- Developer Documentation: Developer documentation is also available from this menu.

9. Help
All kinds of help options online and offline like Xcode Help, Release Notes, Issue reporting etc. are available here.
That’s it with a status bar. Though we have covered most of the important options but you may still find other convenient options for your personal use.
Moving further as the figure below shows, let's divide Xcode into 4 parts and explore them one by one.
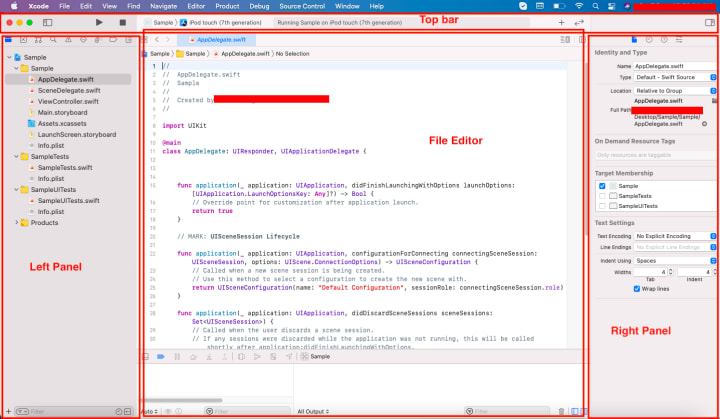
Top Bar
Starting from left to right let’s talk about each option.
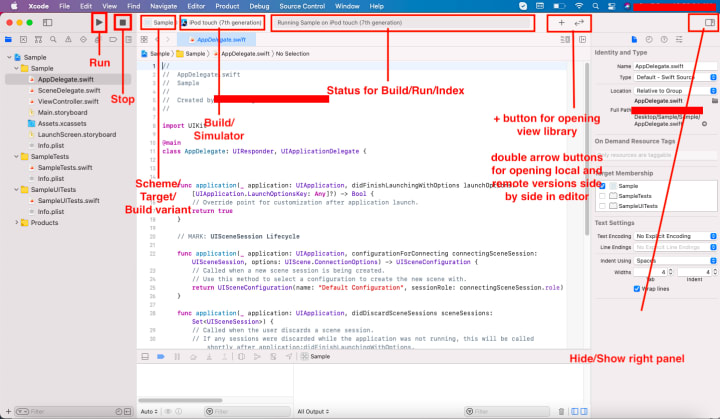
Run button: This is used to run your application. When you click this button it saves any unsaved files and then builds the application and installs the application in the simulator or device selected. Shortcut for this option command + R. If you just want to build Please note this option will not delete the already created build folder for that you will have to use the ‘Clean Build Folder’ option from the Product menu on the status bar. Shortcut for clean command + shift + K
Stop button: This button is initially disabled. It is enabled once you run the application using the above option. Clicking on this button will terminate your running application.
Schema/Target/Build variant: This shows the current schema or target or build variant you have selected for running. We will have a separate article on what is the schema or target or build variant. But for now you can think of schem or target that controls every aspect of the application. Like what files to compile, define external and internal dependencies, build settings, pre and post build scripts etc. Your application can have at least one or more targets.
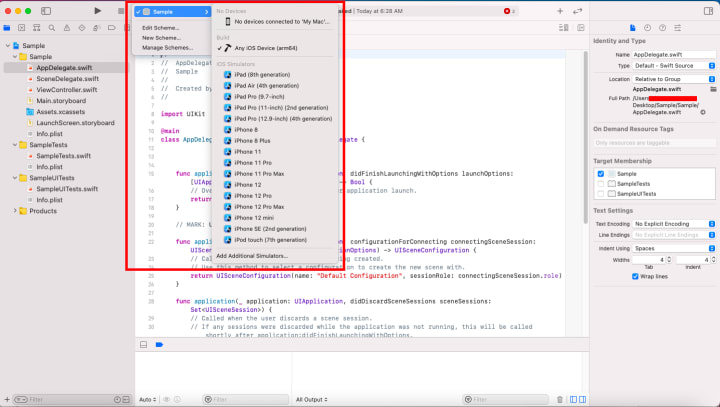
Selected device or simulator: This shows simulator or device selected for running the application. Please refer to figure shown below.
Build/Run/Index status: This shows progress of building, installation and indexing. Indexing is required for features like aut complete and jump to definition of symbols.
Plus Button: This is to bring up view library which has various UI components used to create the various view parts of applications(Xibs and storyboards).

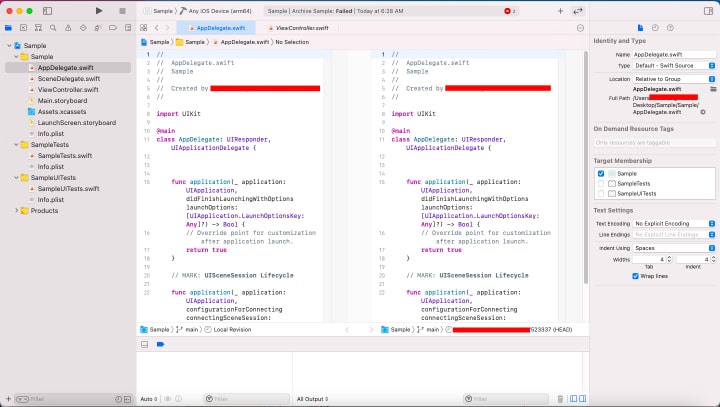
Double arrow button: This is used to open local and remote copy side by side in the editor. It also highlights the changes between remote and local copies in the editor. Local copy on left and remote on right. Refer below figure.
Hide/Show right panel button: This button is used to toggle the right pane view. In Xcode 12 this is a single button. However till Xcode 11 there were 3 separate buttons to toggle left, bottom and right panels respectively.
That’s all about top bar options. Now let’s move towards another part left panel.
Left Panel
Left panel has around 9 options. Let’s explore each of them below in detail
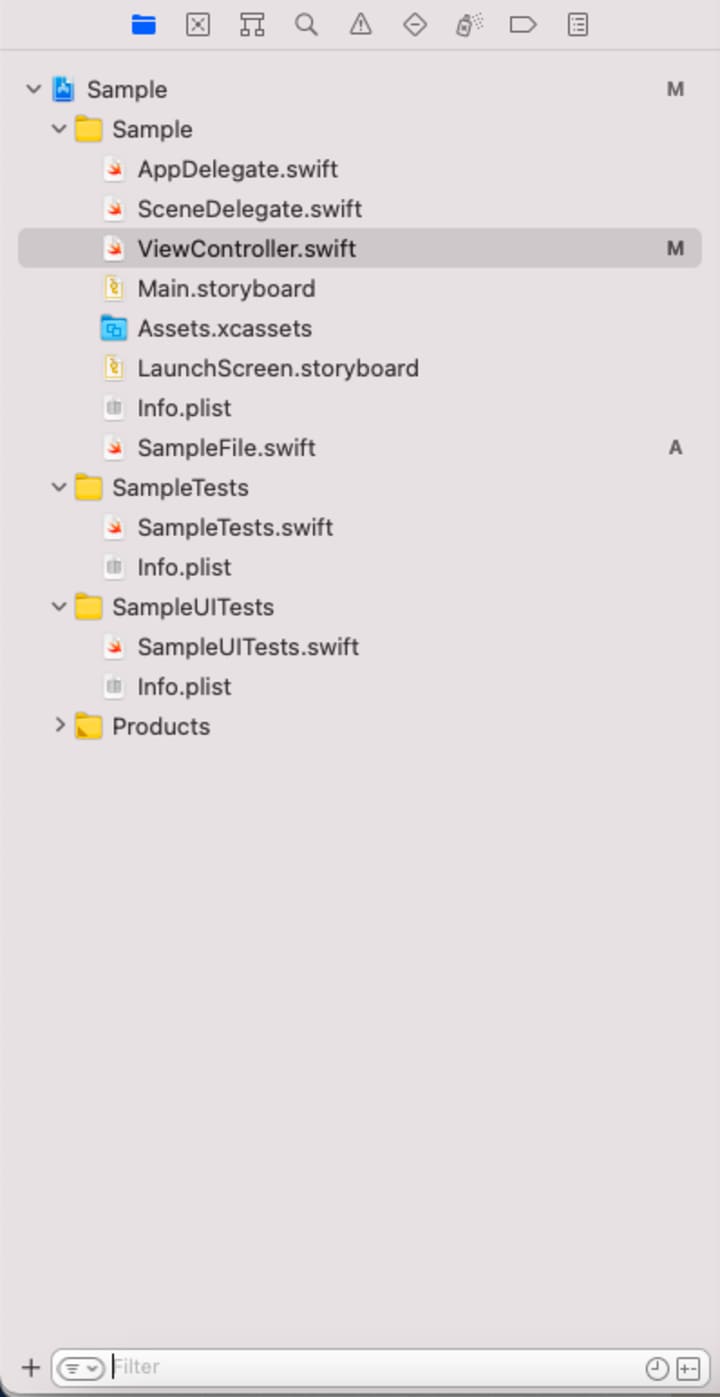
1. Project Navigator:
This is the most important section that shows the project structure of your application. At the very top is .xcodeproj file which is your project file. If you expand the project file you will be able to see the project structure with all folders and groups.
You can add anything file, folder, group, resources or even another Xcode project inside any folder or groups by right clicking on that specific folder or group and selecting the appropriate option.
Now there is a difference between group and folder. Every group is not a physical folder in your project structure. So basically you can create a group without creating a physical folder for that group. So if you right click on a group which is not a physical folder and select ‘Show in Finder’ you will not find anything, A group that is not a physical folder will be visible only when you open the project in Xcode.
Apart from this project navigator also shows the status of your code files and resources if your project is connected with any source control like GIT or SVN. As shown in below figure. If you will add a new file or resource symbol ‘A’ will be visible in front of that file showing that this file is just added and not yet staged and symbol ‘M’ will be visible in front of the xcode project file as project file reference is modified whenever you add anything to project.. Similarly if you modify a staged file symbol ‘M’ will be visible in front of that file or resource.
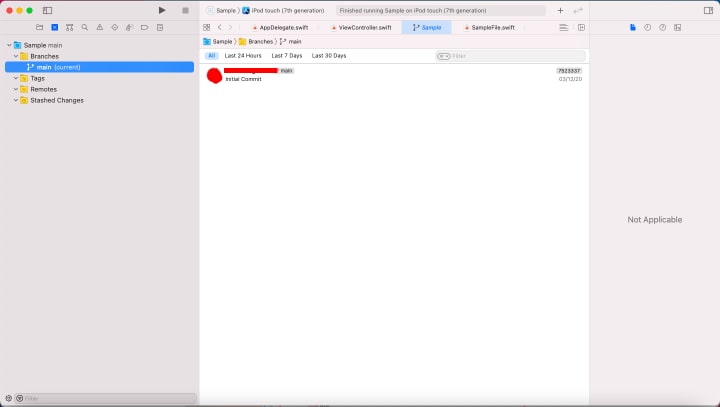
2. Source Control Navigator
This option shows all the source control entities like Branches, Tags, Remotes & Stashed changes. Source control management like branch management, adding new remotes can be done from source control navigator. This option also provides facility to search for branches, tags, stashes etc using search bar at the bottom.
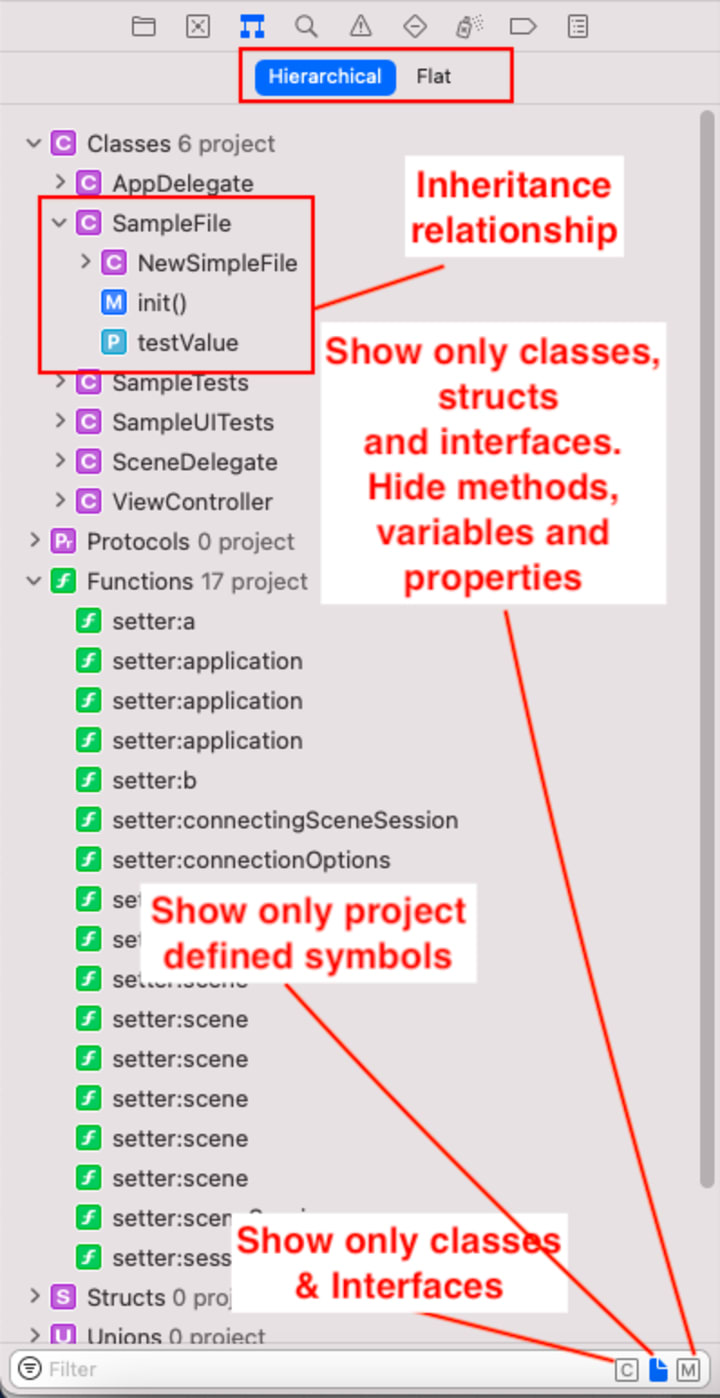
3. Symbol Navigator
This option lists down all symbols. By symbol here we mean everything we declare classes, interfaces, structs, methods, variables, properties etc.
This option can show the inheritance relationship between symbols in the ‘Hierarchical’ option. Apart from the search facility at bottom there are 3 options beside the search bar which can be used to configure the list of symbols. See figure below.
Let’s jump to the 5th option issue navigator directly. We will discuss the search option next article.
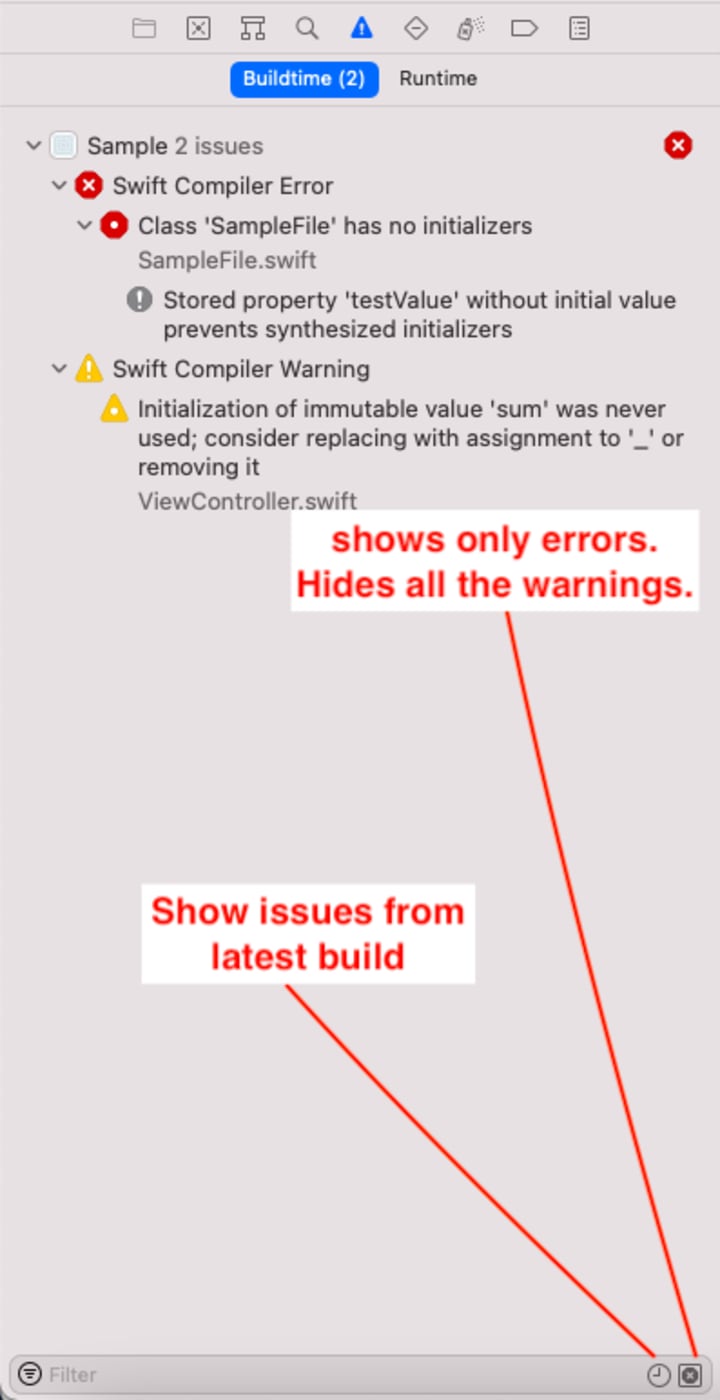
4. Issue Navigator
This section shows a list of errors(with red colored symbols) or warnings(with yellow colored symbols) present in application. Along with a search bar at the bottom user can configure the list of issues for current build and to show only errors. Refer figure below.
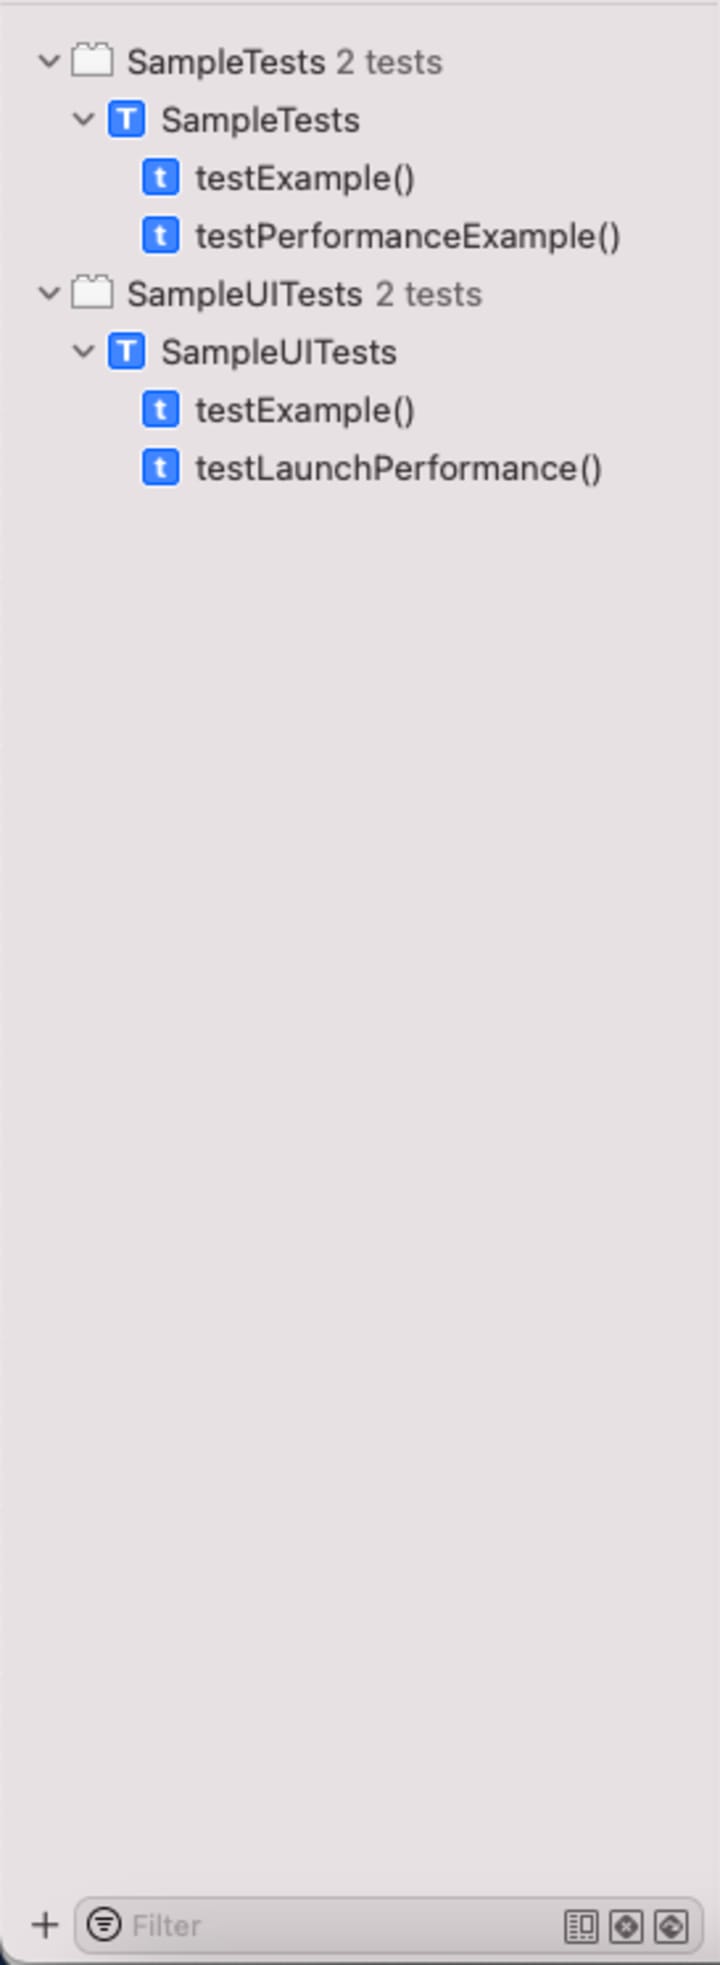
5. Test Navigator
This section shows a list of test classes along with test cases. Any single test case or test class can be run from here by clicking on the start symbol in front of the test class or test case. You can also right click any test case or test class to explore more options like disabling a test case or adding new test cases. To run the entire test suite for application use common + u.
Now let’s move to the last option report navigator as we will cover debug navigator and breakpoint navigator in next article along with search navigator.
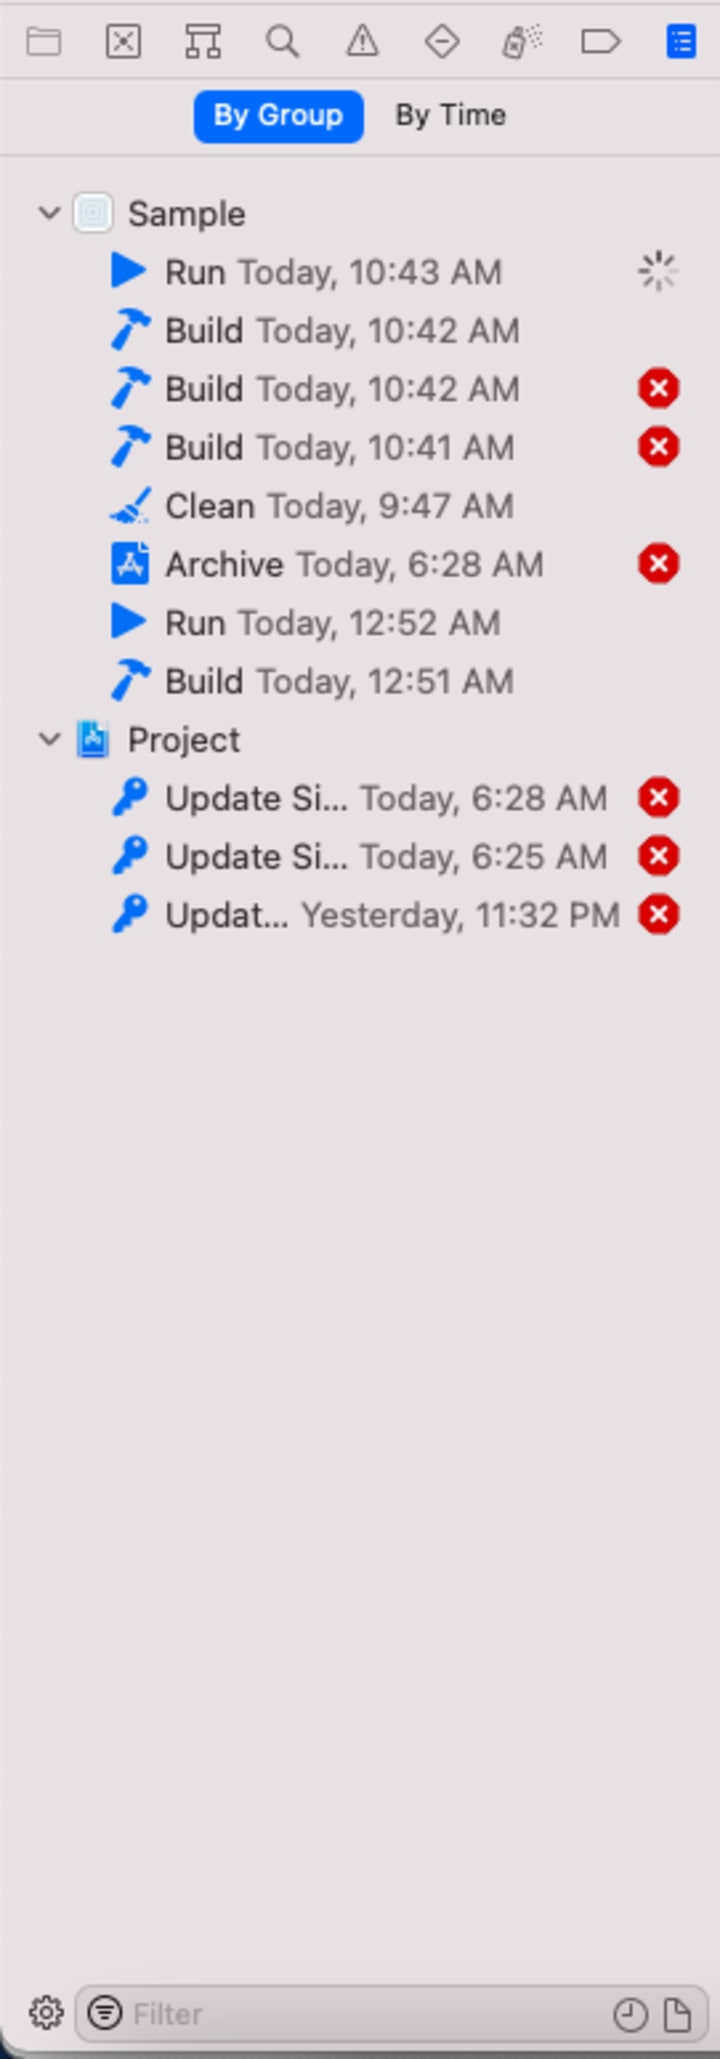
6. Report Navigator
This section shows a list of all builds done for the application and their respective status. List of builds is show schema/target wise. Click on any build displays the details in the editor part. This section also shows ongoing builds with loading indicators in front of that build.
That’s it for the left panel part. Let’s move to the editor part.
Editor
This section of Xcode is mainly used to write your code and configure your UI through XIbs and Storyboards.
Editor shows details of various options you select in the left panel. For example if you click the source file it will open the source file in the editor. If you click any XIB or Storyboard file it will open that file in the editor. The details opened by the editor can also read only sometime like build details opened by selecting any build shown in report navigator.
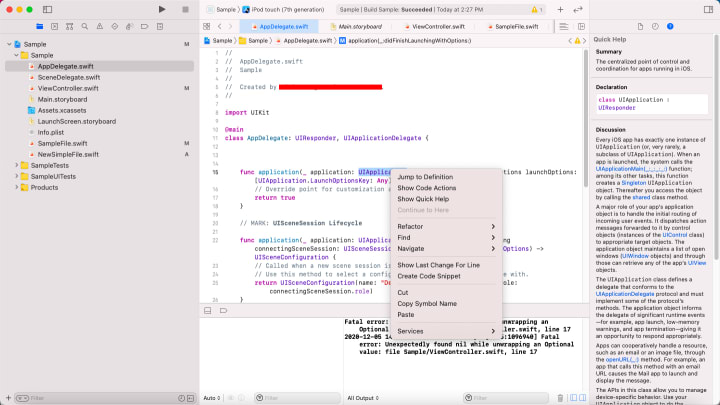
At any point of time while editing your code you can select and right any symbol and get the pop up menu which will show you many helpful options like jump to definition, extract the selected symbol or cold and many more. Refer figure show below
Right Panel
This section mainly opens file inspector for source code files and resource files and it shows identity inspector, connection inspector, size inspector and file inspector for XIBs and Storyboards. Please refer to the figure below.
That’s it for this article for introduction on Xcode. Though we have not converted all features of Xcode we have covered minimum to get you started with iOS native development. We will share debugging and searching in Xcode in detail as part of next articles.
Thanks for reading this article. If you have any queries related to this topic or iOS, Objective C and Swift. Please write us at [email protected] or direct message us on instagram at conficle(instagram username).
Also keep watching this space for upcoming articles on iOS development, software development and technology concepts.
About the Creator
Must-Have Azure Migration Tools for Effortless Cloud Migration
Many businesses are now adopting cloud technologies to remain competitive and agile. However, migrating existing workloads, applications, and data to the cloud can be complex and challenging. Fortunately, Microsoft Azure offers a wide range of migration tools that simplify and streamline the process, ensuring a smooth and efficient journey to the cloud. In this article, we'll look at the critical Azure migration tools that any business should know.
By Agile Deip7 days ago in 01
Faedaze
Daisy leaned back against the wall of the window bench, the dress she was embroidering on falling to her lap, all but forgotten. Her gaze rested on the trees just beyond the edge of her garden, watching with dreamlike expression on her face, waiting for something others doubted would ever come.
By Kelsey Clarey4 days ago in Fiction


Comments
There are no comments for this story
Be the first to respond and start the conversation.