
How to Prepare Better Images for Websites, Stores, and Social Media
Practical steps for improving image quality, removing backgrounds, and exporting files for different platforms.

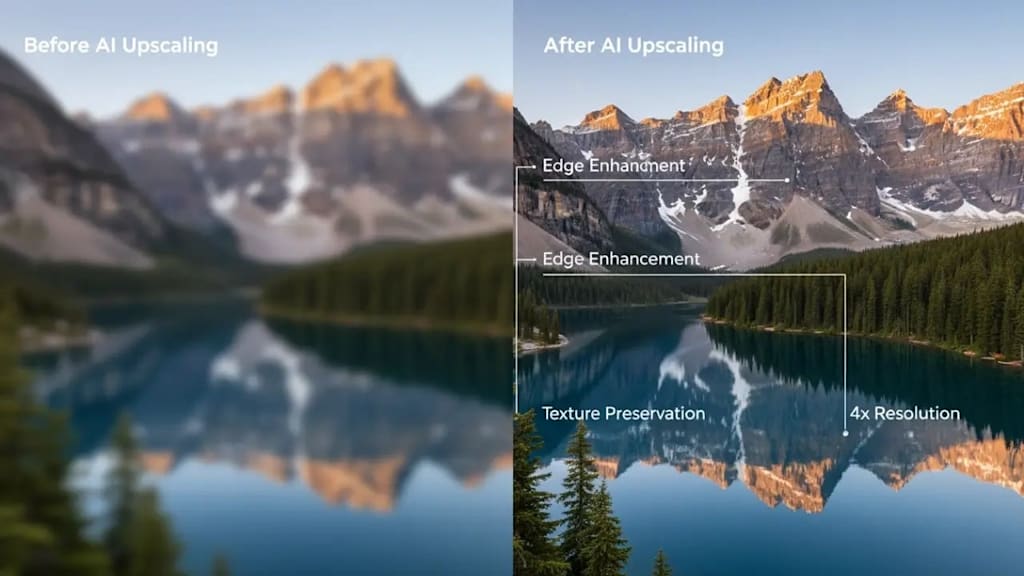
The same image can succeed in one place and fail in another. A small photograph may look acceptable inside a phone gallery but become soft on a desktop product page. A portrait with a busy background may feel natural on social media but unusable on a speaker card. A transparent product cutout may be flexible for design, yet look unfinished if its edges and shadows are not reviewed.
Image preparation is therefore less about applying a universal “enhance” button and more about matching the file to its destination. A useful workflow begins with the best source, separates enlargement from background removal, and ends with a deliberate export rather than the largest possible file.
Define the Final Use Before Editing
Write down where the image will appear and how large it needs to be. A marketplace thumbnail, full-width website banner, printed flyer, profile picture, and presentation slide each have different requirements. The final use determines the aspect ratio, amount of detail, background treatment, and file format.
Inspect the source at 100 percent. Look for compression blocks, motion blur, missed focus, color casts, jagged text, and clipped highlights. AI processing may reduce the visibility of some defects, but it cannot prove what an unreadable label originally said or restore a face that was never captured clearly.
Whenever possible, return to the original camera file or design export. Files downloaded from messaging apps or social platforms may already have been resized and compressed.
Upscale for a Specific Output Size
Traditional resizing makes an image larger by spreading existing pixels across a bigger canvas. AI upscaling attempts to reconstruct plausible edges and textures while increasing resolution. This can make a small file more usable, but the new detail is an interpretation, not recovered evidence.
For general photographs, product shots, or illustrations, an upscale Image workflow can help test a larger output while keeping an eye on texture and edge clarity. Another free image upscaler can provide a comparison when the first result looks too smooth, too sharp, or unsuitable for a particular image type.
Do not assume the highest enlargement factor is automatically best. Begin with the smallest increase that meets the destination. A two-times enlargement may be enough for a web card, while print or a large crop may require more. Bigger files take longer to load and may reveal invented texture that was not noticeable at a smaller size.
Compare outputs at the size viewers will actually see. Check eyes, hair, fabric, product labels, line art, repeated patterns, and areas with fine text. Portraits can become overly polished; illustrations can gain unwanted texture; product edges can look unnaturally hard. Choose the version that remains believable, not the one that looks most dramatic in a before-and-after slider.
Remove the Background After Choosing the Best Source
Background removal is easier to evaluate when the source has enough resolution to show the subject’s edges. However, extreme sharpening before removal can create halos that confuse the cutout. A balanced approach is to select or lightly upscale the best source, remove the background, and then decide whether the final cutout needs another modest enlargement.
A remove bg workflow can isolate a product, person, pet, logo, or other foreground subject and prepare a transparent PNG. Automatic results still need inspection, especially around hair, fur, bicycle spokes, glass, jewelry, shadows, and objects with colors similar to the background.
Zoom in and look for missing edges, leftover background fragments, hard cut lines, and transparent holes inside the subject. Then place the cutout over both a light and a dark test background. An edge that disappears on white may become obvious on black.
Not every shadow should be deleted. A soft contact shadow can help a product feel grounded on a new background. For marketplace listings, follow the platform’s requirements rather than applying the same treatment to every channel.
Build Consistency Across a Set
One polished image is easier than a consistent catalog. When preparing multiple files, define a repeatable standard for aspect ratio, subject size, padding, background color, shadow, color temperature, and export format.
Process a small sample before editing the full set. Place the results next to one another and look for changes in scale, brightness, edge softness, and color. Batch processing saves time only when the source images are similar; a single setting may not suit studio packshots, outdoor portraits, screenshots, and artwork equally well.
Keep filenames useful. A name such as blue-lamp-front-transparent-1600.png is easier to manage than final-new-2.png. Save the original, working file, transparent master, and channel-specific exports separately.
Export for Quality and Performance
Use PNG when transparency is required. For ordinary web photographs, a well-compressed modern format may offer a smaller file while preserving acceptable visual quality. Confirm which formats the destination accepts, and avoid uploading a print-sized file when the page displays only a small image.
After export, open the actual page or draft on both desktop and mobile. Check sharpness, crop, loading time, background contrast, and whether important content is covered by interface elements. Add accurate alt text that describes the image’s purpose instead of stuffing it with unrelated keywords.
Use a Repeatable Order of Operations
For most projects, a simple sequence keeps the work understandable: collect the best originals, define the target dimensions, make a modest upscale when needed, remove or replace the background, correct color and small edge problems, then export channel-specific versions. Review after every major step instead of waiting until the end. If a result becomes less natural, return to the previous file rather than stacking another correction on top. This approach also makes it easier to explain how an image was prepared when a client, editor, or marketplace requests the source.
A strong image workflow is a chain of modest, reviewable decisions. Start with the best source, enlarge only as much as necessary, remove backgrounds carefully, compare edges in context, and export for the real destination. AI tools can make these tasks faster, but the final quality still depends on knowing what should remain faithful to the source—and when an image has been edited enough.
About the Creator
Enjoyed the story? Support the Creator.
Subscribe for free to receive all their stories in your feed.
Comments
There are no comments for this story
Be the first to respond and start the conversation.