
How to Make Your Own Interactive Digital Display
Guide on how you can make your own interactive digital display kiosk

What is an interactive digital display kiosk?
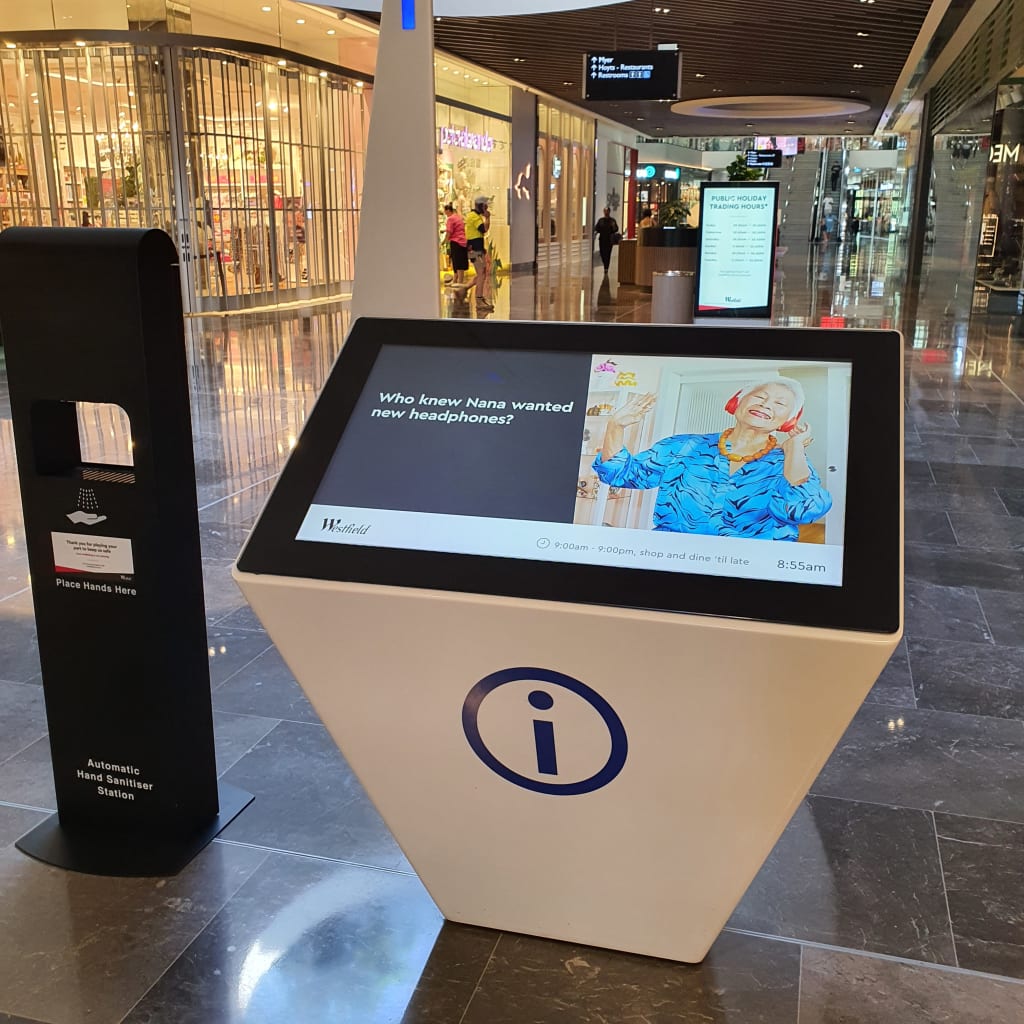
An interactive display screen kiosk is a type of electrical digital signage display where an audience is able to interact with, by either touch, motion, or voice. It’s essentially an LCD or LED screen touch monitor with an inbuilt computer.
What is an interactive display screen kiosk used for?
You can find these interactive displays used as touch screen display whiteboards in conference rooms and classes, interactive touch screen walls in museums, expos, and shows, shopping center/mall directive guides, restaurant and waiting lobbies self-service touch kiosks, and bank ATM’s are also an example of interactive screen touch monitor display kiosks. Basically, in today's world it’s everywhere you look around, but you may not even have noticed before.
How can I make an interactive digital touch screen display kiosk?
In this guide we are going to look into making your own interactive “touch” screen display as these are the most popular type. The only variance with this and other types of interactive display kiosks would be the hardware sensor types and possibly the software, but the steps would still be applicable for any interaction type.
Step 1- What will be your interactive touch screen’s purpose and where will it position?
Will it be used as a restaurant ordering self serve kiosk?
An interactive flat panel touch screen whiteboard/wall?
Or will it be for audience entertainment or informative kiosks?
First thing you need to do is determine its purpose and where it will be located (outdoors, indoors, secure or not secure location). If you are making something like a self serve kiosk with the option for the audience to purchase and buy things, developing a customized app with a payment gateway for your business may be the most robust and secure method.
If you don’t need it to be so complicated like a simple information kiosk, where the audience can “tap for more information”, then using a content management signage kiosk software or even using a web-browser link to your website is also do-able. we will get into these options in more detail further into this article.
The next thing to think about is where will your interactive touch display kiosk be stationed?
If it's going to be outdoors, you will need to consider waterproof and vandal-proof casings. These may need to be custom made or it may also be readily available depending on where you source your touch display units from.
If you plan to have it indoors, you can probably get away without using a “gorilla screen” cover, but you may just want to have the touch display unit fixed onto the floor or mounted on the wall so it doesn’t get stolen.
You may even want to have the touch kiosk to be mobile with casters/wheels, and have it pushed around to different locations or maybe for renting applications. If you do require mobility with these, then you will need to consider power-point positions and internet connection options.
Step 2- What method of interactive kiosk content creating software/app is the best for the application?
This is the most important and first thing you need to find.
The software or app you use to create the content must have the capabilities and final aesthetics you require in your presentation. The second reason this should be the first thing you look at is it will also determine what operating system and hardware you will require for you to install your content onto the interactive touch kiosk.
With any method you choose, the kiosk should also reset to a home page after a certain amount of time after usage, so that the next user can start on a clean session.
Method 1- Digital signage content management software
This method is best to conduct remote support and content updates. This option also allows you to have features like, the time, RSS news feeds, weather updates, countdown timers, and more. If you are looking to constantly update content on the device, then this is the best option for you.
Video by Digitalsignage.com, http://interactive.digitalsignage.com/
I have listed some of the top interactive touch kiosk content creation software's that you can have a look at and see if it suits your application below.
Method 2- Customized app development
This method is best for interactive kiosks with fixed content, where the device is only required to do a certain task for long periods of time. This option is also best for applications where you require payment from Eftpos directly on the device or you want to have your branding style completely customized.
If you were looking into creating a customized app for your touch kiosk but have no knowledge on how to create an app, don’t worry, you aren’t required to be an app developer to make one.
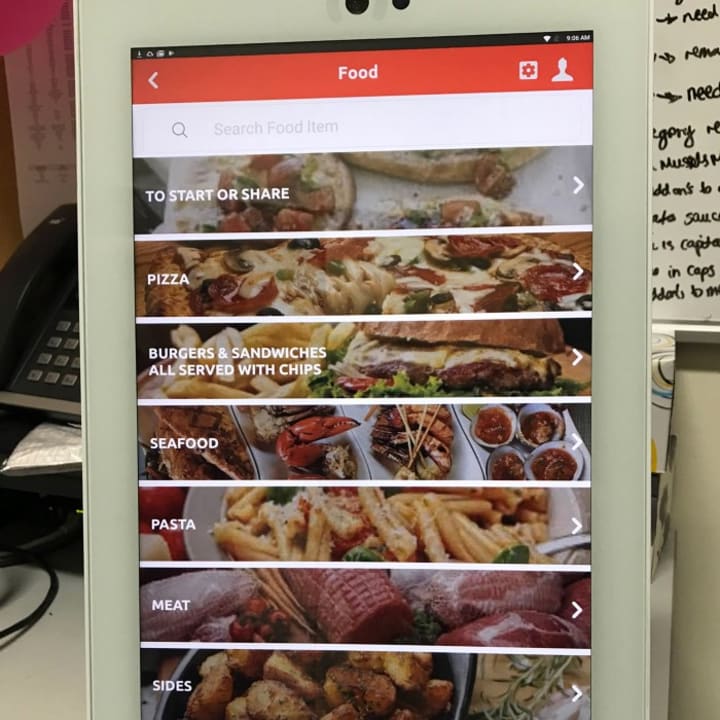
You just need to know the architecture path of how you want your audience to navigate through the app, and also you will need to gather the resource content you want to display in the app (things like original images and food menu, etc).
an example of app Architecture, for a restaurant order menu;
app 1st layout: the user is met with a welcome home page and prompted to tap to continue.
2nd layout: the user is directed to a page where they need to select “ food, drinks or specials” to continue.
3rd layout: if they selected food, they get directed to the menu to select either “burgers, pizzas or seafood” etc..
Once you have the architecture plan of your app you can just go onto Fiverr to hire an app developer to create the app. discuss things like duration and how many hours a day you are willing to pay them for the job, and how the revisions will be paid for.
Also discuss things like; having the app available on IOS, Windows, Linux, or Android on a “15'’ vertical touch display” etc. The resolution of the display is also important, as the app coding will need to be specific to a screen size resolution for some OS (operating systems) for it to work smoothly.
Method 3- URL link and single app use
Another simple method of creating content for your interactive touch kiosk is by using a URL from your own website. This method can be as intricate or as simple as how much knowledge you have on creating websites and it can also be hidden from the public on what your viewers see by using a password block or using a private link.
Again.. you could outsource this to a web developer on Fiverr.
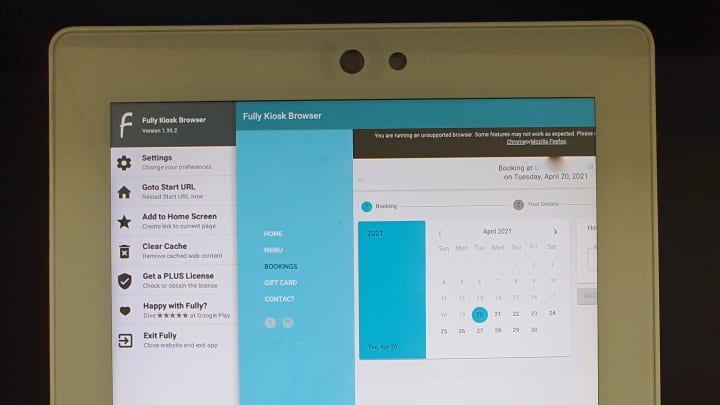
When using a web URL you may want to lock the website into kiosk mode on the touch display device, making it function like an app, so that the user isn’t able to tamper with your touch kiosk and only use the URL you designated.
This trick can easily be done by using an app called fully-kiosk browser that you can download on android OS only. It will essentially turn any website into an app on your touch display kiosk.
For Windows 10 pro, education or enterprise devices only, single app mode can be achieved by using the single app kiosk mode technique with these steps in the windows support page;
Step 3- What operating system should I use for my digital touch kiosk?
Once you have decided what software or app method you want to use for your interactive touch display. You now need to decide what operating system will work the best for your application and software.
The common operating systems you can choose from, which is widely used in the digital signage world, are Windows, Android, and Linux. The reason being is that because these three operating systems are the most customizable and the most robust to handle these applications. The simplest to use operating systems are Windows and Android.
The easiest operating system to start with for beginners is Android, which has low maintenance and has an abundance of resources of software and apps that can be used with it. It is also relatively cheap to buy Android-based hardware. I can confidently say that most, if not all, of the digital signage content management tools and app developers are able to be compatible with this operating system.

Windows OS is also relatively easy to use if you are familiar with its navigation. This operating system is very robust and powerful to use for interactive kiosk displays and can also produce the best results for a complete solution. One thing though, it can be expensive.
The thing you need to be aware of with windows when preparing your device for deployment is the regular updates, sleeping duration, power off duration, time and date database server, and user manual log on, which if not set correctly could cause embarrassing results during operating hours.
Trust me on this! have a Windows device set-up checklist ready, and make sure you tick it all off.
With any of these OS’s, additional remote desktop support software such as Teamviewer, Anydesk and TightVNC, etc. might also prove to be useful for troubleshooting your devices from a different location.
Step 4- Interactive touch display hardware
Once you have the software and operating system planned out, you are now ready to source out the physical touch screen display unit. Be aware that you can’t just use any old TV or monitor without touch capabilities, although it is possible to buy a separate touch grid overlay that can be installed over the top of your screen.
You will need to source out an all-in-one computer with a display screen. Alibaba and Aliexpress are probably the best market-place to find cheap and profitable digital interactive touch kiosk display units, and most of the companies offer OEM or customized logo branding. I personally get all my equipment for all my projects from these two sources and have not had any issues.

On Alibaba, you can contact the supplier directly to customize your order requirements. They usually also provide you with contact details on Whatsapp and email, which is convenient for you to get into contact with them for support on their products.
Their response times are usually extremely fast too, you usually get a reply within a few hours. Great customer service is important to them for the recurring business and also a way for them to beat their competitors that possibly sell the exact same technology as them for the same price.
Step 5- Power and internet connection to the touch kiosk
Another important aspect of interactive touch kiosk displays is, of course, power, and network connection.
Where will it get the power source from and will you be connecting it to Wi-Fi, ethernet cable or 3g/4g internet?
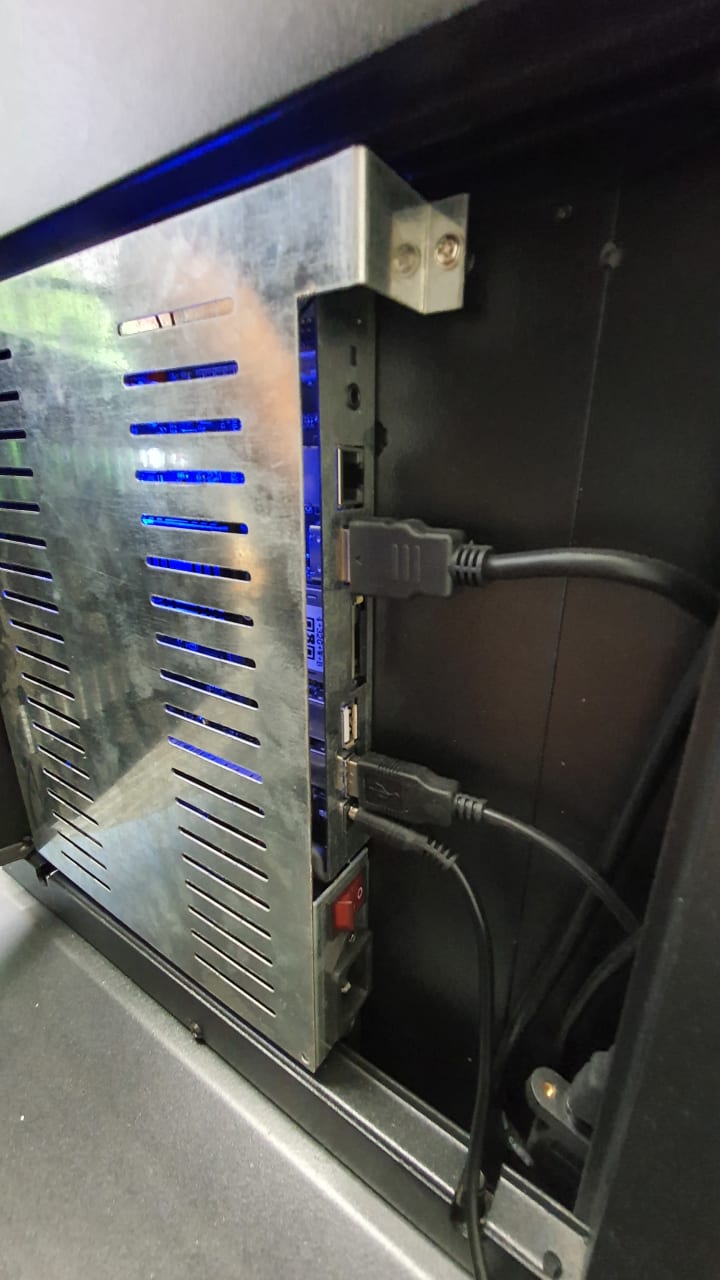
The internet is important for remote support of the kiosk and also to connect your device to the content server to update the content. Wi-Fi or Cat5/Cat6 internet connections are recommended for this application for the best results.
Be sure that your power and data sources are installed prior to installing the kiosk so that the display unit will not be in the way for the electricians to do their work.
Step 6- Installing the interactive display unit
Once the power and data connection ports are settled, you can install the interactive touch kiosk display into position. This is when you should also correctly set up the Wi-Fi password settings and make sure that everything is working correctly with the software/app and OS updates.
Step 7- Testing
You are ready to do the testing now. This is where you should run a supervised live test with a small party to clean out any bugs in your app or find issues that you have missed out on.
Run it for a whole day and keep an eye out on things like;
- The home page resetting duration
- User experience
- Loading times
- And anything else you feel should be added to improve the experience.

Conclusion
Congratulations on completing this complete comprehensive 7 step guide!
To summaries it all down again for you;
step 1: Purpose, step 2: Software, step 3: Operating system, step 4: hardware, step 5: Power and internet, step 6: Installation, and the final step is testing and deployment.
You are now ready to go out there and make your own digital interactive kiosk display to impress your audience, guest and/or client.
About the Creator
The Technologenius
Engineer | Tech Tinker | Gamer | Guides | Tutorials. I may also slip in some Pokemon card and gaming content for some fun time! ;) More content: https://flipboard.com/@TTechnologenius?from=share&utm_source=flipboard&utm_medium=curator_share
Keep reading
More stories from The Technologenius and writers in 01 and other communities.
Unlock the Potential of Your Daily Routine and Start Earning Free Cryptocurrency Today!
Are you tired of only earning money through traditional means such as a 9-5 job or investments? Well, there's a new way to earn some extra cash and it's through the world of cryptocurrency. By doing everyday things such as shopping, watching videos, and even playing games, you can start earning digital assets that can be traded on various platforms. This is a great opportunity for those who want to dip their toes into the world of crypto without having to invest a large amount of money. So, if you're ready to start earning some extra cash, keep reading to learn more about how you can earn crypto by doing everyday things.
By The Technologeniusabout a year ago in 01
Supercharge Your Business Growth with a Robust Mobile App: Inside the World of a Premier Mobile App Development Company
In a world hooked on smartphones, having a mobile app for your business is no longer a luxury—it's a necessity. With the touch of a button, a mobile app can put your business directly in the palm of your customers, providing them with a platform to interact with your brand anytime, anywhere. But who brings these mobile apps to life? Enter, a high-end mobile app development company.
By Jane Smith7 days ago in 01
Best AI Video Editing Software to Speed Up and Simplify Your Editing
There is no doubt that AI is changing the way we work and live, from the application in the medical domain, bioscience, aerospace, meteorology, finance, and entertainment to the practice in computer science, we witnessed AI’s explosive blooming. We may fear it but are more eager to become receptive and adaptive, especially with the rise of ChatGPT, Soar AI, and other image and video generative tools.
By Joker Young6 days ago in 01


Comments
There are no comments for this story
Be the first to respond and start the conversation.