
How to Block USB Port on Windows 10
Disable/Enable USB Port

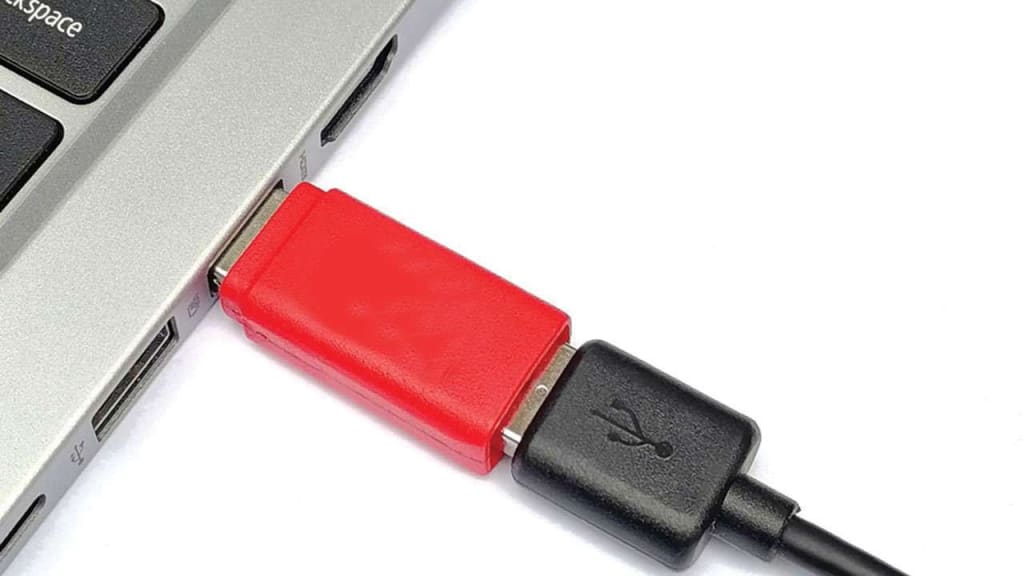
USB ports are one of the biggest communicators of viruses and threats on the computer. You must have seen that the USB ports are always blocked in MNCs, Corporate environment, Schools and Colleges as they never want their data to be stolen or the network getting infected from an outer source.
Disabling the USB port of your computer can rescue your device & data from a malicious attack with foul intentions. And the switch is so easy, that whenever you wish to use a UBS drive, you can easily enable the USB port and use it and again disable the same.
Here in this article, we are going to introduce a few of the best steps that you can follow to block USB port on Windows 10. You can also make use of the Best Third-party USB Port Blocker Software to switch ON or OFF the accessibility.
Top 3 Ways To Block USB Port:
1. Disable/Enable USB Port Through Device Manager :
Disabling or Enabling USB port through the Device Manager is one of the easiest ways to perform this task. Follow these steps for Windows 10 operating system.
Step 1. Press (Win + R) key combination to open the Run Command box.
Step 2. Type in ‘devmgmt.msc’ and hit enter to open device manager. Alternatively, you can also right-click on the Start Button and select the fifth option (Device Manager) from the list.
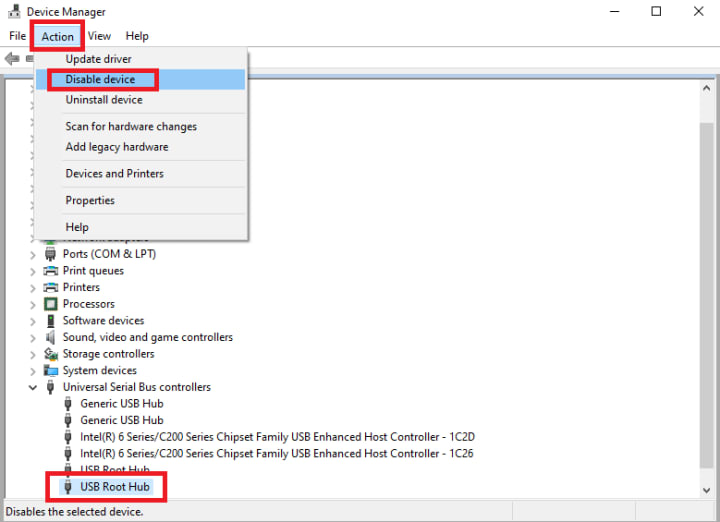
Step 3. Scroll down and expand the USB (Universal Serial Bus Controller).
Step 4. Right-click on all the available ‘USB Root Hub’ & ‘Generic USB Hub’ one by one and click on the ‘Disable’ option.

“Please Note: You should be logged in with an Administrator Account to perform this task as only an Administrator can disable these Drivers.”
Whenever you wish to enable the USB Ports, you will need to sign back in using an Administrator account and perform Step 1 to Step 4 to Enable it again.
2. Disable/Enable USB Port Using Registry :
Disabling USB port through Registry is a bit tricky however a sure shot solution. You can follow the below-mentioned steps to perform the task.
Step 1. Press (Win + R) key combination to open the Run Command box.
Step 2. Type in ‘regedit’ and hit enter to open the registry editor. Alternatively, you can also type registry editor in the search box and click on the registry editor app.
Step 3. If you are not an administrator, it may ask you to enter the administrator user name and password.
Step 4. On the left-hand side, you will find multiple folders, click on “HKEY_LOCAL_MACHINE”.
Step 5. Under “HKEY_LOCAL_MACHINE”, click on “SYSTEM” followed by “CurrentControlSet”.
Step 6. Here you will need to select “Services” followed by “USBTOR”
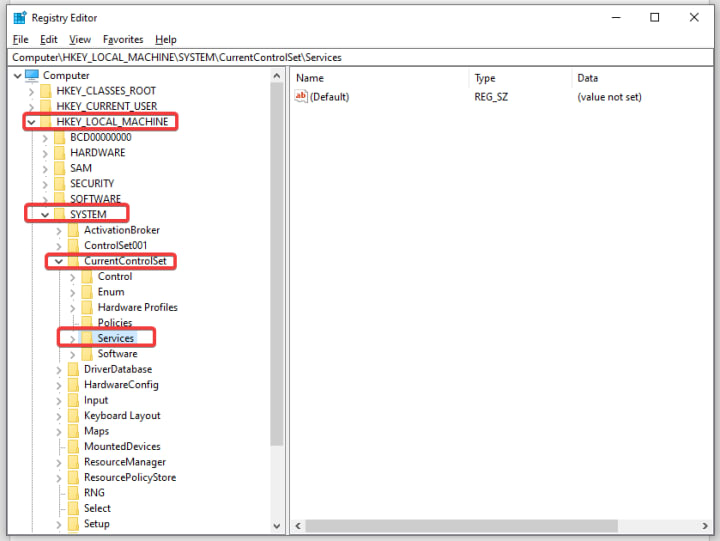
“Please Note: To access USB settings in the registry editor, the final path will be “Computer\HKEY_LOCAL_MACHINE\SYSTEM\CurrentControlSet\Services\USBSTOR”. You can also copy & paste the address in the registry editor address bar under the menu options.

Step 7. In the right-hand side panel, you will find a few files. Double-click on ‘Start’ and change the value data from ‘3’ to ‘4’, click on okay and close the window. Do remember that default value is ‘3’ that is enable and ‘4’ will disable the port. Whenever you wish to re-enable the USB Ports, you will need to follow the path again and change it to ‘3’.
3. Disable USB Port Using Group Policy Editor :
This is the most critical path from where you can disable the USB Ports for one or all systems/users on the network. It requires Administrator access and expertise to perform this action.
Step 1. Press (Win + R) key combination to open the Run Command box.
Step 2. Type in ‘gpedit.msc’ and hit enter to open Group Policy Editor. Alternatively, you can also type ‘group policy editor’ in the search box and click on the ‘Edit Group Policy’ option in the search results.
Step 3. If you are not an administrator, it may ask you to enter the administrator user name and password.
Step 4. On the left-hand side, you will find multiple folders, click on the “Computer Configuration” followed by “Administrative Templates” – “System” - “Removable Storage Access” folders.
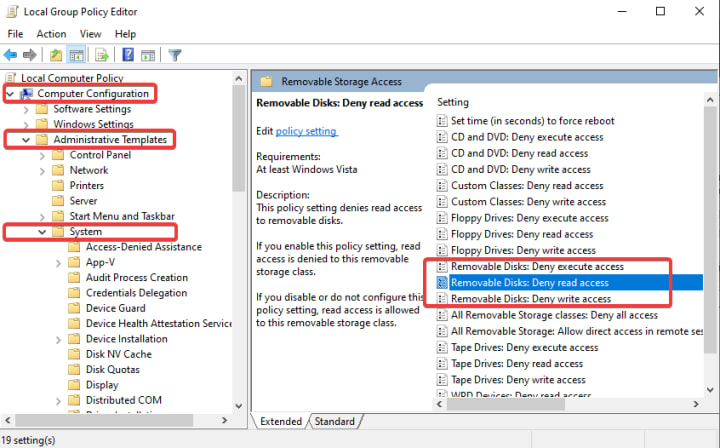
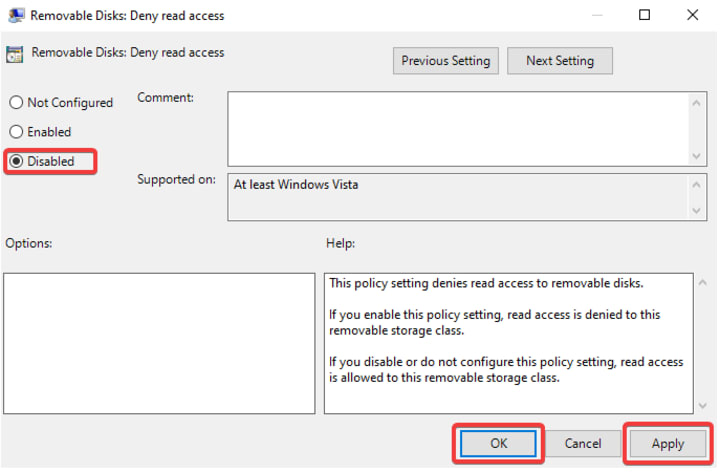
Step 5. You need to right-click on “Removable Disks: Deny execute access”, “Removable Disks: Deny read access” and “Removable Disks: Deny write access” entries one by one and click on edit.
Step 6. Here you will need to disable each of them and click on Apply and okay.
Wrapping Up :
You just have discovered manual ways to disable or enable the USB Ports. If this entire exercise sounds difficult to you, there are a few of the Best USB Lock Software that you can use to switch ON and OFF the USB Port. These Windows USB blockers are lightweight applications that just need your administrator user name and password to change the settings.
About the Creator
lucy taylor
I am Lucy Taylor who spent many years writing on tech-related topics. Apart from this, I love to cover the latest news and write opinionated articles. While not writing, I prefer to spend my time going to the beach or on long bike rides.
Keep reading
More stories from lucy taylor and writers in 01 and other communities.
How to Recover Deleted Video From Windows 11
Went for an awesome trip and made videos? Wonderful! It’s time to transfer them all in the computer for safe space and even create space in your phone. But what if these videos get deleted? We are sure that it is so hurtful because it removes all the beautiful memories that we once possessed within a knack of time. So how to recover deleted videos so that your memories are retained back and kept in a safe place like cloud storage or external drive, etc.
By lucy taylor2 years ago in 01
Tennis in Norfolk Island
Best known for its stunning scenery, rich history and unique culture, Norfolk Island also boasts a vibrant tennis scene that attracts locals and visitors alike. The sport has become popular on this small South Pacific island, providing a great way for people to stay active and enjoy the beautiful surroundings.
By Nguyễn Bảo Quốca day ago in 01
The Ultimate Guide to Luxury Interior Design in Bengaluru
Living areas that are the peak of elegance and splendor are often related to luxury interior designers in Bengaluru, in which sophistication and innovation meet. Among Bengaluru's top interiors designers, Asense Interior is a shining example of excellence because of its best craftsmanship, attention to element, and determination to presenting customers with unrivalled luxury. In this entire manual, we delve into the arena of high priced interior design in Bengaluru, exploring the extremely-modern developments, innovative format concepts, and professional insights provided by means of the usage of Asense Interior.
By Stephen Jamesabout 11 hours ago in 01


Comments
There are no comments for this story
Be the first to respond and start the conversation.