
Comparing Original and Enhanced Footage in CapCut
A Side-by-Side Look at the Original and Enhanced Video Quality

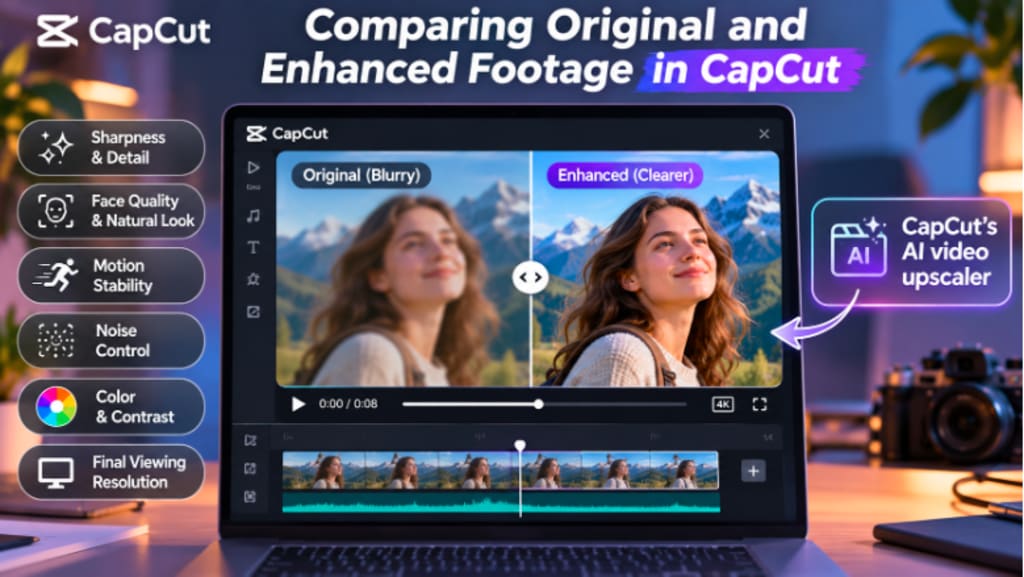
One of the most frequent aims of contemporary editing is to improve the quality of video, particularly if you have footage recorded with an older cell phone, lower resolution camera, compressed messaging app or downloaded clip. You might have the exact moment you need, but if the video doesn't look crisp, is noisy or pixelated, it doesn't look good against the backdrop of newer videos.
While the use of enhancement tools can help, the key is not just in applying an effect. It is carefully looking at the original and improved versions.
There should be a good comparison, helping to determine whether the software has actually made the clip better or simply changed its appearance. Using CapCut's AI video upscaler can be useful in this process, but careful review is still important because sharpening, noise reduction, and AI-driven reconstruction may sometimes introduce artificial textures or inconsistencies in fine details.
The best outcome is typically the clearest, but also maintains the original character of the footage.
Why Comparing Before and After Matters
In video editing, it can be tempting to believe that a higher resolution (and/or looking firmer) is better. This is not always the case.
Astute readers will notice that a clip may look fine on the surface, but have problems when they look closely. The skin can appear too glossy, the details may appear artificial, or edges may have haloes. Some parts may move or alternate between different textures in individual frames.
You can make a more accurate assessment with the original footage and the improved footage.
Rather than the question of whether the new version looks sharper, whether it looks more natural, more stable, and more appropriate for the final product?
This is important because enhancement should complement the video and not be a distraction.
Start With a Representative Section
Select a small portion of the clip that is the most challenging part of the clip before processing the entire file.
This may be a close-up of a face, fast motion, fine detail, text, low light area, or detailed background.
A representation of the test section will provide a bit more insight into how the enhancement will look for the entire project.
A simple static frame test will not detect issues that happen when the object is moving. Similarly, reading about a bright scene doesn't allow you to see how it deals with shadows and noise.
Running some of the more difficult seconds first can save a lot of time in the future.
Look at the sharpness without getting carried away!
Sharpness is usually the first thing people notice. Better video quality can produce sharper outlines, more distinct textures and contrasts between items. The enhancements may help lower resolution video clips appear more appropriate for modern televisions.
But sharpness alone is not the only measure. Over-sharpening can produce false edges at hair lines, facial contours, buildings and text. It can also enhance compression artifacts or noise.
Meaningful clarity, not extreme crispness, is the criterion to look for in a good comparison.
The enhanced version is hard on the eyes or digitally processed, the settings are likely too high.
The aim is typically to restore a more natural look but still maintain the verisimilitude of the scene.
Look Closely at Faces
Faces are especially significant in assessing improved video footage. People are very sensitive to differences in facial appearance. AI can attempt to fill in missing information in the eyes, skin, teeth, hair and facial contours.
In some cases this yields a more concise result. In other cases, the face may start to appear somewhat plastic.
Compare the original and improved versions, observing the face for a few seconds as it moves.
Look to see if eyes are consistent and intact, if skin texture is natural, and if facial features are intact.
This is particularly true of interviewees, family recordings, documentary footage, and personal videos where it is important to capture authenticity rather than enhance the visual quality of the recording.
Check Motion, Not Just Still Frames
One of the worst errors in enhancement testing is evaluating the testing enhancement by taking a look at screenshots.
A still frame might look great, but the video frame when it's moving will show "flickering" and "unstable" edges or changing textures.
This can occur due to the different ways in which the frames are analyzed during the enhancement process over time.
The clip may appear to shimmer when the hair, grass, fabric, signs, reflections & fine patterns are shown.
Always play back original and improved video at normal playback speed. Stop whenever you have to, but don't just stop because you have paused images. Many times stability of motion is more important than maximum sharpness.
Evaluate Noise and Low-Light Areas
Older and underexposed footage may have visible noise. That noise can sometimes be more noticeable when the video is upscaled.
This improved version could be crisper, but it could also show grainy compression of the specific areas better. Noise reduction can be used, but excessive noise can result in smooth, plastic-like surfaces.
When comparing versions, concentrate on dark areas, shadows, skin, and flat-colored areas. A balanced result will eliminate excess noise without over-masking the texture.
However, if the enhanced version is too smooth, it is better to decrease the strength of the effect.
Look out for Compression Artifacts
Many clips are already compressed into a low resolution. This is typical when using videos sent via messaging apps, downloaded from social media or exported several times.
Common compression artifacts can be blocky regions, the edges can ring, banding can occur, or there may be smearing during motion.
When upscaling, sometimes these problems become more evident, since the image is being enlarged. That's why the original and improved versions should be carefully compared.
The new version might be too powerful to enhance artifacts and not provide any additional clarity in the image. However, in some cases, a pre-upscaling light clean up can yield a natural finish.
Compare Color and Contrast
Enhancing video content shouldn't be done without a specific purpose, otherwise you may end up altering the overall appearance.
Confirm consistency of skin tones, highlights, shadows and saturation. Sometimes an improved version may look more dramatic due to the extra contrast or stronger colour. This can make the image appear sharper, when in actual fact, there has not been any marked improvement in the detail itself.
A fair comparison is possible between resolution enhancement and colour changes. If evaluating detail, try to keep the colour treatment of each version the same.
This makes it easier to determine if the enhancement is actual improvement in visual detail or just increased contrast.
Use Side-by-Side Viewing
The side by side comparison is one of the best methods for assessing enhancement. Put the original version to one side and the processed version to the other.
As much as possible, match the playback timing. This helps you to compare the same time without having to remember.
Another effective technique is that of a split-screen comparison with the original image on one side and the improved one on the other.
Switching between the two versions can also be useful for close examination to pick out subtle differences. These comparison techniques can help identify actual improvement and artifacts.
Take a look at the Final Delivery Resolution.
You should look at your footage at the size your audience will see. A clip could be visually unappealing in the editor at 200 percent magnification, but fine when played at normal size.
It is possible for the opposite to be true. Artifacts may not be seen on a small preview window but will be visible on a large display. When the finished product is to be exported in 1080p check out the enhanced video in that resolution.
If the project is to be played at 4K resolution, play it on an appropriate high resolution display, if possible. The ultimate viewing context should be your criterion.
How AI can be helpful in Enhancing.
AI upscaling can be especially useful for enhancing the quality of older footage, when it's necessary to improve the resolution and present it alongside more modern content.AI upscaling may be especially beneficial when wanting to enhance the quality of older footage, for example when it's needed to improve the resolution and present it together with more recent material.
For instance, a documentary can use footage from the past and contemporary recordings. A family video can be composed of clips captured on various phones. Low resolution shots from an older camera can be part of a travel project.
However, when dealing with such scenarios, the AI video upscaler feature in CapCut can be employed as part of the workflow to enhance the perceived clarity of lower-resolution video clips, before they are added to the higher resolution timeline.
The important thing is to consider the results instead of just taking it for granted that the improvement is necessarily better.
The best results with AI processing occur when the original video has identifiable edges, shapes, and textures. The improvement might not be significant if the source image is very faint or badly degraded.
Avoid Processing Everything the Same Way
The enhancement settings don't have to be the same for every clip. This is because a bright outdoors clip can work better with a greater degree of sharpening, whereas a dark indoors clip could need more careful noise control.
A portrait or landscape might need different levels of processing. The same treatment may not yield the same results across all clips.
A better solution would be to compare the various types of footage and make use of the various setting options. This is particularly true for longer projects with content from multiple cameras or years.
Keep the Original files.
Always retain original footage. Enhancement can be thought of as a new version, rather than a replacement for the source.
The original file allows you to try again if the processed result ends up being too aggressive, or if you find a better method.
The way to do this is to leave the source alone and save the enhanced clips in a separate folder with easy-to-understand names. This helps to compare versions and prevents unwanted loss of quality.
Final Thoughts
The most crucial step in video upscaling is comparing original and improved video footage.
The aim is not just to make the image sharper.
The successful enhancement should be more clear, preserve natural faces, not create more motion, reduce noise, and not overemphasize compression artifacts.
The overall viewing quality is best compared with the full picture: sharpness, texture, color, motion, faces.
Having a short section tested first, side by side playback and checking at final expected delivery resolution can help you make your decision.
An incremental improvement is often more aesthetically pleasing than an extreme improvement.
Video enhancement is most effective when it plays a supportive role to the original footage rather than replaces the character of the original footage. When the enhanced version appears cleaner, more uniform and yet natural when played back, then it has done its job.
About the Creator
Gulshan
SEO Services, Guest Post & Content Writter.
Enjoyed the story? Support the Creator.
Subscribe for free to receive all their stories in your feed.
Comments
There are no comments for this story
Be the first to respond and start the conversation.