
A Small Business Workflow for Enhancing Product Footage
Simple Steps to Make Product Videos Look More Professional

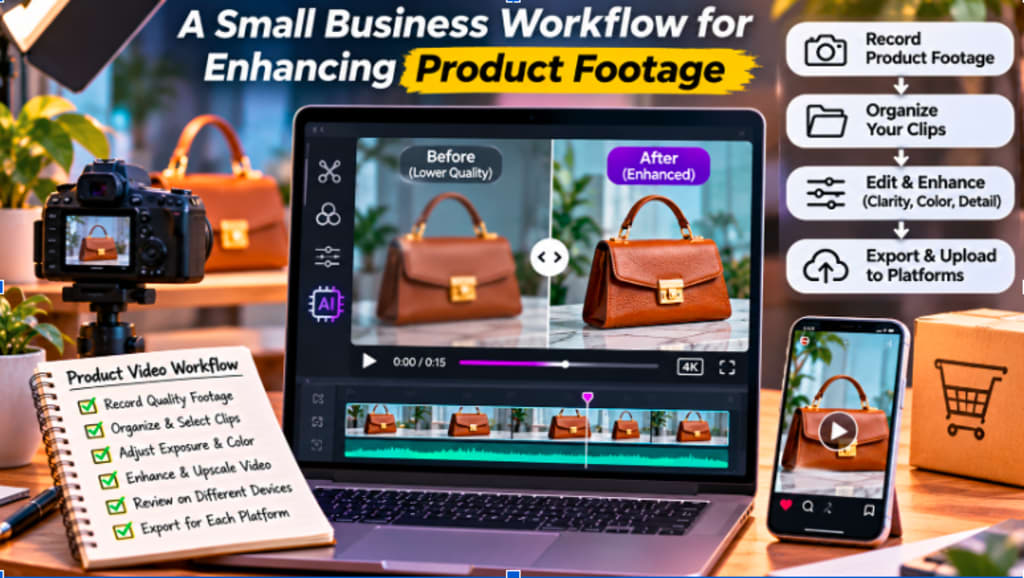
Product videos are one of the best tools to demonstrate the product and the way it functions and why it may be beneficial to the customer for a small business. These short clips can be displayed on various platforms such as websites, social media, online marketplaces, advertisements, product pages - sometimes far reaching and more useful than still images.
But for small businesses, professional production teams and fancy camera equipment is not always available. Video footage can be shot with a mobile phone, in varying lighting, or with poor quality visuals and sound.Video recordings can be taken on a mobile phone, in different lighting situations and a limited visual space. The video may appear somewhat soft or noisy, wobbly or stuttering, even if the information it contains is helpful.
A simple workflow for enhancing this footage can complement this without over-complicating the production process. The aim should be to produce clean and accurate videos of products, which will be consistent in visual presentation and still look lifelike.
Start With the Best Source Footage You Can Capture
Enhancement works well if the original recording has some useful visual information. While software can enhance clarity, it can also help minimize some of the distractions in low-resolution video and make it more suitable for the new displays, it can never replace good recording techniques.
Clean the camera lens, and ensure that the product is well lit before shooting. For many products natural window light is acceptable, and simple LED lights can offer some consistency when shooting in the interior. Don't use a combination of very warm and very cool light sources as this can produce confusing color variations.
The camera should not shake. Product footage can sound much better than hand-held recordings when using a basic tripod or phone stand. In particular, stability is crucial at close range when shooting, as any slight movement can be noticeable.
Correcting these fundamentals will minimize the need for post-correction.
Organize Product Clips Before Editing
Some surprising time can be saved with a simple file structure.
Do not put all the recordings in one folder, instead, group clips by product, angle or purpose. For instance, break up the wide shots and close-ups, demonstrations, packaging shots, and lifestyle shots.
This makes it easier to find the best clips when putting together the final video.
It also enables to discard easily identifiable unusable recordings early. If the clip is so badly out of focus, it was covered or is too over-exposed, it may be not be worth enhancing.
Sometimes small businesses must create content fast and have a neat organization system to avoid the need for unnecessary searching and editing.
It is also important to not alter the original recordings. Use non-destructive editing as much as possible and make working copies to go back to the source file, if the addition fails due to the unwanted output.
Correct Exposure and White Balance Before Enhancing Detail
Correct the basic look of the video before enhancing it with sharpness or resolution.
The product should be easily visible with minimal loss of detail in highlights and shadows. Also white balance should be adjusted to make the colors believable.
When color is a vital factor in the purchase, like clothing, cosmetics, accessories, home furnishings, food packaging, or art, this is especially important.
The shots that seem blue in one and green in another can make video look out of sync and can mislead customers.
Color corrections don't have to be "dramatic". In most footage of products, you need to be consistent more than create a highly-stylized cinematic grade.
The product should be the focus of the image.
Evaluate Whether Upscaling Is Actually Necessary
Not all the clips require enlargement or enhancement.
If the video was recorded in 1080p and it's mainly posted on social media, then the current 1080p might be good enough.
Upscaling can be useful for reusing older footage, if multiple cameras captured different resolutions or when a clip is required to be inserted into a higher-resolution project.
A business might have an older product demo that is still relevant, but is obviously older than the new demo. In such a case, the CapCut video quality enhancer can be integrated into the workflow to enhance the quality of the lower-quality content to make it seem clearer before it is merged with the newer video.
The improved outcome is always accompanied by a thorough examination. It isn't the case that the more pixels, the more natural the image will look.
Test Enhancement on a Short Section First
Shooting all the product footage, only to check the results later can be time-consuming.
Rather, pick a representative, short segment and try the enhancement settings on that area first.
Important product information like texture, printed labels, edges, reflectivity or moving parts are ideal to be part of the test.
Check if the enhancement will make the product look like a picture taken with a sharp lens.
Be sure to read logos and small print. Over-processed letters may cause halos to appear around them and over-processing may result in unnatural fine patterns.
If the test is successful, it can then be used as the reference for other clips during the project.
This will ensure consistency and avoid re-experimenting each file.
Keep Product Texture Looking Natural
Video is a common way for product videos to convey quality.
Customers may scrutinize surfaces in fabric, wood, metal, leather, food, cosmetics or handmade products.
They can make an unnatural appearance if sharpened too aggressively.
The fabric may end up being too rough, packaging for a skin care line might have unwelcome sharp edges, or a shiny object may appear to have distracting digital lines.
The goal of enhancement is to improve the product's visibility, not to highlight its surface.
View the improved footage at normal viewing size and compare it with the original footage. The improvement may only be noticeable at extreme zoom levels, but may cause artifacts during normal playback, so decreasing the processing power can cause a better result.
Control Noise Without Removing Too Much Detail
In small businesses, products are sometimes recorded inside, where there is limited lighting which can create digital noise.
Make sure noise reduction is used sparingly, as it can help produce a clearer image.
Good noise reduction can result in surfaces being overly smooth with no natural texture. This can be a serious issue if users require to observe the quality of the material or the small manufacturing details.
It's better to have a balanced approach. Minimize noise, but still maintain a level of “grit” for the product to look like it would in real life.
When there is substantial noise in multiple clips, spending a lot of time on post production noise reduction may take longer than striving to get a good shot during the next shooting session.
Ensure smooth and stable motion.
Product videos often feature close-ups, camera panning, hand movements showing product features, and rotation. This motion should not be the subject of enhancement.
Play a processed recording at normal speed and see if the edges are flickering, patterns or textures moving or changing between frames.
These issues are not necessarily apparent in one still frame.
That's why you should always look for a video quality from a moving image, and not from a screenshot.
When it is necessary, administer stabilisation sparingly. If the image is overly stabilized, it can be very cut out and may also warp the image around the edges in an unnatural way.
A nice natural shot is more likely to be useful than an aggressive shot.
Build Consistent Product Videos Across Different Platforms
A small business might require the same footage for a number of reasons. This can be used horizontally on a website and vertically for short-form social media. When it comes to ads or marketplaces that prefer square or portrait shots, it can be helpful to have those.
If these formats are planned from the outset it will be much easier to edit. During filming, ensure there is sufficient space around the product that the video will not lose any significant detail when cropped into various aspect ratios.
If the master looks good, make platform specific versions from that master, instead of going through the process of enhancing separately for each platform. This facilitates the quality maintenance and consistency of colors, sharpness and overall appearance from channel to channel.
Look through the Final Video on Real Devices.
Check the video before publishing it out of the editing software. View on mobile, desktop, and larger screen if available.
What looks great on a big editing monitor may look like a different story on a smaller display. The text may be too small, the finer details won't show, or the product may only be a part of the frame.
Considering mobile review is crucial as numerous customers are finding products via their phone.
After it's uploaded to the intended platform, also check the video. Additional compression that may be applied by social networks or sites can cause the published export to differ.
The final online version is the one that the customers will see; this version should be part of the quality-control process.
Develop a Repeatable Workflow for future Products
As a small business generates more content, efficiency is a key consideration. Document a workflow if it works well.
Repeat similar lighting, camera settings, file organization, color corrections, enhancement levels and export settings for future products.
This does not imply that all of the videos should be the same. Some products will need different approaches to the creative, but a consistent technical process will minimize error and editing time.
Titles, logos, product labels and export settings are all available in templates, and can help to save time as well as ensure a consistent look for your brand.
As time passes, the process becomes easier to duplicate and the business can put more effort into the product than the process.
Final Thoughts
Most importantly, enhancing product footage doesn't mean that you have to make every clip into an ultra-sharp footage with tons of extra processing.
Good recording, organization, exposure and colour and selective enhancement when it is actually improving the video are the best starting points for a small business workflow. The upscaling, sharpening, product stabilization and noise reduction should complement the product and not detract from it.
By testing a small clip, maintaining natural texture, verifying motion and checking across devices, common quality issues can be avoided. Above all, the completed video should accurately reflect the product.
A clean, stable, natural-looking video provides consumers insight into what they are looking at, and for small businesses, it helps to create professional-looking videos without the creation of an unnecessarily complicated production process.
About the Creator
Gulshan
SEO Services, Guest Post & Content Writter.
Enjoyed the story? Support the Creator.
Subscribe for free to receive all their stories in your feed.
Comments
There are no comments for this story
Be the first to respond and start the conversation.