
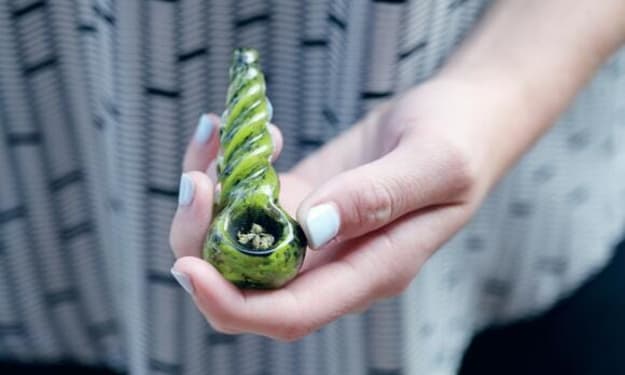
First Time Cannabis Growers Guide
From start to finish, tips for getting your first grow up and running


There comes a time in every marijuana user's life when they decide to partake in the adventure of cultivating their own plant baby. This moment comes with different factors and we all end up in this place based on our own reasons.
Maybe you have a knack for growing plants and you want to see if your skills will translate into herb, let me tell you now that they will. Maybe you have been spending too much money at the dispensary since legalization and you want to save a hundred dollars on your ounces. Maybe you want the pride and satisfaction that comes with the patience and time required to grow properly.

Whatever your reason, when you make the decision and start to scour the world wide web for resources, you will find yourself in abundance. An array of differing opinions and perspectives all on growing a simple, common weed.
Well, trouble no more, I have come to the rescue. Use the guide below to kick ass on your first grow, to smash targets on the 10th crop or just to get high and happy with your home product. Whatever your purpose, below you will find the gems needed to succeed.

Let’s talk Seeds.
No matter what you do, this is where it will begin. The quality of your seeds will determine the quality of your plant species, no matter how much money you spend on equipment and dope soil. Choose from a well-known supplier. I use distributors from the Netherlands that send seeds in discrete packaging. I am not going to include their name here out of respect for their trade, but trust me in this approach to finding the right one.
Google around for high-quality seeds. Take names of the top 5 distributors. Google them separately and find reviews away from their websites to ensure validity.
Buy feminized. Only female seeds can produce bud. Before you go and start saying "what about auto-fem and mixed bags and blah, blah", etc. Just buy female seeds okay.

Let’s chat indoor equipment
Lightbox – This is a reflective cube that you house your plant inside. The reflective insides will help feed more light to your plant getting it big and strong. Get one as big as you can.
Plant pot – You know a fish will only grow as big as the bowl it is placed in. The same is said for your plants. Get as big a pot as you can
Lights – Your plant needs to eat, and the more you can feed it the better. Whatever your setup, do not go cheap on lights. Get as many as you can. First-time growers always make the mistake of not having enough light.
Timer switches for your lights to ensure the correct feeding window.
Chemical test strips to ensure PH level is correct.
Soil (tomato soil works great).
Fertilizer (one high in nitrogen for the beginning of your grow and the other high in phosphorous for the second half).
Gardening gloves .
Scissors for trimming .
String for tying branches.

How about soil, punk?
Get Tomato soil from your local gardening shop or online. Purchase some chemical test strips. On top of this, you will want to purchase two fertilizers. One is higher in nitrogen for the beginning phase of growth, nitrogen helps the plant grow strong in the beginning. The second soil should have higher levels of phosphorous and potassium for later on in your grow, this helps in the flowering stage to produce larger buds.

The Basics
You have all your equipment ready. Your plant pot is set up with soil and your lightbox has been assembled and all your lights are plugged in, hooked up, hanging in place. Some individuals at this point would set up a ventilation system. This could either be a carbon filter system or simply a fan and a window. You will decide the importance of this yourself. As a side note, I lived in a bottom apt of a large apt block and always had a plant growing with no ventilation other than an open window. I never received a complaint.
To begin the growing process, you must first germinate your seed. This is a simple process and depending on your finances it can work one of two ways. Purchase little soil seed germinating pucks from the plant store, or use a paper towel. Both practices are the same, yet the first has fewer possible problem areas.

To germinate, the seed must be kept moist, dark, and cool for a few days. Wet a paper towel, fold it in half and place the seed inside it with the pointed tip of the seed facing outwards (this is where the little seedling shoot will appear when growth begins). If you purchased the jiffy soil pucks, follow the instructions on the back of the package.
After a few days, you will see a small shoot pierce the hard shell of the seed and attempt to make a break for the sun. This is when you can transfer the seedling to your plant pot inside the lightbox. Burry the seedling a couple of inches in the soil, ensuring the sprout is facing upwards without obstruction.
This is now the seedling stage of growth. You must be very careful not to overwater your plant for the next couple of weeks as it matures into the vegetative stage.

You will notice after a few weeks that a nice set of green leaves have emerged from the stalk and now your plant has moved on to the main growth phase. For this stage of the growth period, you want to keep higher levels of nitrogen in the soil (hence why you use the nitrogen-rich fertilizer at this stage) along with around 21 hours of light. This will feed the plant the maximum amount of sunlight and help it grow big and strong.
Near the end of this phase is when you begin tampering slightly with the plant. Bending and breaking and tying the plant's branches in all sorts of ways will help to produce larger buds and more of them.
This is a pretty professional move and not recommended on first growth but if you wanted to give it a shot then please watch a YouTube video first. Your plant is a special little friend, and you don’t want to go breaking things in the wrong places.

The next change will happen depending on the flowering stage of your strain (this is all based on the specific seed you chose to grow). To start the flowering stage, you will change the amount of light given to the plant. A reduction of light from 21 hours down to around 12 or 16 hours will trick the plant into thinking winter is coming. This will change the plant's cycle and flowering will begin.
This last stage usually takes up to three weeks. Buds usually grow the most near the end of their cycle so keep an eye out for any discoloration in the leaves and buds and maybe add some more phosphorous to the soil to boost the final bud development. You can do this by using the second soil you purchased. Feed some into the soil bed and slightly aerate the soil being careful not to nick any of the roots.

Now you are coming up to the end of your growth, your journey is not quite finished though, and you still have to be careful to process the plant in the right way to optimize your smoking experience. At least a couple more weeks will be required to dry and cure the buds you have grown.
Don’t relax just yet, keep up the hard work and the reward will absolutely be worth it. Very soon you will enjoy some of the best smoking in your entire life.
About the Creator
Robert Webb
Freelance writer.
I write about all walks of life, from fiction to non-fiction, self-help to psychology, travel to philosophy.
I like to bring a sense of humor to serious topics, a splash of philosophical thinking, and a dash of weirdness.
Keep reading
More stories from Robert Webb and writers in Potent and other communities.
4/20 one of 365 days per year that I smoke weed
I smoke pot constantly. And it’s a good thing that I do. The plant helps keep my mood stable. I am diagnosed with schizoaffective disorder bipolar one type. I am prone to terrible mood swings, but not when I'm smoking marijuana. My psychiatrist was so pleased with the results she observed from me smoking weed that she took me to get my medical cannabis card.
By David Heitz4 days ago in Potent

Comments
There are no comments for this story
Be the first to respond and start the conversation.