

I arrived at Brazos Bend State Park, Texas in a good mood despite my pack weighing in at just over 48 pounds. Pulling the F-stop Ajna from the back of the Jeep and throwing it over my shoulders I couldn’t help but think if all this work was really worth it. Just about every photographer who does an article comparing two or more lenses photograph some stationary subject like a target or brick wall. I have always felt those types of test do nothing to illustrate how the lenses operate in a real world shooting environment. For that reason I have always conducted my lens comparisons in the field photographing the subjects I would normally use the lenses for.
Sure I could just use a photographic target and show you this lens will resolve x number of lines per millimeter while this lens will resolve x + x. Don’t get me wrong, that is great for figuring out what lenses is better and being a serious gear geek I enjoy that information. But what does that difference really mean in a photograph of a bird? Will I notice a difference in actual use between this $3,000 professional level lens and this $1000 consumer lens? Is that difference worth the extra cost?
These are the types of questions that shooting a target or brick wall cannot answer and is why I conduct my comparisons like I do.
For todays outing I had the following gear in my pack:
- Olympus OMD EM1 /w grip (EM1)
- Olympus OMD EM1 (EM1)
- OLympus MZ 300mm f4.0 IS Pro (Micro Tuna)
- Olympus MZ 75-300mm f4.8-6.7 II (75-300)
- OLympus ZD 50-200 f2.8-3.5 SWD (SWD)
- Olympus ZD 150mm f2.0 (Little Tuna)
- Olympus MC-14
- Olympus EC-14
- Olympus EC-20
- Godox V860iiO
- Godox X1T-O
- 3D printed skimmer pod w/ ballhead
- 3 liters of water
I have seen a lot of µ4/3 photographers in forums and social media complaining about the weight of newer professional level gear from Olympus. Some even claiming that it’s gotten to where µ4/3 camera/lens are approaching full frame size. Those comments always make me laugh because it is so easy to prove wrong. I could go through and prove it right here by looking up weights and comparing a similar load out of full frame gear, but I have more important things to do like provide you with this information. I will say as a previous full frame/APSC shooter that there is no way I could fit a similar load out into a 40L bag, let alone carry it while covering just over 8 miles. This and the amazing weather-sealing of Olympus is why I switched systems after 25 years with Canon.
Anyway, let’s continue with the comparison.
It was really foggy driving in, so everything was covered wet with dew when I arrived. This comparison was to include the Olympus ZD 150 ƒ2.0 (Little Tuna), but while switching from the Olympus ZD 50-200 ƒ2.3-3.5 SWD (SWD) to the Little Tuna I dropped the Tuna. Which resulted in it getting wet on both ends and never un-fogging while I had my subject in front of me. I actually had problems with all the lenses fogging up because of having to lay them in the extremely wet grass. There were a few times I had to remove the lens hood and wait for the lens to un-fog before taking any photos because they wouldn’t un-fog with the hood on. I thought about removing the hoods completely but needed them on the lens to keep the front element from getting wet while laying in the grass.
Another problem with my preferred way of doing lens comparisons is actually getting all the gear into position to photograph my subject. I am one of those rare photographers who doesn’t like to crop, so getting close and filling the frame with my subject is the only alternative. In normal photography outings this is never really a problem because I typically drop my pack and sneak/crawl into range with just my camera and lens. When you have four lenses and two cameras that you want to photograph something with the difficulty of getting into position is compounded. Normally I have this small tarp in my pack that is used when the ground is wet or muddy or full of bird poop. Today I was concerned with the weight of my pack, so I left out everything that was not essential and one of those things was my tarp. I spent the entire day cursing myself for leaving it behind.
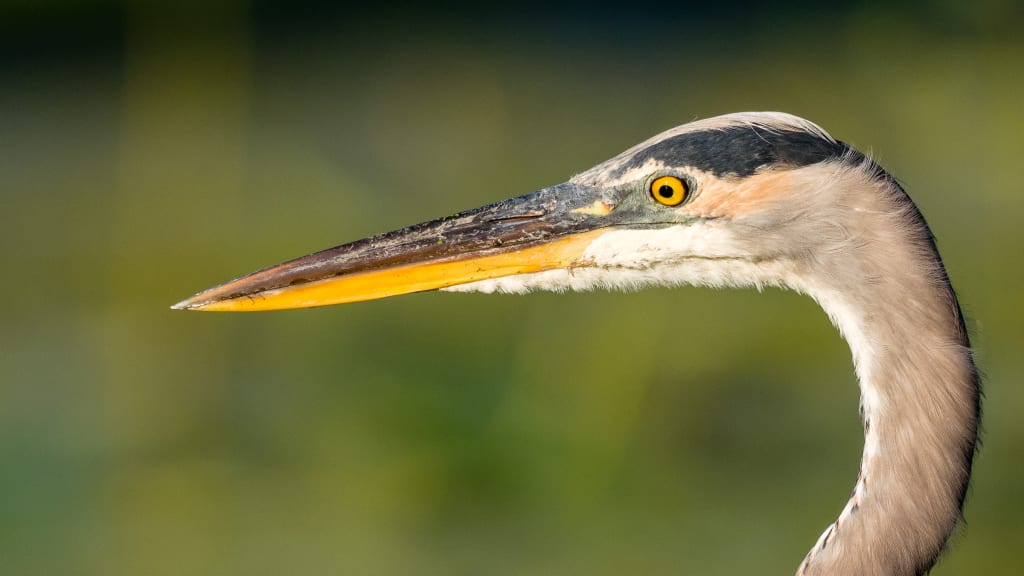
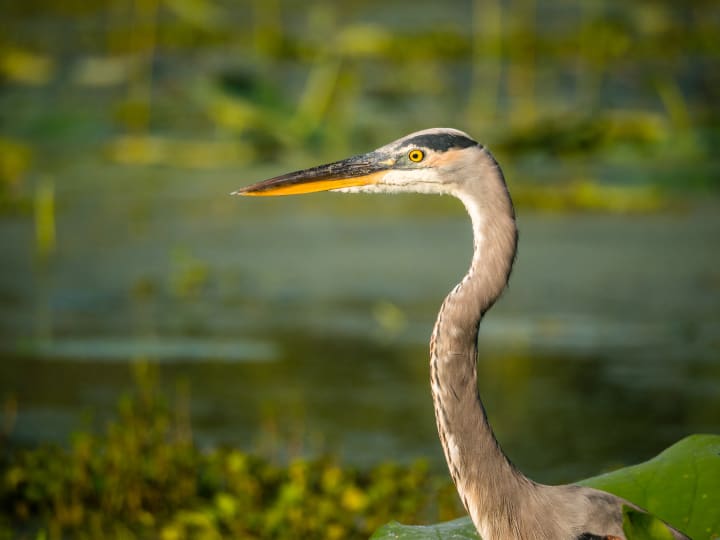
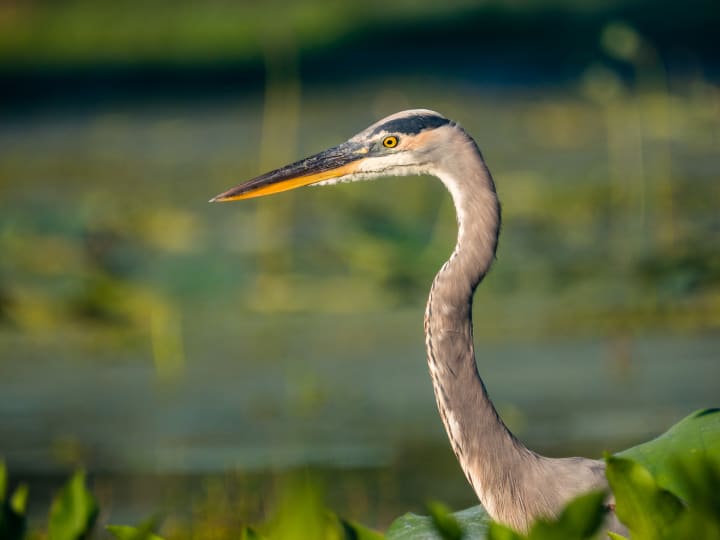
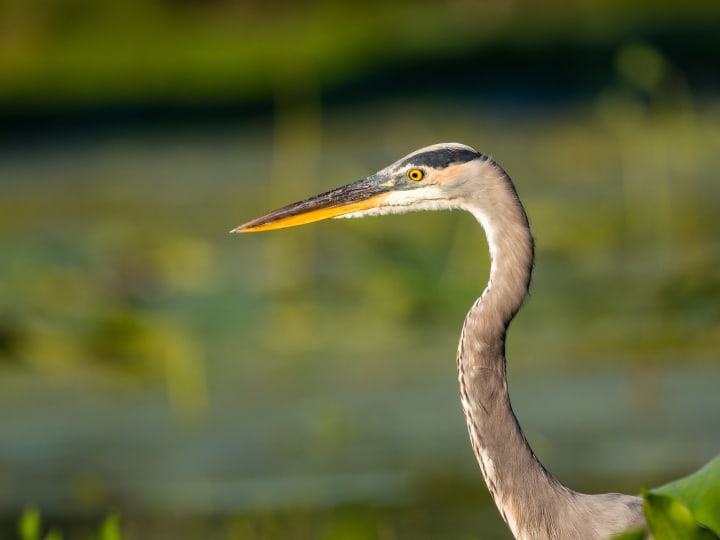
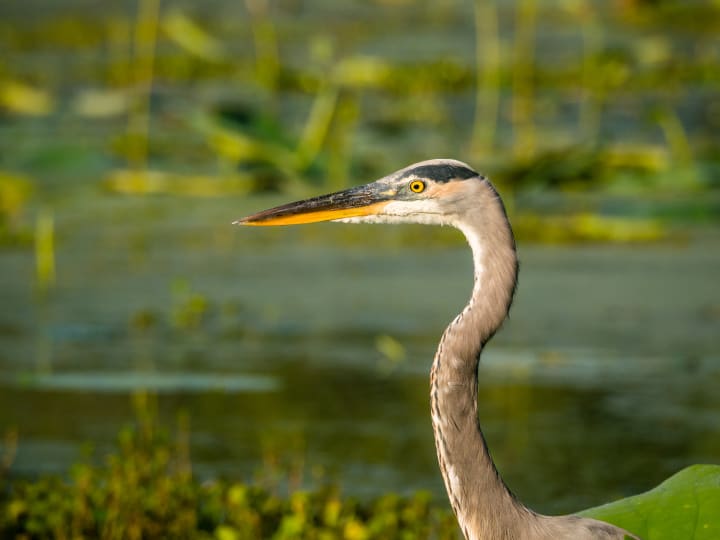
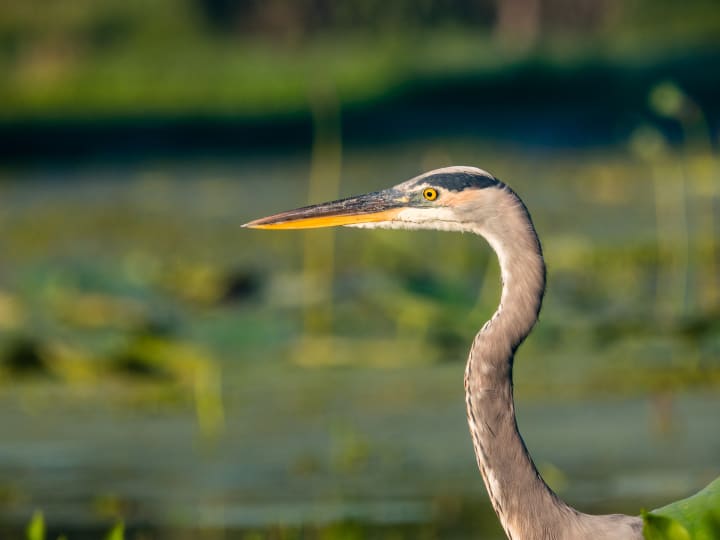
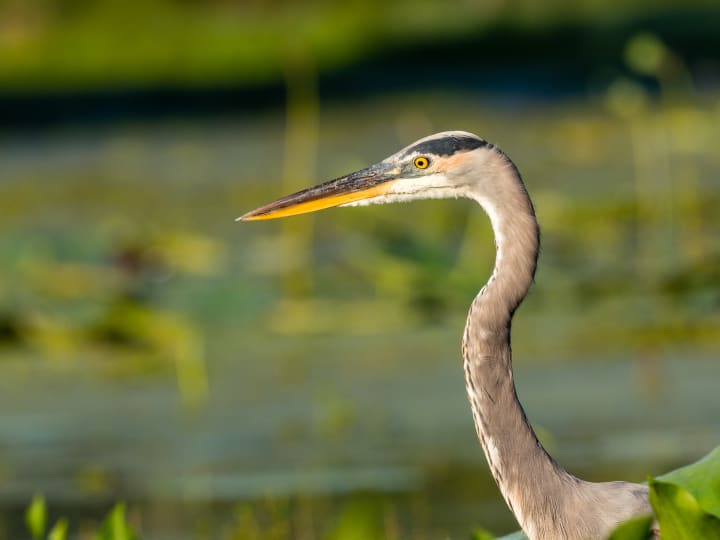
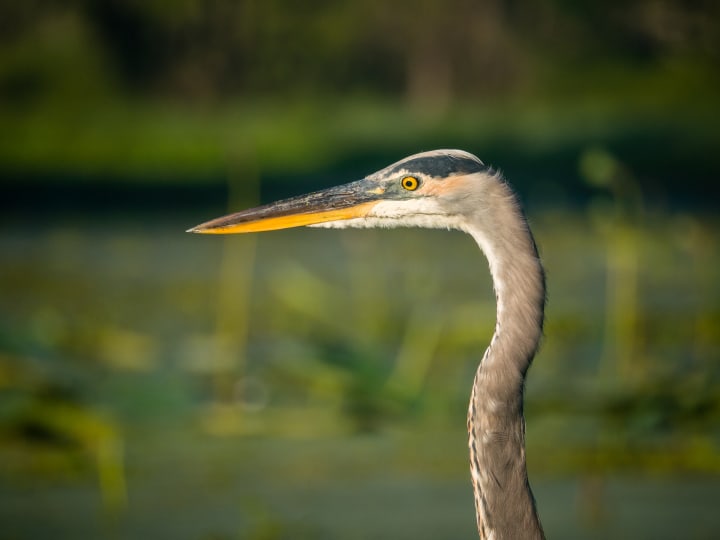
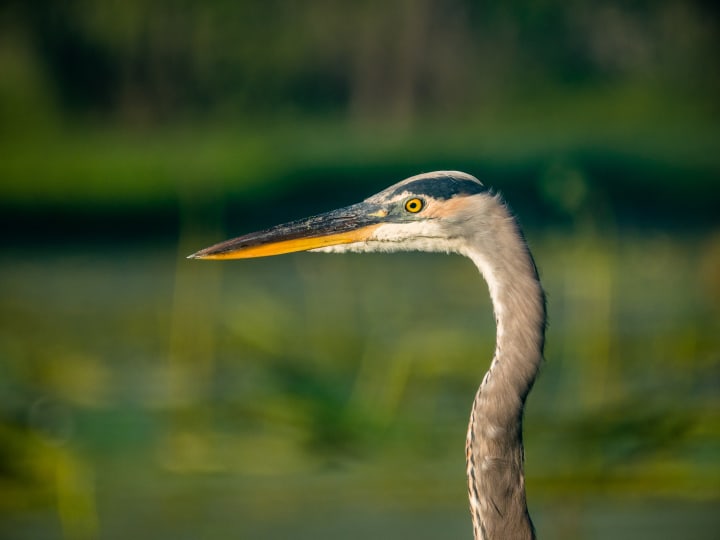
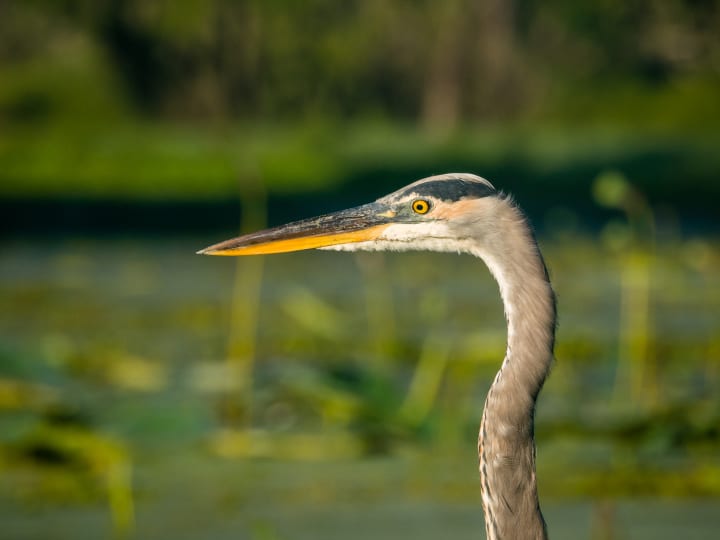
I had tried to crawl towards three different birds while dragging the pack behind me. The thought was it would give me a place to layout my cameras and lenses while photographing the bird. Problem was the pack caused a bit too much commotion, which spooked my chosen subjects before I could get close enough for even one photograph. I changed my tactics when coming upon this Great Blue Heron (Ardea Herodias). This time I crawled towards the bird while carrying two cameras with lenses attached. I am really good at judging distance and talk extensively about it in my article on depth of field (DoF). Today I was just a little off in my prediction and ended up at 41 feet away vs the planned 50 foot distance. After getting into position with the two cameras I laid them on the grass being careful to not get the front lens elements wet before slowly crawling back to grab the other two lenses. It took me about 45 minutes to get into position with all the lenses because I was being extra cautious to not spook another subject (something I hate doing).
Shooting Parameters
Since this is a lens comparison I feel it is vital to give as much information about the shooting parameters as well as conditions. This helps others when comparing the different photographs as well as making inferences to their shooting style. In full disclosure the Olympus MZ 300mm ƒ4.0 IS Pro (Micro Tuna) and Olympus MZ 75-300 ƒ4.8-6.7 II (75-300) were used on the same Olympus OMD EM1 (EM1) while the SWD was used on a different EM1.
Camera Settings:
- ISO - Auto
- White Balance - Auto
- SAF w/ Single Small Auto Focus Point which I placed for optimal composition.
- Drive - Continuous Low w/Anti-Shock (set to 6.5fps)
- IBIS - SIS1
- Metering - ESP
- EV - -3/4 Stop
- Mode - Aperture Priority
- Photos all taken in RAW and processed via my custom preset in LightRoom (no crop)
- Handheld w/Elbows braced on knees while sitting on the slope of the bank
I almost exclusively shoot all my lenses wide-open unless extra DoF is needed, like when shooting gators with the Little Tuna. Almost all µ4/3 lenses are sharpest when stopped-down one full stop. So when doing lens comparisons I take photos wide-open as well as stopped-down one full stop. This does several things for the comparisons.
First, it shows you how images look when shot wide-open. The advantages to shooting wide-open are better bokeh as well as lower ISO. As you stop a lens down you gain DoF but it also causes a change in the bokeh quality. This change makes the background not as blurry/creamy and can result in the subject being harder to differentiate from the background. When shooting wide-open you are also letting in the most light, which will help keep your ISO low (better image quality) when light is not optimal or when needing a fast shutter speed.
Second, stopped-down to optimal sharpness shows what the lens is really capable of doing. This is where you will see a lot of photographers concentrating on when doing lens comparisons and in some ways I can’t blame them. But it really doesn’t tell the full story about a lens unless you compare those images to ones shot wide-open. By shooting the same subject from the same location wide-open and stopped-down allows comparing not only sharpness of the subject but also the change in bokeh quality between the two. Believe it or not the change can be pretty dramatic and I have found that unless the extra DoF is really needed the additional sharpness is not worth the loss in bokeh quality.
I also tried to maintain a parallel perspective to minimize any perceived increase in sharpness due to increased DoF. In testing lenses I have noticed that an increase in DoF can give the impression of greater sharpness because of more being in focus. To keep the perception to a minimum I try to keep my subject as parallel as possible. So in some ways shooting the head and neck of the Great Blue Heron had an advantage over a smaller bird where I would have shot full body. Shooting full body of a smaller bird would have given to some extant the perception of photos taken with the 75-300 and SWD being a bit sharper because of the increased DoF.
I moved into my initial position (which ended up being 41 feet according to EXIF) and took photos with the first three lenses. While switching to the Little Tuna I dropped it and the elements at both ends (had caps off when it dropped) got wet from the grass it rolled in. I spent a few minutes trying to get it dry and un-fogged but couldn’t.
A fellow photographer and friend Danny aka nzmacro has a saying that I like to use when talking about wildlife photography. “Contrary to what a lot of people think we do with long tele lenses, we use them at close range. The closer to the subject the better and that applies to any tele lenses really. That's where the details are, in being close to the subject.” This is something I have always followed and why I get close to my subjects. I knew my initial photographs were from approximately 50 feet, which is about the farthest I like to be away from most subjects. Nothing is ever a guarantee when photographing wildlife and after spooking three other subjects I stopped at this distance to at least come away with some photographs for the comparison. Rather than wast time trying to un-fog the Little Tuna I decided to move closer to get better images, hoping it would give it time to un-fog.
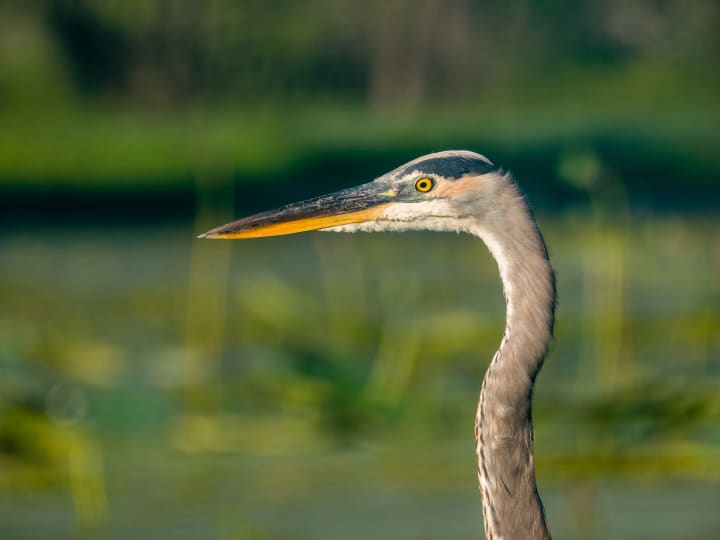
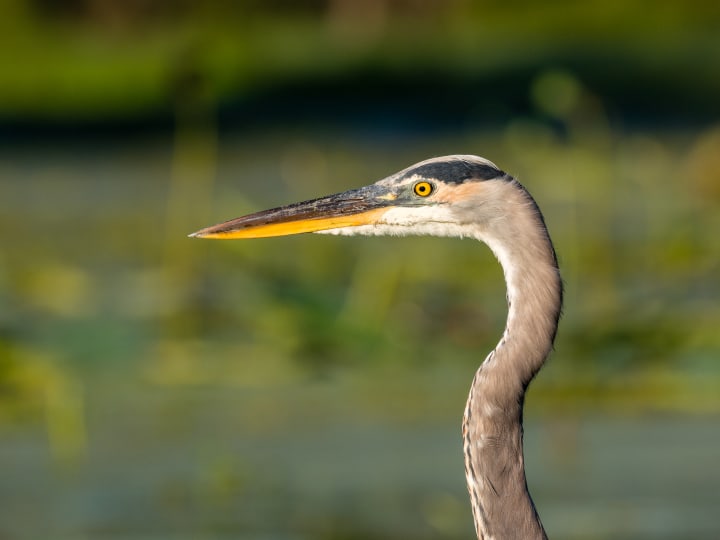
I moved forward to what turns out to be 35 feet (per EXIF) but the Little Tuna never un-fogged enough for clear images. While at this distance I was able to capture wide-open and stopped-down photographs from the other three lenses for the comparison. I really wanted to do a four lens comparison but that just wasn’t to be.
Next up, the photographs from both distance for you to review. Since the photos in the article are not the largest, which helps with lens comparisons, here is a link to the full resolution images on Flickr.
Shooting distance of 41 feet with all three lenses wide-open
Shooting distance of 41 feet with all three lenses stopped-down one full stop
Shooting distance of 35 feet with all three lenses wide-open

Shooting distance of 35 feet with all three lenses stopped-down one full stop
The Results
Before going into my thoughts on the outcome I wanted to mention how much more useful I feel a lens comparison is when you photograph the same subject, from the same distance, within a few minutes for all lenses involved in a real world setting. This really does allow you to compare the images since everything from shooting distance to the available light are nearly identical.
Ok, my thoughts on the outcome……….
Color - I was really surprised by how different the colors are between the photographs. These three lenses have very different colors and I processed them all using my normal custom preset that I use for all my wildlife photographs. I will point out that a few months back in a quick comparison between the Little and Micro Tuna and noticed the very similar colors between the images (which I was very happy to see). Personally I prefer the color from the Micro Tuna followed by the 75-300 and finally the SWD. I was really surprised to discovery that I preferred the 75-300 (a lens I rarely use) over the SWD since I have always liked the images from it.
Resolution - It is pretty clear that the Micro Tuna has significantly more resolution than the other two lenses. The images just appear sharper and with greater detail compared to the other two. All three lenses sharpen up a noticeable amount when you stop down one full stop, which is what I expected after looking at LensTip’s testing of the Micro Tuna and SWD (unfortunately they have yet to do any test of 75-300). I find the wide-open shots from the Micro Tuna and SWD to be usable but the 75-300 really needs stopped down a full stop to become usable. When looking at the images I encourage you to also look down the GBH’s neck and compare some of the fine feather details between the images.
Distance - I have always talked about shooting distance and how you want to be as close as possible to capture as much detail as possible. The first set of photos are from close to my personal maximum shooting distance for birds, while the second set is from a distance I find much more comfortable. They are also from a distance I typically shoot from, if not closer depending on size of bird. Even with only an approximate 6 foot difference in shooting distance I can see a noticeable increase in detail capture from all the lenses. The 75-300 with it’s lesser resolution seemed to benefit the most from getting closer. Unlike the farther shooting distance the wide-open shot from the 75-300 is right on the cusp of being usable while the stopped-down shot is significantly sharper as I would expect. I think from around the 25 foot distance the 75-300 would easily start to become usable wide-open. The other two lenses as are easily usable wide-open (do sharpen up stopped down) and do capture more detail when closer as expected.
Bokeh - I know that this aspect of an image comes down to personal preferences, but here goes. The 75-300 easily has the worse bokeh of the three lenses, especially when stopped down to ƒ9.0. There is really nothing you can do about it other than get closer, the bokeh in the closer images is not as bad as the farther images in my opinion. It’s slower aperture just can’t compete with the faster lenses when it comes to bokeh. The SWD and Micro Tuna have a similar wide-open aperture (ƒ4 vs ƒ4.9), so the amount of blur is pretty similar. But to me the transitions between color is no contest and the Micro Tuna creates much more pleasing out of focus areas. This difference is really noticeable if you look at the vertical weed that crosses right behind the beak in the images with those two lenses. That change in color is just not as harsh or sudden from the Micro Tuna as it is with the SWD and that 1/2 stop difference is just enough in my opinion to also create a little more blur to be noticeable.
Shutter Speed / Freezing Action / ISO - I was shooting a static bird so shutter speed was not really my concern. My shutter speed requirements for this comparison were fast enough to handhold, fast enough to freeze any incidental movement from the bird or from the wind blowing its feathers while being at base ISO. I bring this up because of the slower shutter speeds when using the 75-300. Keep in mind that I am currently concerned with shutter speed from a freezing the action standpoint, will address the ability to handhold in the next section. Sunrise was 7:07 and I took these photos between 8:15 and 8:24, so I was shooting in good morning light. The Micro Tuna had no problem with keeping shutter speed high enough to freeze the action. I like to photograph birds catching food because you never know what they will pull out of the water, still after that bird catching a baby gator photograph. To freeze the strike from a bird I have found that 1/800 is the absolute minimum and even at that speed you can get some motion blur, for that reason it is better to be at 1/1000 or faster. The Micro Tuna even stopped-down to ƒ5.6 was still at 1/1000 shutter speed, more than enough to freeze the action of a bird strike. The SWD is also a lens I always shoot wide-open so it’s 1/1250 was more than adequate, even stopped-down it was at my bare minimum of 1/800. The 75-300 is another matter, wide-open it was at my bare minimum of 1/800. This leaves no room for any error or change in lighting and also means that shooting in a little less light I would have to raise my ISO to keep shutter speed high enough. The lens already isn’t the sharpest, so an increase in ISO is going to decrease detail captured and make the image just that much softer. Since the lens is distance sensitive that means for farther away shots (like my 41 feet images) it needs stopped down to ƒ9, which lowers the shutter speed to 1/500. Now we have to increase ISO even more to get shutter speed back up to freeze action and the images fall even farther behind the other lenses. If shooting static subjects there is no need to worry about shutter speed beyond ability to hold steady. When needing to freeze action the 75-300 image quality drops farther behind the other lenses because of the higher ISO required. This is why I say the 75-300 requires good light and in anything less it’s image quality compared to other lenses like the Micro Tuna drops significantly due to higher ISO required to maintain fast shutter speeds.
Shutter Speed / Handholding / ISO - The Micro Tuna is without a doubt the King of the three lenses. I find the weight just about perfect (could be a bit heavier, especially when using the MC-14) for handholding and combined with the amazing Sync IS this lens is so easy to handhold. I can even shoot pretty smooth handheld video with this lens. For this test the shutter never dropped low enough for me to even be concerned. When using the Micro Tuna I don’t even think about my shooting technique until much lower shutter speeds. During this outing I just raised, framed, focused and shot. Every single image taken with the Micro Tuna was perfectly sharp, it really is that easy to shoot. The SWD is a little light in my opinion to handhold when using the EC-14 (which I was in during this comparison), but perfect when using bare lens. I did need to pay a bit more attention to technique when using it, but the Olympus IBIS really is amazing and during this test there was no concern about getting sharp images. I did have a small number of out of focus shots with this lens (maybe 10%), but some of it could also be due to PDAF focus errors. With this lens I don’t start to concentrate on technique until I get down to the 1/400 mark (for the record with the Micro Tuna I start to pay attention around 1/250). The 75-300 as I have always said, is way to light for the focal range. When shooting it wide-open I had to really pay attention to technique and had at least 25% of the images blurry from camera movement. It is just so light that the smallest of movements can cause the camera/lens to move. For this reason I always shoot the lens at the bottom of a breath like when shooting a rifle. Now when stopped-down the shutter speed dropped to 1/500 and I ended with about 50% of the images with motion blur. Had to really pay attention to technique while using the 75-300. To ensure I had sharp images for this comparison I shoot about twice the number compared to the other two lenses. Unfortunately the 75-300 is just a much harder lens to shoot, a remake with Sync IS (Like Panasonic did with their 100-300 lens) would make such a huge difference in this lens.
Honestly, this test turned out exactly as I predicted it would. The only real surprise for me was the color differences between the lenses and the fact that I preferred the color from the 75-300 over the SWD. Really wish I could have included the Little Tuna and do feel somewhat let down by not being able to test it. I briefly considered waiting and trying again but my favorite time of shooting is here and it was a lot of work to drag all this gear out and concentrate on getting those shots over other photo opportunities. One of my failed attempts when dragging my pack was a Green Heron who would have been in the most beautiful light as the sun came over the trees. If I was out to just shoot I would have gotten in place with nothing but the 300/4 and waited for the sun. I don’t regret taking all the gear out and doing the test, I really did want to see how they compared. It is not something I am willing to do again, unless I do it from the kayak where weight is really not a concern. Shooting from a kayak brings a lot of variables you have to take into account and is why I didn’t do this shootout from it. But now with this comparison done to use as a reference I may try to do all four from a kayak one day in the future. The problem is needing an increased shutter speed to compensate for kayak movement would, which would effect the 75-300 more than the other lenses. So it wouldn’t be a completely fair test, but it would allow me to also bring the Sigma 50-500 ƒ4.5-6.3 aka Bigma for a five lens shootout.
I have uploaded full resolution images from the article to this Flickr album so you can view them in greater detail.
I have another comparison article between the Micro Tuna and 75-300 with my favorite Red Fox (Vulpes Vulpes) Gorgeous as the subject that you will find interesting as well.
If you enjoyed this article please subscribe to my profile so you can read my current stories as well as know when I publish new ones.
If you would like to view more of my photographic work or purchase some of the images in this article visit my website https://phocalart.com
Phocal
About the Creator
Phocal
I am outdoor adventurer and wildlife photographer who also enjoys story telling.
See as well as purchase my photographic work here: https://phocalart.com
Keep reading
More stories from Phocal and writers in Photography and other communities.
A Gentle Reminder
I got to my favorite alligator (Alligator Mississippiensis) photography park (Brazos Bend State Park, Texas) over an hour after sunrise because I accidentally slept in. It is the middle of mating season and I can hear them down in the swamp bellowing as I get my gear together. Unfortunately by the time I made my way to 40 Acre Lake they had finished establishing their territory for the day and there was only the occasional bellow. This time of the year the park is full of Yellow-Crown Night Herons (Nyctanassa Violacea) hunting crawfish and it didn’t take me long to come across one on the hunt.
By Phocal3 years ago in Photography
Capturing Magic
In the world of photography, timing is the key to everything. While skilled compositions and technical proficiency are undoubtedly crucial, the perfect lighting can create the perfect photo. Nowadays, we can determine any light ourselves and are no longer dependent on any natural light source, thanks to the developed technology. We can turn every day into a night by using the right filters. And we can illuminate every night to be seen as a day. A typical process, especially in the film industry.
By Krishan Mubashar5 days ago in Photography
Good Picture
This comprehensive guide to photography focuses on capturing moments, emotions, and stories, not just clicking a button. It covers key principles and techniques such as composition, lighting, and camera settings, aiming to elevate photography to the next level.
By Praveen Pk5 days ago in Photography


Comments
There are no comments for this story
Be the first to respond and start the conversation.