
PAINTING FOREVER
How To Paint Wood Furniture - Complete Guide

For those who refurbish furniture for a living, it would be your routine to find beaten up and seasoned dressers and tables and then turn them into something new-like. This is a profession for many people and even some pursue it as a passion project. They track down salvageable items from abandoned warehouses and such and then do their magic.
When it comes to completed pieces, many rely on the online portals where sellers meet buyers and then ship the articles to them. When it works, it is one of the most hassle-free and seamless ways of conducting business and earning top-dollar for the work you have put in. But most of the time, people do not go online to shop for furniture. It is still one of the items that are personalized and need to check it out before purchasing one.
Before you are able to sell something online or on the site, you need to make it sellable first. In this article, we will go through some of the practical tips and procedures that will help you in painting wood furniture like a pro.
You will find little bits of information online here and there and there is no one comprehensive guide that will help you in getting all the answers you are looking for in order to paint wood furniture.
So, sit tight and make notes if you need to, because we will get into detail about each aspect of painting wooden furniture.
Preliminary Steps
Like all the serious work, there is a preparation phase before applying the ultimate skin on the furniture. It is a crucial step because it will determine what you will get at the end.
In the case of painting wood furniture, the prep work consists of the following steps:
Place the article that needs to be painted in your workshop and away from pets and kids.
Remove all the accessories from it to have an even surface to work on. This includes removing all the doorknobs, hinges, and other hardware items. It is necessary because you do not want stray splashes or straight strokes on the items. This will mar their original coat and make them untidy and smeared. If there are other doors and drawers attached to the item, you should remove them too. Having an even playing field will enhance your efficiency and help you finish the task with ease and convenience.
Sand Your Heart Out
Sanding is one of the most important prep steps on your way to painting furniture. There are some blog posts as well as some of the instructors online that propagate the idea of not sanding for some types of paints or not doing it at all.
As far as we have done the research, we have found that sanding is always necessary to get the best surface to paint on!
Put it this way, sanding will get you a medium that is receptive to paint which helps in gluing the paint with the surface. This is a serious boost to the long life of paint, when compared to a surface that is peeled, chipped, too smooth, or glossy.
Go for a power sander if you find a layer of varnish or other paint on the surface. 80 grit sandpaper is a great choice for almost all types of surfaces and materials. By this time, you have a clear idea about the benefits of sanding the surface.
The adhesion will be at its best if you go deep down to the natural wood. If you just can’t get there, try to keep up as much as possible. Sanding is important to turn a normal surface into a receptive one. It means the primer will not have a hard time sticking to a roughed-up surface. This ensures maximum adhesion and longevity of the paint on the wooden furniture.
As stated earlier, if you can’t get to the natural wood, it would suffice to rough up the surface a little bit. This will help you in applying the primer to the medium with ease.
Once, you have prepped the surface for the primer, get fine sandpaper, like 220 grit or something like that. This will smooth the roughed-up surface and make it somewhat even. If the piece you are working on does not have a top varnish coat or other paint, you can skip the 80-grit sandpaper part and start with the 220 grit right away.
In contrast to a strict sanding regimen, you can sometimes opt for a fine grit sand sponge, but there are limitations. For instance, if the wood is bare or in excellent condition, then you can skip the sanding part with sandpaper and go directly to the part where you apply primer.
Pro Tips: When working with laminate furniture, remember to steer clear of the sanding part. It is not real wood and sanding it may harm the surface for good. Also, veneer furniture is another tricky piece because it had only a thin layer of real wood on the surface with plywood or particle piece underneath. If you sand too forcefully, you may go through the real wood part and then end up destroying the piece. In the case of furniture like this, going for a fine grit sponge is the best way to rough up the surface without risking damage.
Repairs
When you are working with a piece of old furniture, there are always chances that you will get to fix some of the basic issues in it before you get to the painting part. So, if there are gouges, scratches, and holes in the furniture, now would be the best time to get rid of them by repairing them. Some people go for new hardware such as doorknobs and hinges. For this, you should make sure before closing the gouges and making new ones whether the new items align perfectly with the hardware.
On the practical advice front, you can easily mask or make the holes and marks disappear by using a stainable and a paintable wood filler. This will help you in getting rid of all the imperfections on the surface of your furniture. Then, after the wood filler is completely dried, you should sand the material smoothly by using a fine-grit sanding sponge or a power sander to make it even.
If you are planning on repairing the material or replacing the hardware after the work is done, you will end up blemishing the clean and newly-painted surface of your wooden furniture. So, your hard work would all end up for nothing.
Prep
As stated earlier, merely applying paint over the immediate surface of the wooden furniture does not cut it. There are specialized prep and other steps involved in the preparation of the wooden furniture before it is able to accept the paint. This way, the adhesion will be maximum that will also serve for the longevity of the paint.
The first step in every preparation of material, both for priming and painting that comes after it, you need to make sure there is no dust or dirt on the surface of your wooden furniture. Dirt and debris affect the level of adhesion that you can get with the paint. It also makes the surface uneven in the shape of bubbles and other particles that stick out from the even surface.
There are many sections in a piece of furniture that you want to leave as they are. In your case, if there are stretches that you do not want to paint, you should cover them with masking tape or some other material. This will help in saving them from the stray marks of the paint. Also, it will help in keeping the surface from being painted by mistake. Sticking old newspaper is also a great way to keep the surface unpainted!
During prepping, a clean and dry place is necessary to keep the material from getting unwanted moisture. Sometimes, this atmospheric water would turn up on the surface of the wooden furniture, it is too much concentrated in the place, and you will face hurdles while painting the material. So, dry and clean space is a must for the whole process to turn out fine.
Prime
If you are scouring the shelves in your nearby hardware store, you will find a number of brands and paints that you have never heard of in your lifetime. This is a good thing and if you are a little overwhelmed by the sheer number of the cans, you are just learning about the world of colors and paints!
There are many brands that claim that you do not need to have a primer applied to the surface before getting on with the final color. The lines written on the pales go like “no priming necessary” or “paint & primer in one”. This could not be farther from the truth!
Primer is an effective sealant and a necessary component in properly making the wooden furniture ready to receive the fresh coat of paint. It also strengthens the material from chipping, scratching, or peeling by adding a thick layer over the bare material face. So, no matter what the brands suggest, you should always go for a necessary regimen to enhance the physical and apparent integrity of your wooden furniture.
For those who are wondering which primer is the best, there is a little difference between brands and chemistry. Mainly, you will find two major kinds – water-based and oil-based. According to many professional wooden furniture painters, water-based primers work best with wood and are super-easy to handle.
Spray primers are a great way to apply a thick coat of primer without worrying about refilling your custom paint spray with the liquid. Also, there are cases of fluids where you would find it hard to apply the primer evenly.
A spray primer called Zinsser Bulls Eye 1-2-3 is a great piece that covers all the bases and ticks all the bases that you would expect a leading primer to tick. A can of this spray would enough to cover handsomely a wide range of surface without a hiccup and looking for a refill. A coat richly applied would be enough to prime your wooden furniture to its core.
There are reasons when you think your piece would need a second coat of primer. You are not paranoid or overbearing about the process when you do. For the best second coat application, you should sand the furniture thoroughly after applying the first coat (of course when it is completely dried) of primer and then apply the second coat.
Here are certain precautions that will make your work smooth and save you from the harmful effects of the droplets.
Use a spray can nozzle because it is easy to move and handle, carries a reasonable amount of liquid without straining your hand, and just, it is less work and more joy. This ensures the application is even and smooth without breaking the bank.
Wear a respirator while you are working with spraying devices around the furniture. This is a must to keep yourself from the hazardous effects of fumes. Many take them as a joke but this would mean risking your health and life for nothing. So, always cover your face with a mask or a helmet that covers both your face and head.
Sand Again
If someone told you that painting wooden furniture was all about playing with colors, they were joking with you. As you would have understood by now, more than half of the work comprises of priming and preparing the material to be painted. This is as important as applying the final, top coat of paint itself.
So, when you are done applying the primer to the surface, it is time to take a break, from 30 minutes to an hour. In this time, the paint will dry and be ready for both application of the paint as well as getting a second coat of primer, if needed. Use a fine-grit sanding sponge for rough patches or imperfections, and you will get an evenly sealed surface to apply the paint on. Remember to wipe the furniture with a rag for a pristine look and feel.
Paint
If you are looking for the fun part, this is it!
Keep in mind that whatever you were doing up until now, it was to reach this point. Once again, it is best to use spray paint to make sure you get an even and flawless finish. There are a number of brands and models for spray paints, but you need to sift through a number of pieces before you settle your heart on one. It should not strain your hands while carrying it for a long time as well as getting the best hardware for your buck. To go with a spray painter, you need an air compressor and a hose to make your way through the painted article.
As you would imagine, there are other ways to apply paint on the surface other than spray. You can use a brush or rollers on a surface and they would yield excellent results without getting out of shape. For a brush, you need to make sure the angle is perfect for lesser hand strain and smooth application of the paint. They are ideal for detailing and applying paint around the nooks and crannies in your wooden furniture. As far as the rollers are concerned, go for them when you need to cover a large patch of the surface.
For the materials in your paint, the ideal one for wooden furniture is acrylic enamel. There are specialized paints for wooden furniture and cabinets as well. They also work just perfectly but you need to strike the perfect balance between the value and your money. Whatever you choose, make sure you go for a shade that also goes with other furniture and articles of your space.
Pro Tip: If you plan on going for a spray-less route, you should use both rollers and the paintbrush. For detailing or going through the edges and indents, go with a brush and then immediately apply a foam as close to the points as possible. This way, you will be able to eliminate the brush strokes without marring the surface.
Sand
Sanding is an integral part of the whole painting process. It always gives a clean and a slightly roughed up surface for you to work on. This ensures that the paint penetrates as deep as possible and sticks to the surface, adding to the longevity and beauty of your wooden furniture. Again, a fine-grit sponge will make it ready to receive yet another coat of paint without breaking a sweat.
Make sure to wipe the surface with a rag or a clean and dry brush. A damp rag would also work just fine to remove the fine particles off the surface.
Second Coat
To make sure your paint coat is thick enough, you should go for a second coat of paint if not the third. This is also beneficial when you are using a spray gun for painting. Sprays apply an even and uniform layer of paint effortlessly but there is one steep downside to it – the coat is too thin and can be scratched with a slight bump or collision. This could show the primer on the inner layers and mar the surface.
So, a second coat is a must to apply an effective cover whether you are using a spray gun, a roller, or a paintbrush!
Make sure you have enough paint to cover all the paint coats. If a color runs out and you purchase a new one, there are great chances that both colors don’t match. The best way to tackle this issue is by buying in bulk and then preparing for application.
Clear Coat
A topcoat is the ultimate look and feels that your wooden furniture will get. This cannot be overstated because no matter the quality of paint you apply on the surface, it cannot withstand the wear and tear of everyday use.
If you are wondering about the topcoat paint for your wooden furniture, here are some of the options for your consideration:
Polyacrylic
This is one of the preferred topcoats for wooden furniture by experts in the field. It gives out a hard finish that gives out a crystal-clear surface and comes in a number of sheens including matte, which is a fan favorite.
The best thing about polyacrylics is that it comes in both spray gun and in the liquid form for easy application. The liquid is preferred over spray because it offers a thicker coat and added a better cover for enhanced protection.
A foam brush is ideal for the application of this product. The best thing about polyacrylic is that it is dried out quickly so make sure you should move quickly. You should not use a brush too often or touch up a surface that is already dried because it will mar the face of the wooden furniture. Then, give it around 2 hours to dry completely, then sand with a grit sanding sponge, and apply another coat. Make sure you repeat this step 3 to 4 times for an impeccable topcoat finish.
Minwax Finishing Wax
This is a great alternative to polyacrylic, which is not as long-lasting as this one, but you will get a soft and lustrous finish. Still, it is ideal for an item of lightly-used furniture. Another great feature of this wax is that it only requires a single coat and it is all done. You apply the wax and then wait for 20 to 30 minutes and then buff the surface for a clean and clear look.
Wind Up & Cure Time
There is a difference between drying paint and cure time. Most paints dry in 2 to 4 hour and then takes around weeks and months to cure. Mostly, it depends on the paint but an average paint takes on average from 1 to 2 weeks.
Read more about Painting
About the Creator
Dandelionclub
Writer, Hobbyist, Traveller, Art Lover
Keep reading
More stories from Dandelionclub and writers in Lifehack and other communities.
PAINTING FOREVER
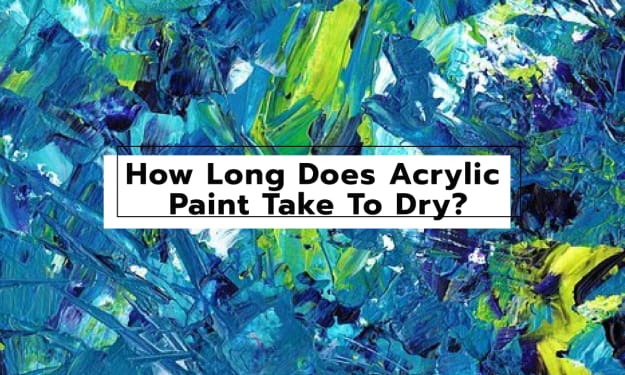
When it comes to drying, acrylic paints are much faster compared to spray paints or any other kind. This is mainly because of its properties and composition. If it is directly exposed to air, then the paint is likely to dry quickly. While other factors like humidity, exposure to wind and temperature can make the paint dry even more quickly. If on one hand, it is an advantage, then on the other it is also considered as a disadvantage as it provides the artist with less time to play around with it on the canvas and needs to be very quick with his movements so he can at least blend all the colors properly. Now if you want to look into more detail as to how long does acrylic paints take to dry exactly, then keep reading. First, let us look a little at its background.
By Dandelionclub3 years ago in Lifehack


Comments
There are no comments for this story
Be the first to respond and start the conversation.