
This article is a follow up piece to 'How To Make A One Log Fire; Part 1 The Swedish Candle'.
The purpose of that first article was in relation to Vocal's Wave Makers Challenge.
The Challenge is to write an article about reducing your carbon footprint. I am not going to go over old ground again here so in summary this is it. Burning wood releases carbon. If you want to reduce the amount of carbon you produce, burn wood smarter. This article is going to show you how to make a wood rocket. The wood rocket is the smartest way to cook and generate heat with wood outside. It is not only more environmentally friendly it is just genius in its design, in its use and its practicality. With the right tools it is incredibly easy to make. You can find these online, quite small in size, with your name engraved on them, wrapped in plastic for about $30. An insane and laughable proposition.
My first part, 'How to Build A One Log Fire, Part 1 The Swedish Candle' was criticised for being a little too jokey and not serious enough. Also it needed a chainsaw to make. So I am going to put my sensible head on and pull up my big boy pants and just show you the important parts of this far superior yet simpler system.
The Wood Rocket works on a simple rocket stove principle. Air comes in the side feeding the fire and is released with the heat from the top.
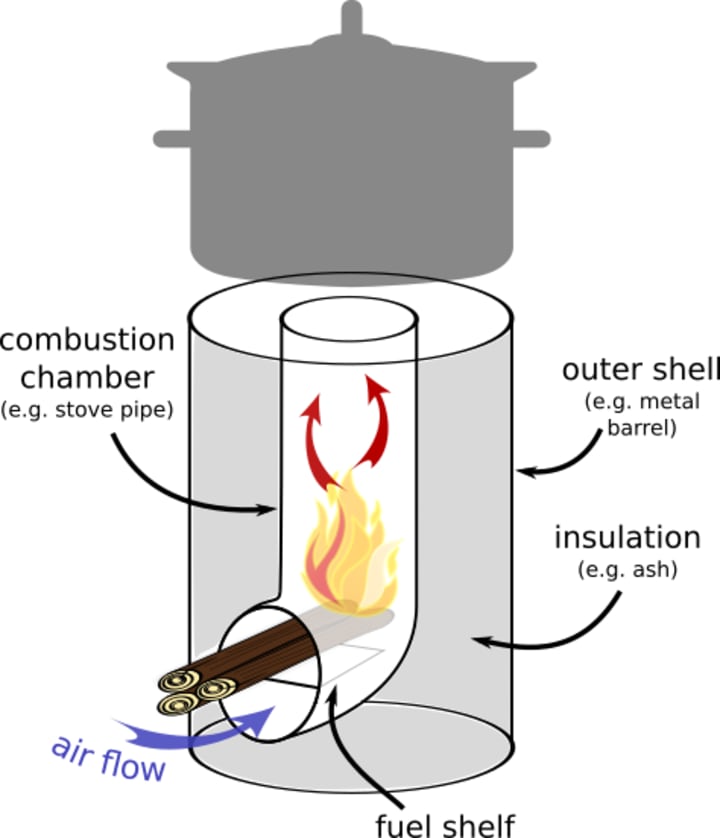
The efficiency of this stove is just incredible. so let me just get to it and show you how to make one.
How to Build A Wood Rocket
Stage 1 - Take one dry and seasoned log, a fresh cut green log will be exceptionally difficult to start to burn for this task.

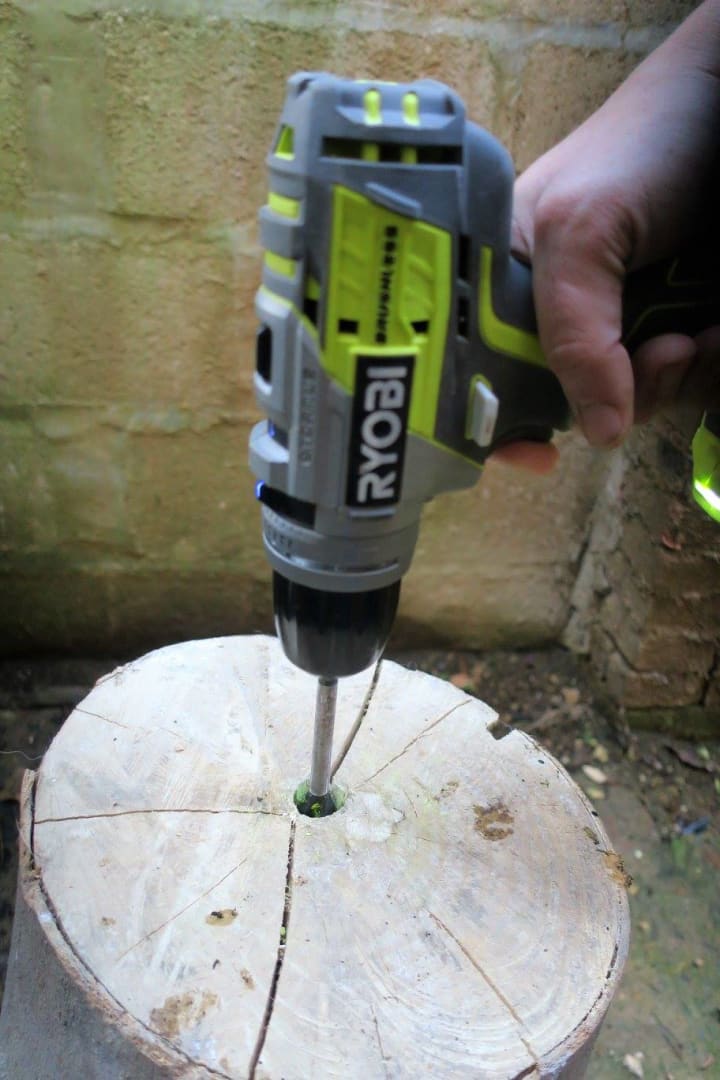
Stage 2 - Take your drill and put on your largest wood drill bit, this is a 25mm piece... larger will work even better but this is the largest piece most people have in their drill kit... If you have a flat 25mm piece you might have to work up to it in stages using smaller drill bits..

Stage 3 - Drill a chimney hole straight down the middle, this is the wood rocket hole and is where the flame will come out the longer the chimney hole the better. I have done this with an extension drill bit before, that works really well and creates an impressive flame, unfortunately I sheared it doing this job so we will make this one with no extension. The drill can stick when you do this. So just remove the drill turn over the log and tap out the shavings. Then continue.
Stage 4 - Your chimney needs a fireplace, a vent to feed the fire. Line up from the side and create a second tunnel connecting to your chimney. The sawdust will block your progress, just stop, pull the drill out, empty the hole, return and continue. Keep the sawdust you may find it useful later.

One wood rocket built... A second vent works really well but this is it in its simplest form... A longer chimney (the tunnel down the middle) works better and will give you a stronger flame.

Stage 5 - This bit is the tricky bit and why you should try and make the biggest diameter hole you can... You have to ignite the wall of the chimney you built... This is all about air flow... If you ram your hole full of kindling, you will only burn the kindling... I use some dowel, paper kitchen towel and some of my home made accelerant and make sure that there is air channel running through the whole rocket... Blowing down the vent hole helps, so does turning the vent hole to face the direction of the wind...

Once your vent tunnel is burning you are pretty much there... If your fire goes out lightly blow down your vent hole and it should reignite... Just remember for those first fifteen minutes it is all about feeding the fire oxygen... Your dry log will do the rest...

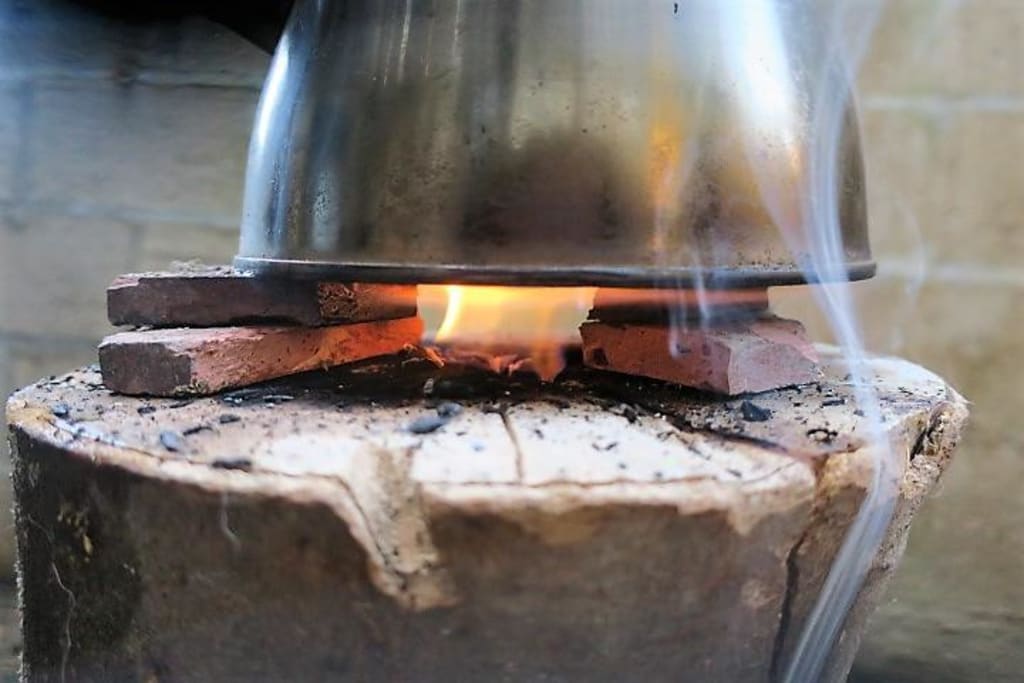
Stage 7 - The best thing about a wood rocket is how once lit; how slow burning and low maintenance it is while also being pretty versatile. Working outside you can light one of these up until its time for a tea break and you have a perfect stand for a kettle...
It is also very hard to extinguish as it feeds itself from the inside out. This makes it amazingly effective in harsh conditions.
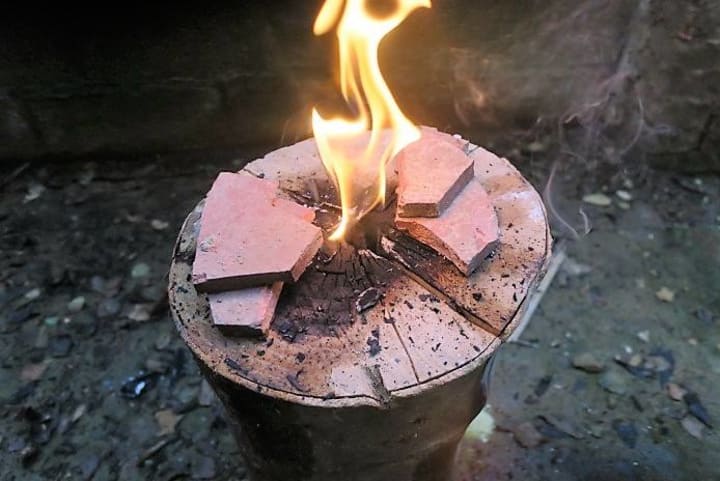
But first you are going to want that cup of tea so take an old terracotta tile and break it up..

Now this tile will make a stand for the kettle, you need a stand for airflow, the Swedish Candle (see Part 1) has its own airflow, the wood rocket is a slower burner and if you want to cook on it you need to protect that airflow or you will smother it... you can use anything to do this job, a couple of well placed stones does exactly the same job.
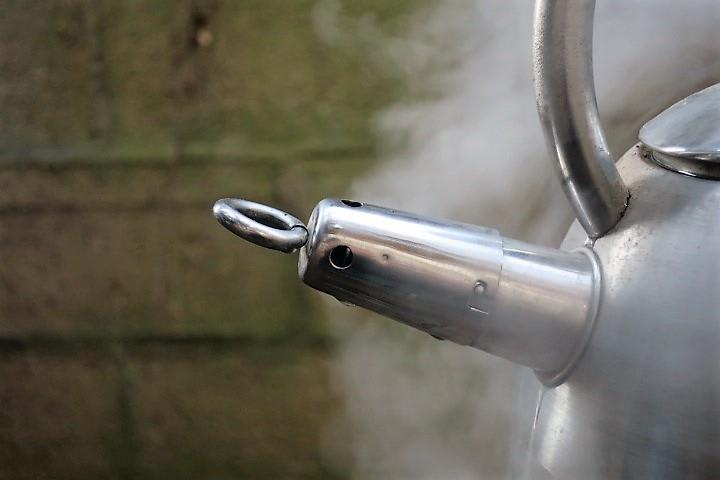
Feel really dumb here. I have no long shot of the kettle, but here enjoy the close up...

Ten minutes later boiling water, take a break and enjoy that cup of tea. Don't forget that handle is going to be hot.
This is the wood rocket about 80mins after lighting, good to cook on after 30 minutes... Now I am going to pour cold water on it and extinguish it... Let it dry and use it again another day... The wood rocket works on simple bottle stove principles... Left burning you have a fire and heat source for about 6 hours not many wood fires can you offer you that luxury... this could be your cooker for six to seven meals or a pretty safe heat source all night... The most amazing thing is you can actually lift and move the wood rocket once lit and carry it to a new location, but use some common sense...

If you want to cook a massive banquet out in the wild you can have three or four of these going and arrange them like your kitchen hob.
I need to give you a word of warning though. Making Wood Rockets is addictive you may be making these and cooking off these all summer.
Thank you for reading my story.
This is my third entry for the challenge called 'Wave Makers'.
You can find my first entry here, 'How To Make Dandelion Lemonade... And Save The World'
I publish my stuff independently for no other reason that I would rather these strange ideas that rattle around my head from time to time have a place to go.
My reach is decided by you so if you enjoyed this and think it could reach a little further I would love for you to share it.
If not that is also cool.
I have more strange musings here, Enjoy.
If you are also interested in publishing your own ideas here on Vocal and getting paid for it, I can get you a cheaper introductory rate by clicking here. This gets me a small affiliate payment from the platform.
Have an awesome day.
First published on Vocal May 2021
About the Creator
Tom Brad
Raised in the UK by an Irish mother and Scouse father.
Now confined in France raising sheep.
Those who tell the stories rule society.
If a story I write makes you smile, laugh or cry I would be honoured if you shared it and passed it on..
Composing the Soundtracks of Our Life
Lionel Fabert is an award-winning composer known for bringing movie trailer soundtracks to vibrant life. Fabert has always loved music, beginning when he picked up the guitar at 9 years old. This love of music inspired Fabert to quit a great-paying job in corporate Paris and strike out as a freelance music composer and sound designer.
By Susan Scava4 days ago in Lifehack
The Top 6 Benefits of Invisible Teeth Braces
In the realm of orthodontic treatment, clear aligners have emerged as a revolutionary alternative to traditional braces. This innovative approach addresses several shortcomings associated with conventional orthodontic methods, presenting a solution to common challenges faced by patients seeking teeth alignment.
By Rupesh Kumar 7 days ago in Lifehack
In The Blink of Her Eye
Time itself bent and morphed, allowing Shannon the precious seconds needed to see and adjust to the disaster unfolding in front of her. Each frame showed minute details she would have missed had the clock not slowed down until she heard every click of the hands as they swept toward the end of everything. If only she was being melodramatic...
By Lisa VanGalen2 days ago in Fiction


Comments
There are no comments for this story
Be the first to respond and start the conversation.