
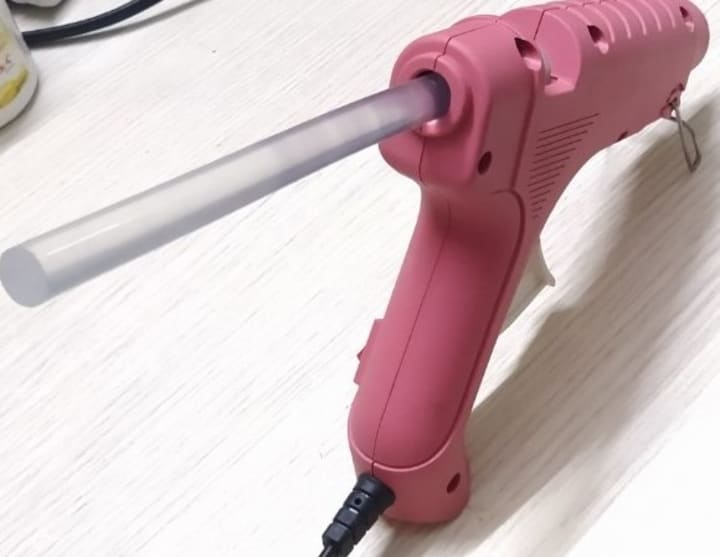
A glue gun is a must for any artist.
WELCOME art example.

Disclaimer: All photos are from the author’s own collection.
I have tried to explain the basics, arts, and some products that can be obtained by a glue gun.
It is used to melt plastic sticks and to craft different types of artistic shapes which I am going to illustrate. It is available in many power ratings and I am having that with the lowest power rating. It is also sufficient for artwork. Initially, it takes about 10 to 15 minutes to heat up, after inserting the plastic rod and switching it on.
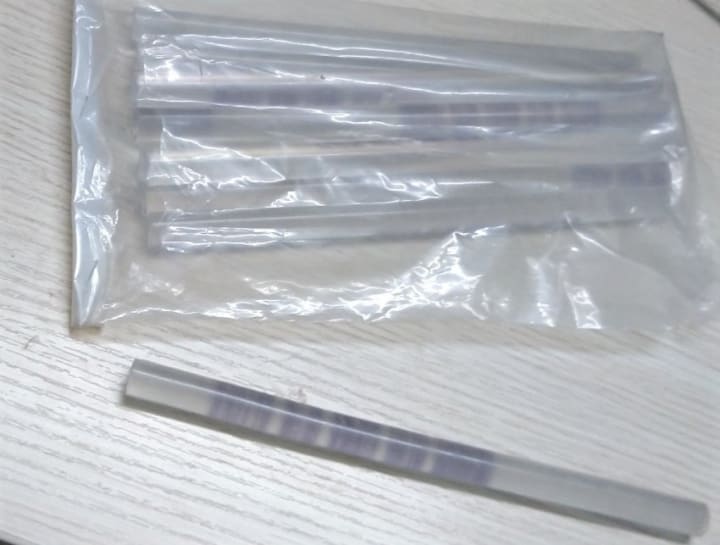
The stick is to be inserted as shown and pushed into it. After about 10 minutes, the trigger is pressed by a finger to get the molten plastic.
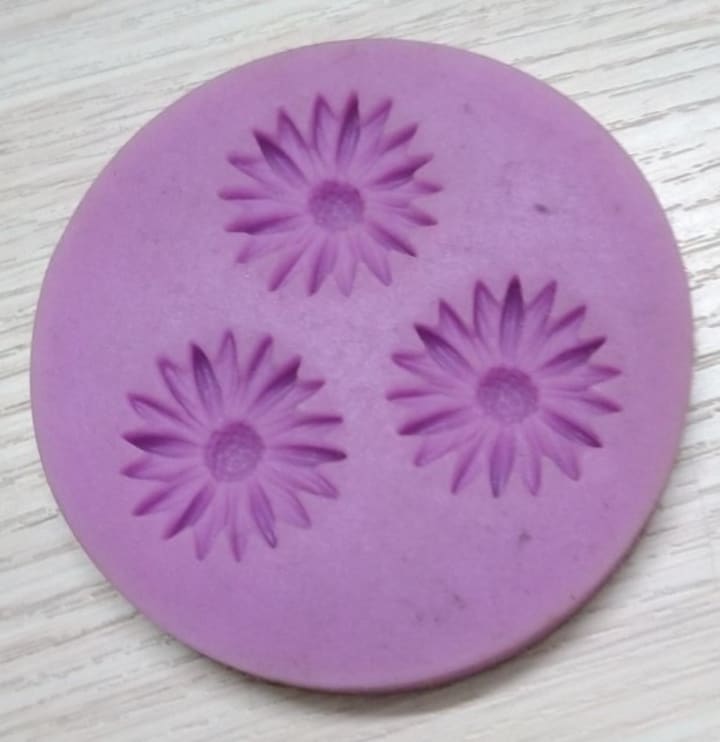
Silicone rubber molds are available. This will make things very easy. We have to fill it with sufficient liquid plastic and allow it to solidify. Solidification time depends on the size of the mold.
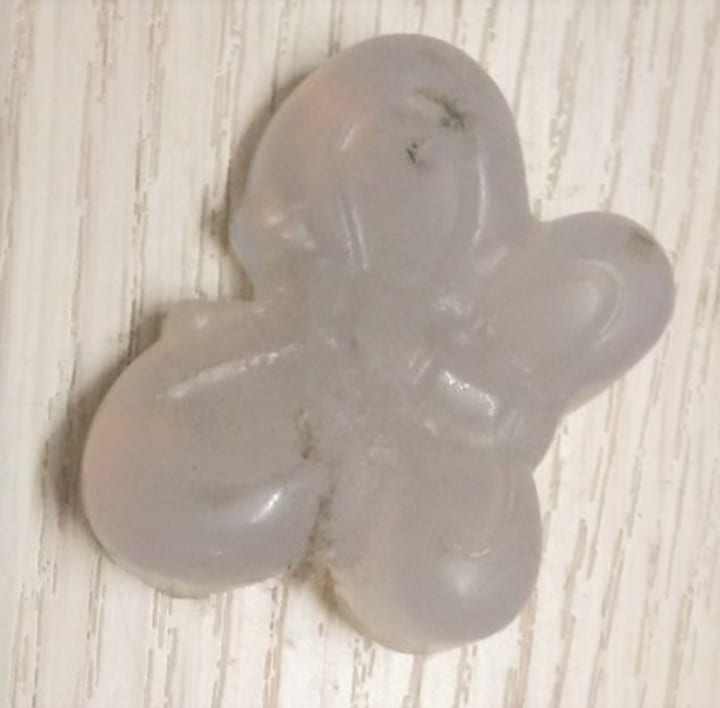
One such product from a mold is shown. It is a plastic butterfly. We can add colors also.
WELCOME art with glue sticks- Example

Brass Plate:
Whenever we are doing something like letters and other flower shapes you need a heat dissipation plate if you do it on wood there are two problems one is that it may stick to the world and be difficult to remove and the heat removal rate is very slow and it lands solidify fast if you do it on paper it will definitely stick to the paper and you can’t remove it so we have to do it on a metal plate ideally and steel and brass are effective the best thing is brass as it solidifies very fast because brass is a good conductor of heat so I am using the brass plate for doing all these things

For doing this welcome all the latest must be of the same size and therefore I will have written using a scale and pencil on the brass plate.
Instead of writing all the letters, I have written the letter as shown above!
It is a combined letter where we can use it for getting all the letters of the word WELCOME. We can get all the letters instead of writing them individually and rubbing them off.
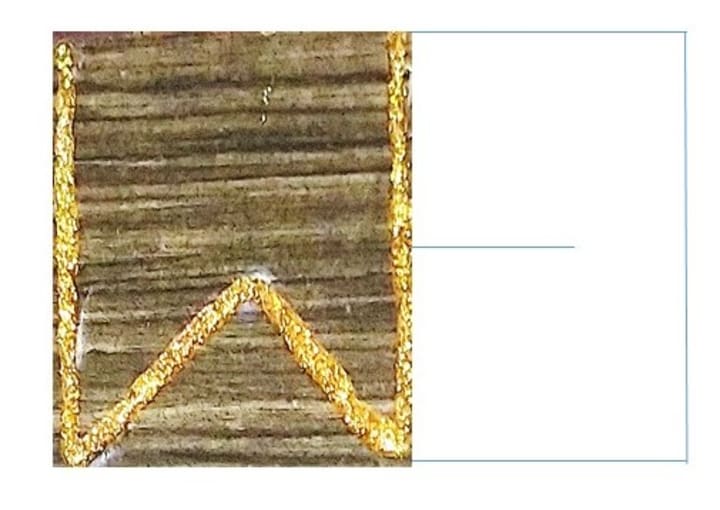
But we can’t do all the letters at a time. Once the letter W solidifies. carefully remove it. Go to the next letter E, as shown below.
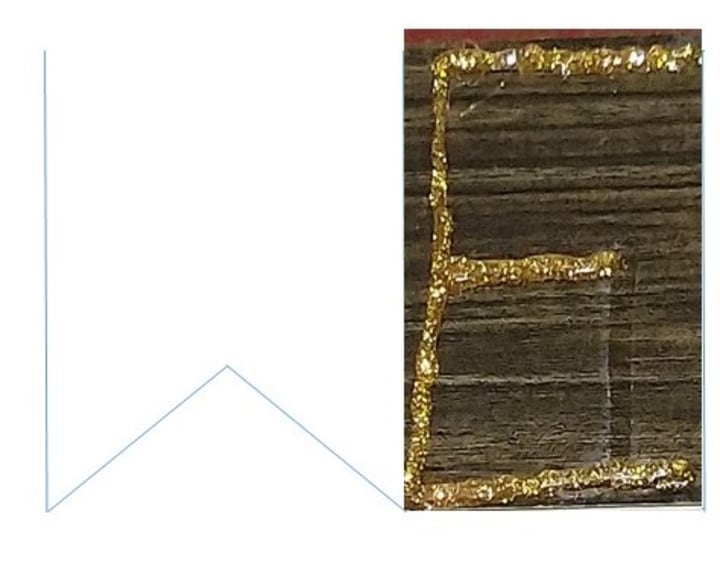
Similarly, all the letters I am explaining with figures and these figures are self-explanatory.


We can arrange them paste them using any binding agent, to any place we want.
Note:
Again do “W” and reverse it to get “M”
Do them in such a way as to get different colors for letters.
“E” is required twice. Do them in different colors.
Any one-color stick will be sufficient for 3 letters of the size I have shown.
We cannot change sticks while doing it, till it is completed. So, do letters are to be done like “W” then “E” and “O”. Then with other stick, do other letters.
If it solidifies very slowly then we had to wait to do the next little because we can’t remove this letter or we need a very big plate so that we can do the next letter in some other place. Also, the glue gun when it is switched on that will be small molten plastic trickling down therefore to avoid this way to switch off and switch on periodically if we are not doing continuous work. to avoid all these problems, the best thing is to make it solidify fast by taking a good conductor of heat and we should dissipate heat also therefore ideally I have selected the cross plate as shown in the figure.
About the Creator
Keep reading
More stories from Jayaram A S and writers in Lifehack and other communities.
Project selection criteria for engineering students
Important parameters to be considered are: 1. Usefulness Simply fabricating something is a waste of money and effort. The project should be useful to the people in the country or region to which it is targeted. For example, if we are planning to do a room heater in a place where the average temperature is nearly 38 degrees centigrade, it is meaningless. Normally, a project should be in the form of a solution to the existing problem for a specific geographic region. An example is getting desalinated water for a small city near a beach, using a solar power unit.
By Jayaram A S2 years ago in Education
Planting Yaupons for a Thriving Garden:
Title: Cultivating Yaupon Holly: A Guide to Thriving Gardens Introduction: In the world of gardening, few plants offer the versatility, resilience, and beauty of the Yaupon Holly (Ilex vomitoria). Native to North America, this evergreen shrub has long been cherished for its ornamental value, wildlife benefits, and cultural significance. Whether you’re a seasoned gardener or a novice enthusiast, incorporating Yaupon Holly into your garden can elevate its appeal while supporting local ecosystems. In this article, we’ll explore the benefits of cultivating Yaupon Holly and provide practical tips for ensuring its thriving growth.
By Kavya Organic Garden3 days ago in Lifehack


Comments
There are no comments for this story
Be the first to respond and start the conversation.