
3 Inexpensive Tools to Monitor Students, Encourage Productivity at Home
When parenting goes digital...

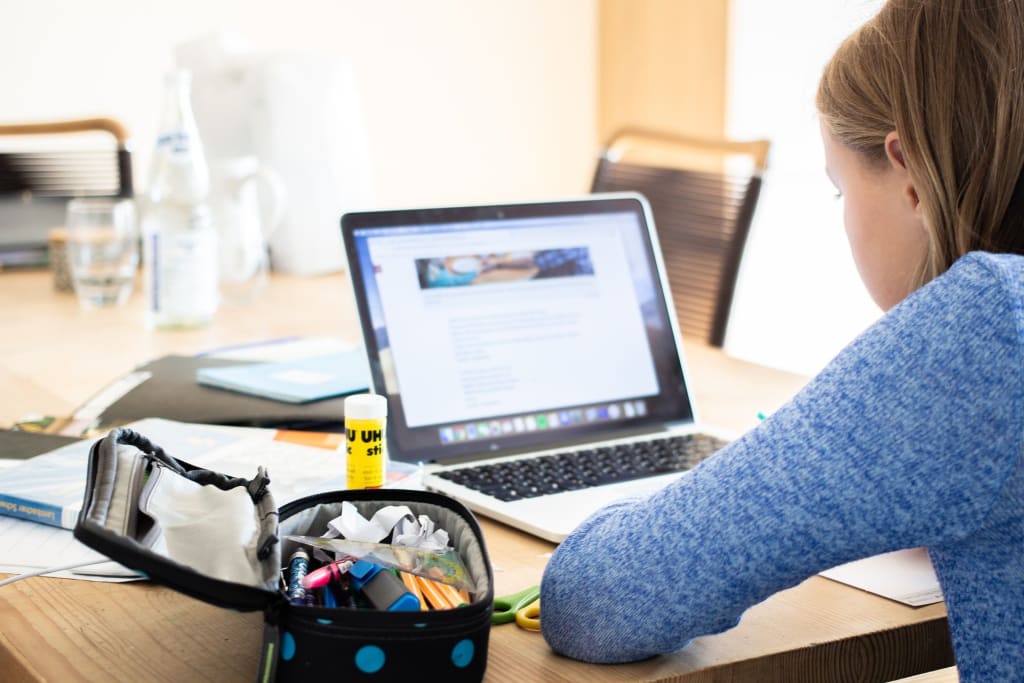
Already challenged to remain productive, remote workers now face an added responsibility. While most schools have re-opened, parents are still hesitant to send children back. Some schools have already re-closed.
Through online learning and enrichment programs, we collaborate with teachers to make the most of each experience. And still, we need to stay active to keep our children on daily target.
Engagement isn’t generally the issue but focus almost always is. To stay on target, even the brightest children constantly need nudged. With frequent reminders, even the most difficult child can be pushed to excel. And if you have a child like mine (this girl has a 142 IQ at age 9) -- you need to stay on them, to keep them off YouTube and to just get their work done.
In fact, while at home, how many times a day are they told to get back to their seats – to stop visiting other sites and to finish mandatory schoolwork? How many times have you caught them playing a game – or worse yet – using the fact that their teacher has them play “educational” games -- as a means to get out of chores?
Sometimes, it can be daunting. This in itself is a constant chore. This constant back-and-forth will definitely keep us off our own course. And, we’ll spend more time fighting than focusing on the work that we call our own.
But in the long term -- accountability is everything, and it will continue to go a long way.
I’m a busy person. Between owning a business and taking care of a 15-month-old, I needed a solution. So, I came up with three simple solutions, and I’m ready to share them with you.
Here you can monitor your child and go about your own productively. As long as they are connected to the same Wi-Fi router, you can regularly monitor -- and in some cases, actually control what they do! Don’t worry, I have included the “hows” and “whys.” So, there’s just a little less work that you will actually have to do!
#1. | Splashtop Personal & Splashtop Streamer

With free and paid licensing rights, Splashtop actually gives you a variety of options when it comes to monitoring and nudging your student. In fact, many businesses use this program on employee computers, whether in-office or remote.
Depending on the version you download, you could have complete and total access to your student’s computer (meaning you could use the computer as if it were your own) or you could simply monitor it on your Mac, Windows, and/or Android device.
This option is free, extremely easy, and a favorite to many.
Set your child’s computer up for remote monitoring and access:
- Navigate to http://www.splashtop.com/personal or your mobile app store. You’ll want to download the “Splashtop Personal” app to the device accessing your child’s computer. Download the “Splashtop Streamer” to all devices you want full control.
- Follow the steps on each screen to install your new programs. You will have to register your account and then verify your email address prior to use. They also make you do this for each device accessing your account (The app is pretty secure and another reason I like it).
- This may depend on your device, but I think you only need to open the streamer app once. I believe it runs in the background each time. You will need to open the Splashtop Personal app each time you start a new session. You can adjust your settings within each app to better fit your liking.
- To use this software, open the Splashtop Personal App.
- You will see a display with connected devices. Select the device you wish to access. Their screen should then appear. Simple as that.
Once your device mirrors theirs, you will be given options and gestures to personalize your experience. Remember, you will be able to not only see what they’re doing but collaborate right on screen. You can type, scroll, and even click on the mouse. Audio will transfer and play on all devices. This means you can turn on their camera, turn off the games, and show them what they need to revisit.
I personally love this tool and use it every day (not just for my daughter). I work between devices, and it’s nice to access my MacBook while in the kitchen! I highly recommend this app, as well as these two others.
#2.| Windows 10
Windows 10 has a number of options for remote viewing, access, and display on multiple devices. Like Splashtop, you can even relay sound and tune in to your child’s class during morning group instruction.
While it is often stressed that Windows easily projects to a SmartTV or Miracast-compatible device, you quickly find that a Roku, Bluetooth display and even a gaming console will work just as well.
Some people swear by using the Chrome-based browser. I don’t personally recommend it. Chrome can be too laggy when projecting from Windows 10, directly. Personally, I like using Roku, because it is just as fast and I can take it anywhere in my house for a change of scenery. I can work from my office or living room without feeling crowded.
How to do it:
- Make sure you have the screen-casting/screen mirroring features enabled on your Smart TV or Miracast device. Bluetooth displays may need to be made discoverable, whereas Roku and other streaming devices simply need to be turned on.
- Make sure your computer’s Wi-Fi setting has been turned on.
- Click the Start button or navigate to your start menu. Then, scroll to settings (the keyboard shortcut for this would be the Windows Button + I). Then, click on Devices.
- From the device menu, go to “Bluetooth & Other Devices.” From here, you can add the device via Bluetooth or, you can add a new “wireless display or dock.”
- Find your device.
Once it’s connected, you can easily turn this function off or on without removing the device for future use. Use the Windows + P shortcut to go directly to the Project screen. From here, you will be able to duplicate your child’s screen on your device. You would also be able to use this menu if you ever wanted to extend your screen to more than one!
#3. | Chromebook

You might wonder why I would include both a PC and Chromebook on this list. Truthfully, students are using both, depending on their class.
A PC uses a Windows-based environment, while the Chromebook has one of its own. While I don’t recommend Chrome on a Windows machine, it is easy to cast and the picture looks nice. You won’t be able to control what’s on the screen. But that is totally fine if your only goal is to monitor.
What I don’t like about Chromebook is that your devices are limited. My daughter can only cast her machine to the TV in my office (but, I haven’t personally played around with this setting). When casting to the bigger screen, audio will only play on one device. She does get around this by using headphones or by simply plugging in a speaker.
Display your child’s Chromebook on a TV or another compatible device:
- Make sure the device is turned on and that it’s casting-enabled. For some devices, they just need to be turned on. For others, they may need to be made discoverable. This will depend on your device and model.
- Navigate to the bottom right-hand corner of your Chromebook screen. Click on the time and select the settings option (the tiny gear that pops-up in this area).
- Scroll to Device. Then, click on Displays.
- From here, you're going to select "mirror built-in display." If your device isn't found, you might need to restart it, verify it’s on or find another device (not all TVs connect easily – if at all).
Now that your screen is connected, you will be able to make quick adjustments. Because we’re all using different formats and devices, you might need to rotate your screen orientation. You’ll also be able to change how fast your screen is projecting and how clear the picture is duplicated.
Of course, there are many other ways to watch your child working away in class. But, these are my three favorites. As a bonus tool, I highly recommend the Family Link tool by Google. You are able to set time limits for various apps, usage, and accessibility. You are also able to lock devices, ban apps, and require authorization at the “parent-level.”
This comes in so handy in our daily lives!
About the Creator
Jessica N. Abraham
Jessica N. Abraham is a writer, designer and publicist with a background in public relations, social branding and digital marketing strategies. She specializes in Business, Technology and Career Development.
http://www.jessicanabraham.com
Keep reading
More stories from Jessica N. Abraham and writers in 01 and other communities.
Digital Advertising, Trends & Revenue | What to expect in 2021
“The shift to online spending and the massive increase in audiences for media during the pandemic has driven a new reality for advertisers,” addresses Nev Hasan, Executive Director of Agency Sales at Foxtel.
By Jessica N. Abraham3 years ago in 01
Future Trends: Innovations in Construction Drone Technology
In today's rapidly evolving construction industry, innovation is the key to success. Among the latest technological advancements making waves is the widespread adoption of drones. These construction unmanned aerial vehicles are not just gadgets for enthusiasts anymore; they have become indispensable tools for construction project managers, vice presidents, and officials alike. Let's explore how drones are reshaping the construction landscape and what the future holds for this groundbreaking technology.
By Anshul Jain3 days ago in 01


Comments
There are no comments for this story
Be the first to respond and start the conversation.